
by Simone Collins | Jan 23, 2018 | Craft Tutorials
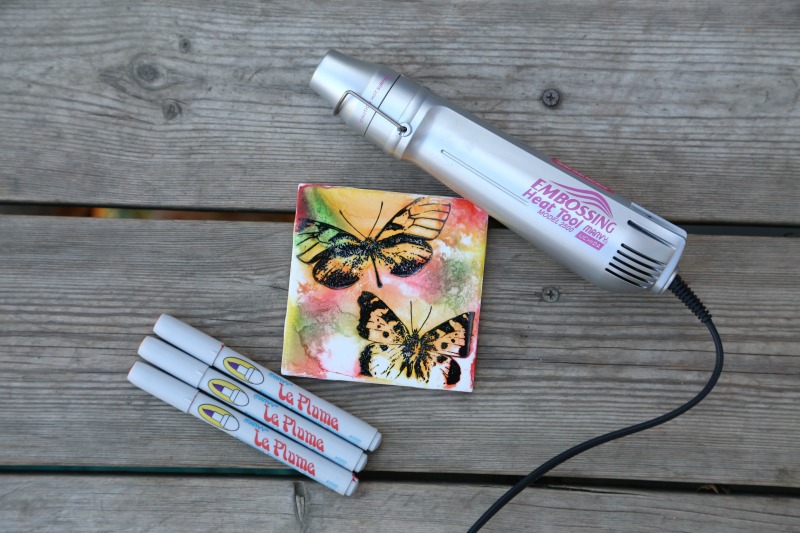
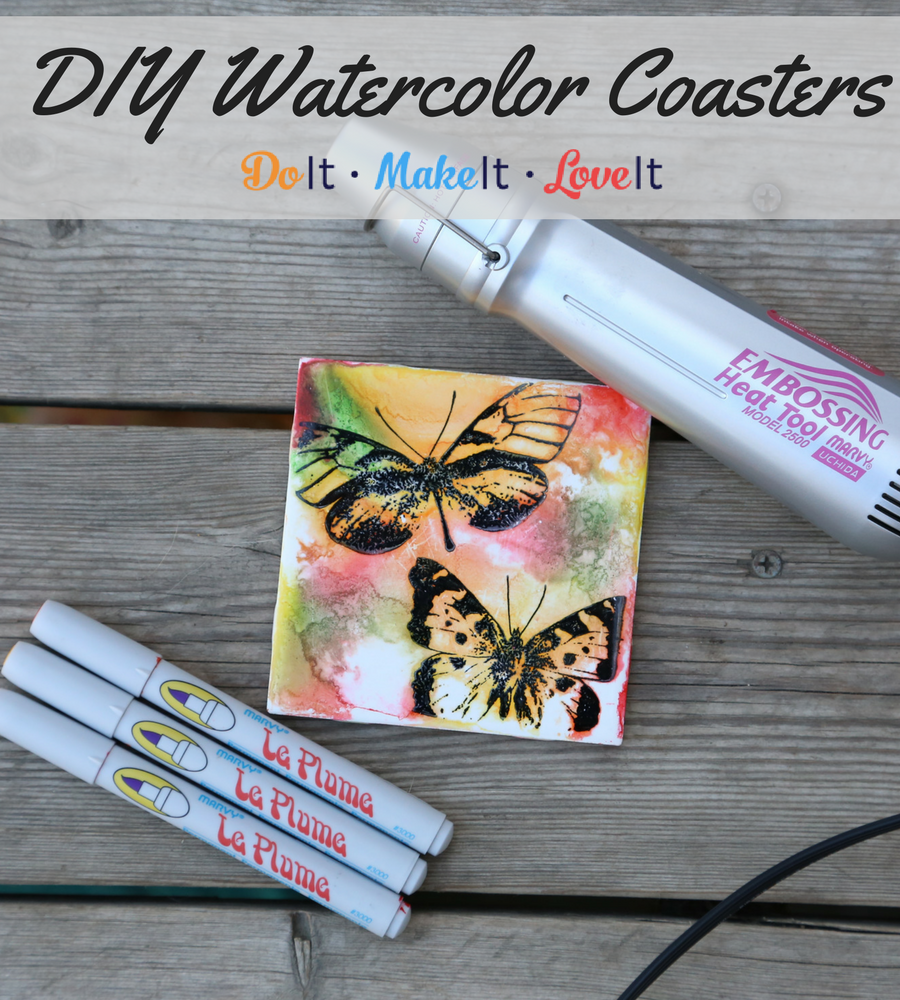
These butterfly watercolor coasters make a great gift or an easy update to your home decor. With spring just around the corner, you’ll have the perfect present for bridal showers, housewarming parties, or just a fun decoration for your back patio.
What I love about this project is it’s so easy to master and once you do it, you can create the same effect on lots of surfaces. The alcohol ink creates a gorgeous watercolor effect. Once you master this trendy technique, you can make all kinds of crafts for home decor, party decorations and more. The best part is that you can use any kind of alcohol ink based markers you have at home! No need to buy special inks just for these watercolor coasters.
Butterfly Watercolor Coasters with Alcohol Inks
Supplies:
- Ceramic Tile
- Le Plume Permanent Marker
- Rubbing Alcohol, 70% by volume or higher
- Small spritzer bottle
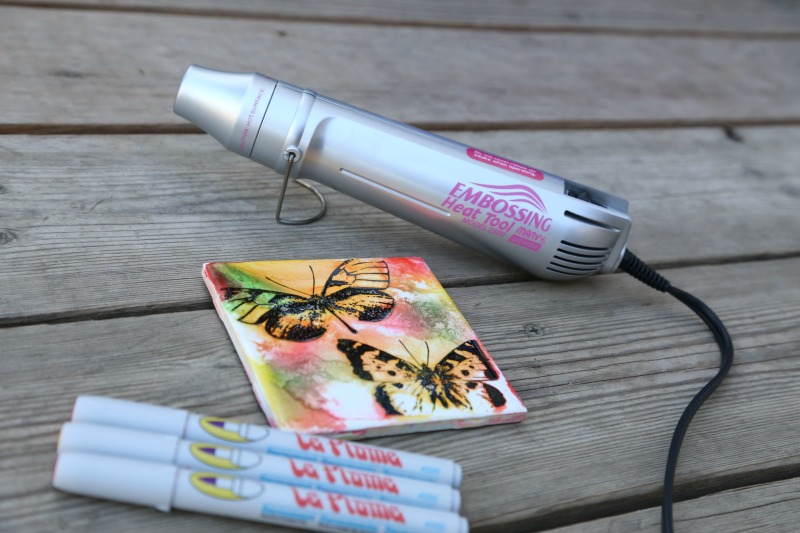
- Embossing Heat Tool
- Rubber Stamps, optional
- Permanent Stamp Pad, optional
- Cork sheet
- Adhesive
Instructions
- Using your Le Plume Permanent Markers, draw dots of color all over the top of your coaster.
- Fill your small spritzer bottle with the rubbing alcohol.
- Spray the color on the coaster. Turn the coaster as you see the colors running. You can always spritz more alcohol on the coaster to make the colors flow more.
- When the coaster is full of color, lay flat.
- Either allow the coaster to dry on its own, or use your Embossing Heat Tool. The heat will dry the coaster but also give different effects to the colors. Move the heat around quickly and keep the tool at least 10 inches from the coaster.
- Once the coaster is completely dry, you can add an image over the top of the color using rubber stamps and a permanent ink pad if desired.
- When the top of the coaster is completed and dry, add a piece of cork to the bottom with an adhesive.
Easy to create and fun to receive, you can’t get much better than these DIY watercolor coasters. Dress up a stack of coasters with a fun ribbon for extra special presentation. Bundle them into a set of four with some pretty drinking glasses and you have a great handmade gift!
As always, we love to see your projects! If you made this project or another project you’d like to share with us, share a picture on our Facebook page or tag us on Instagram.

by Simone Collins | Jan 17, 2018 | Craft Tutorials
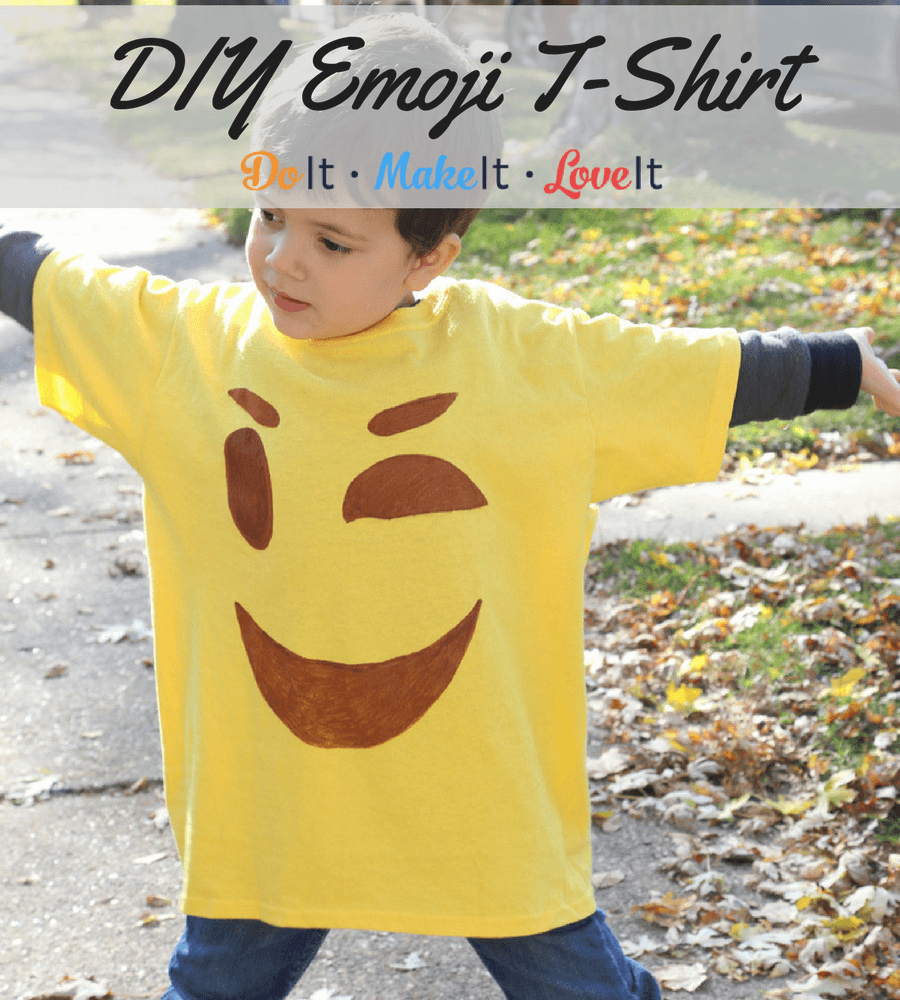
Did you go see the Emoji Movie when it came out? Do you speak in symbols? SO DO WE!! So obviously an emoji t-shirt is a must-have. I love this project because it combined something that my littlest one and I both love (emojis) and it was a simple, no-mess activity we could do together on a rainy day. We picked out bright yellow t-shirts from the craft store to make this DIY 15-minute emoji t-shirt, but you can pick out any color and get more intricate with your designs. You know, like a brown t-shirt with big white eyes 😉 Scroll down to get the full instructions to make your own!
15 Minute DIY Emoji T-Shirt

Materials List
- Plain cotton T-shirt, pre-washed
- Marvy Uchida Fabric Markers
- Printed Emoji Image, sized for T-shirt
- Cardboard, cut to fit inside T-shirt
Instructions
- Place the printed emoji image inside the pre-washed T-shirt with cardboard behind the image. The cardboard will keep the ink from bleeding to the back of the shirt.
- Using the Fabric Marker, trace over the design completely.
- You can remove the image once you’ve traced, but leave the cardboard in place.
- Fill in the image completely with the Fabric Marker.
- Finished, no heat setting is required.
How easy was that? I love this project because it’s pretty mess-free, takes little time to set up, and the kids get so excited to color on clothes. Fabric markers and plain t-shirts make perfect projects for rainy days, family events, and parties. This project is just so fun and simple, definitely recommend trying it when your kids are sick of the 20 million toys they have in the house.
Which emoji did you pick? Share a picture of your t-shirts with us on our Facebook page or tag us on Instagram!
by Marti Wills | Jan 13, 2018 | Craft Tutorials
Hi everyone!
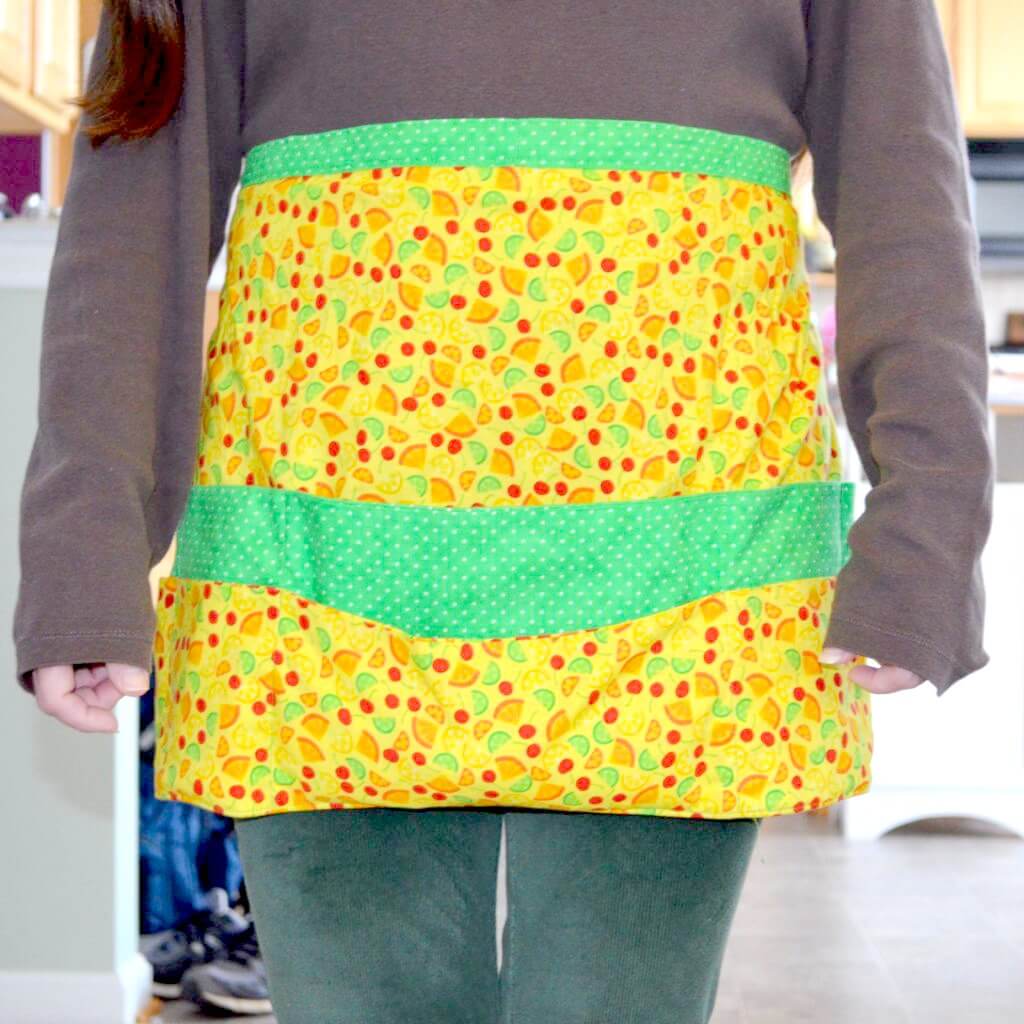
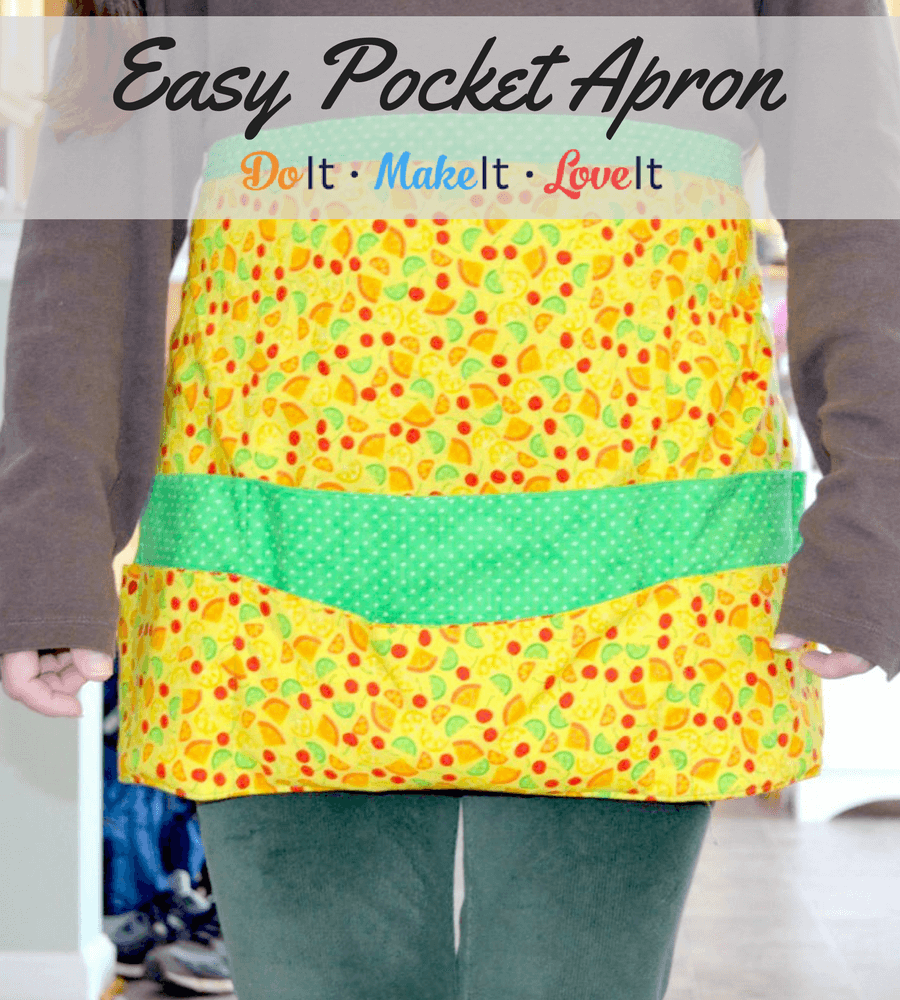
I recently started a new job where I needed an apron with lots of pockets to stash things in. They had one there I could use but it didn’t have enough pockets AND it certainly wasn’t very exciting. So I decided to make my own.
I based my pattern loosely off of the one they had – I find this a good method for a lot of things I want to make. Now I am passing this pocket apron tutorial on to all of you!
You will need a sewing machine and basic sewing skills to complete this apron but it is definitely a great beginning sewist pattern and can be done in 3-4 hours at most.
Easy Utility Apron Tutorial
Supplies:
- Sewing machine
- Scissors and ruler or better yet a quilter’s rotary cutting tool, mat and ruler (I will demonstrate those in this tutorial if you are unfamiliar with them.
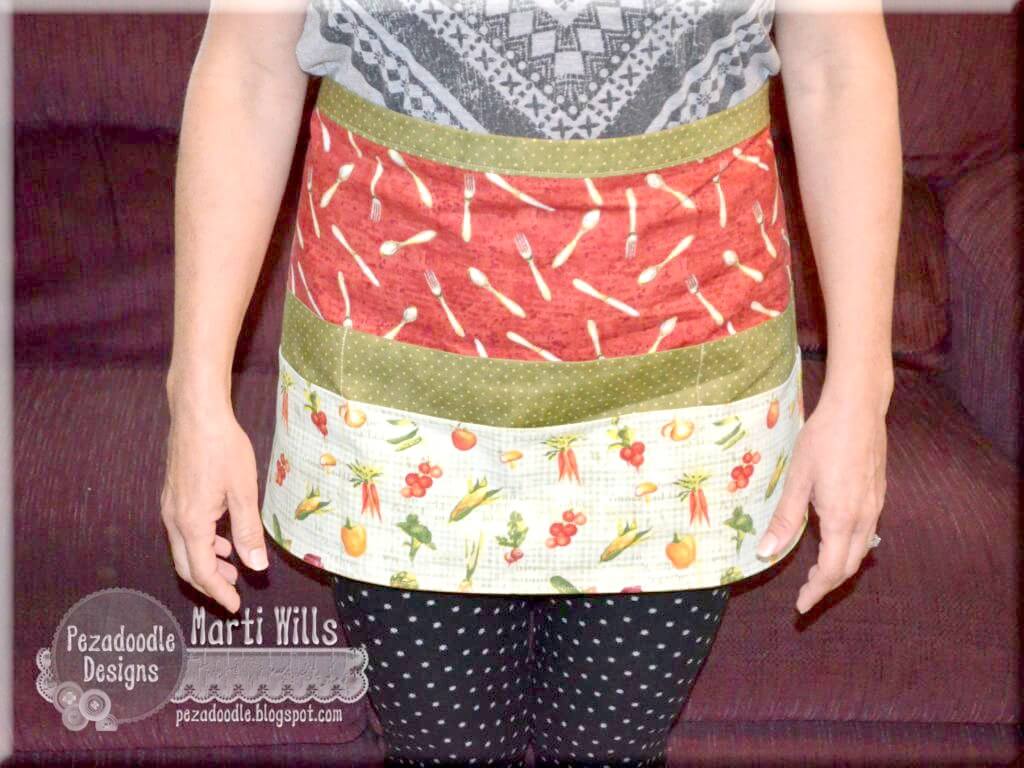
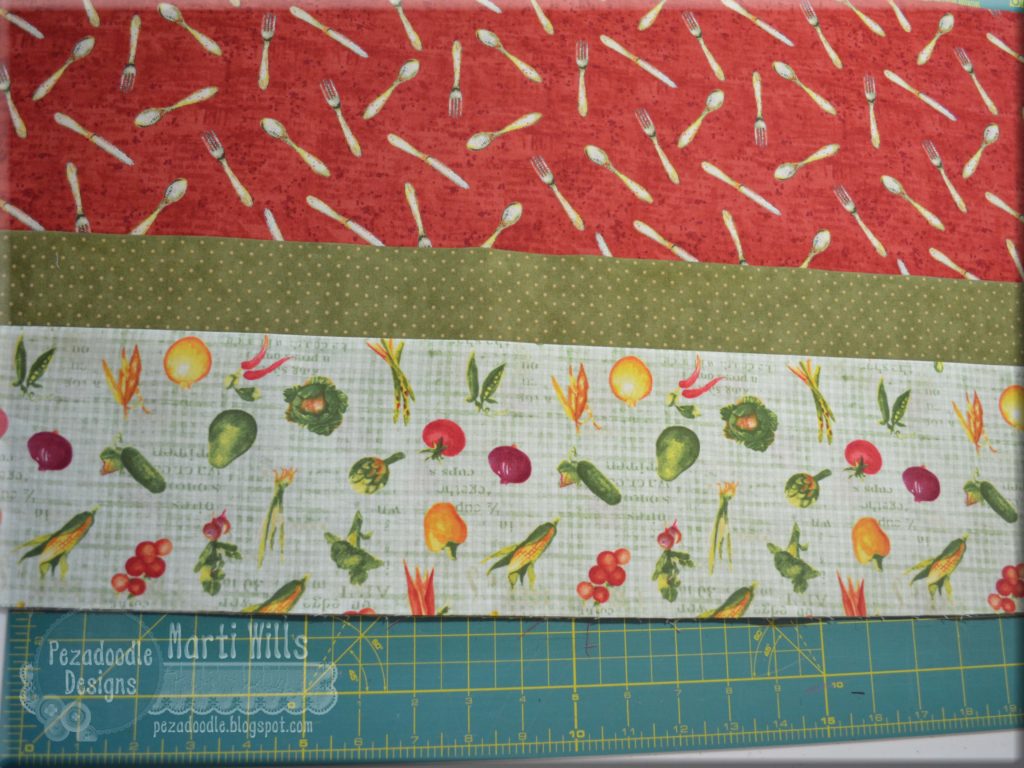
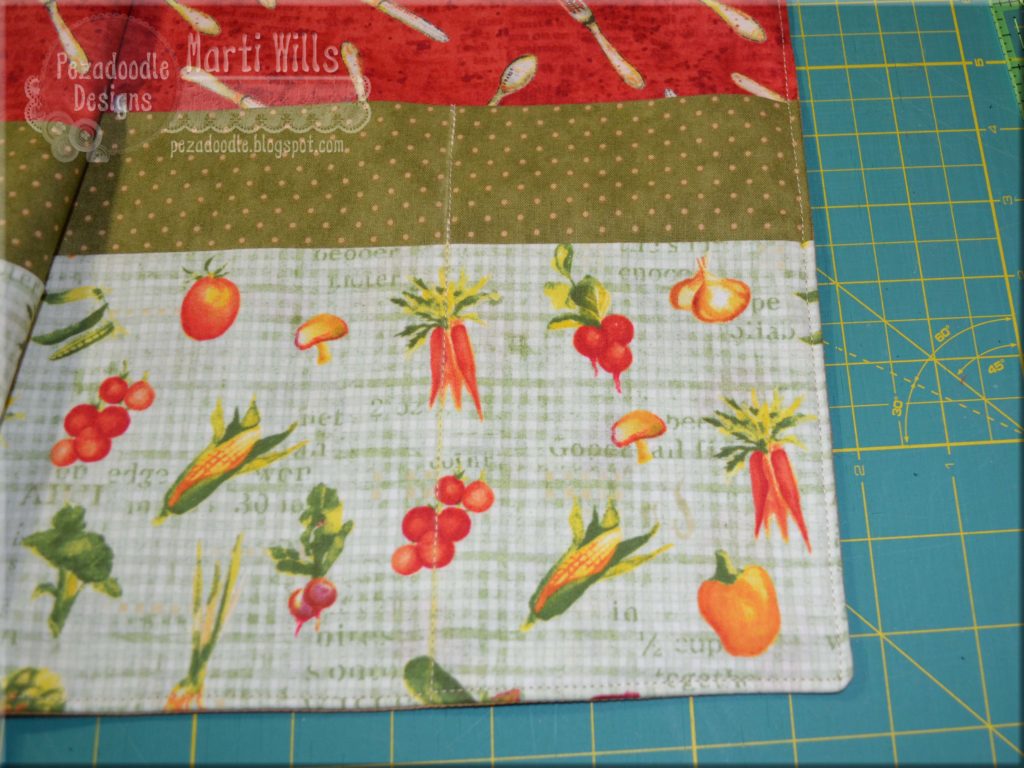
- Fabric 1 – body of apron (the reddish color in the above pic) – 1/2 yard
- Fabric 2 – large pocket & tie (the green polka dot fabric above) – 2/3 yard
- Fabric 3 – small pocket (vegetable fabric above) – 1/3 yard
- Fabric 4 – backing (this can be cheap or leftovers from a previous project as it doesn’t really show) – 1/2 yard
- Matching thread
- Iron
- Spray starch (optional but I never sew without it!)
Instructions
You may want to use more or less different fabrics so adjust yardage. If you want to get a separate fabric for the tie you need 1/4 yard though you may want slightly more in case the cut edges are uneven so much that you have to trim it down quite a bit.

Since this is an item that will be washed when in use I strongly encourage you to wash your fabric before starting this project.
This simple project calls for rectangles of fabric so we will start with a discussion of a super easy way to cut your fabric to make sure you get a straight, even, well measured cut. This requires an investment of supplies but if you plan to sew more than this single item it will be well worth it. However, cutting with a good pair of scissors also works!
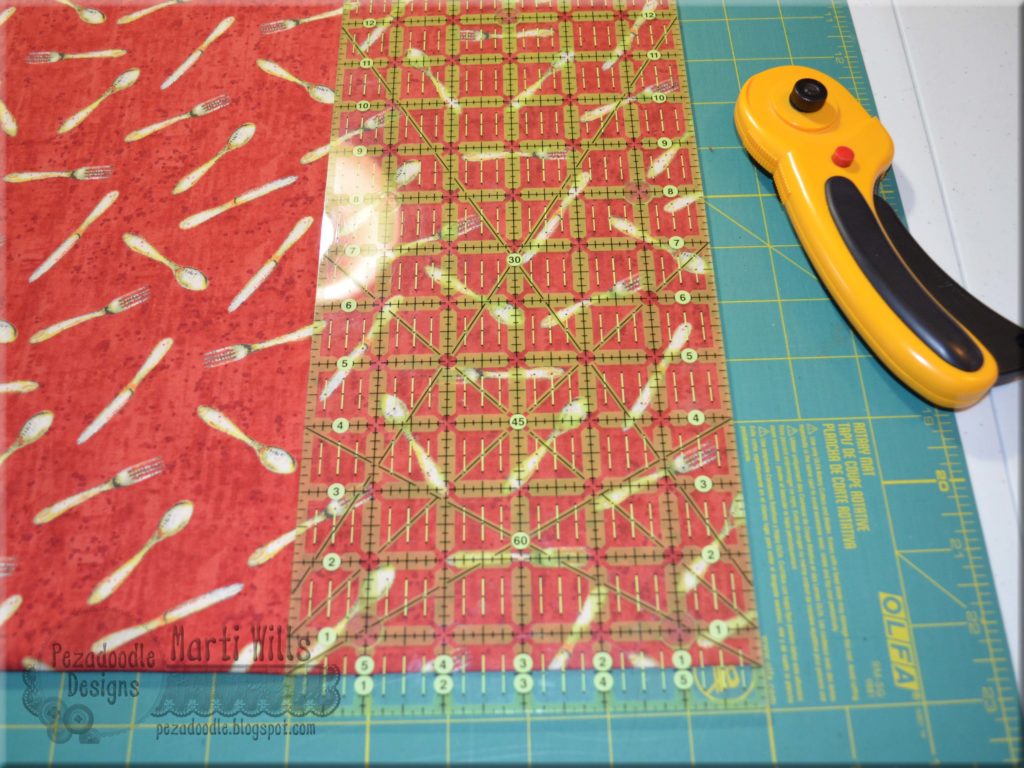
In the picture above I have a rotary cutter and a green cutting mat. The mats can be expensive so I get mine at Joann’s using a 50% coupon when available. The rotary cutter has a replaceable blade which is nice. In addition, you can see a clear plastic grid style ruler with yellow markings.
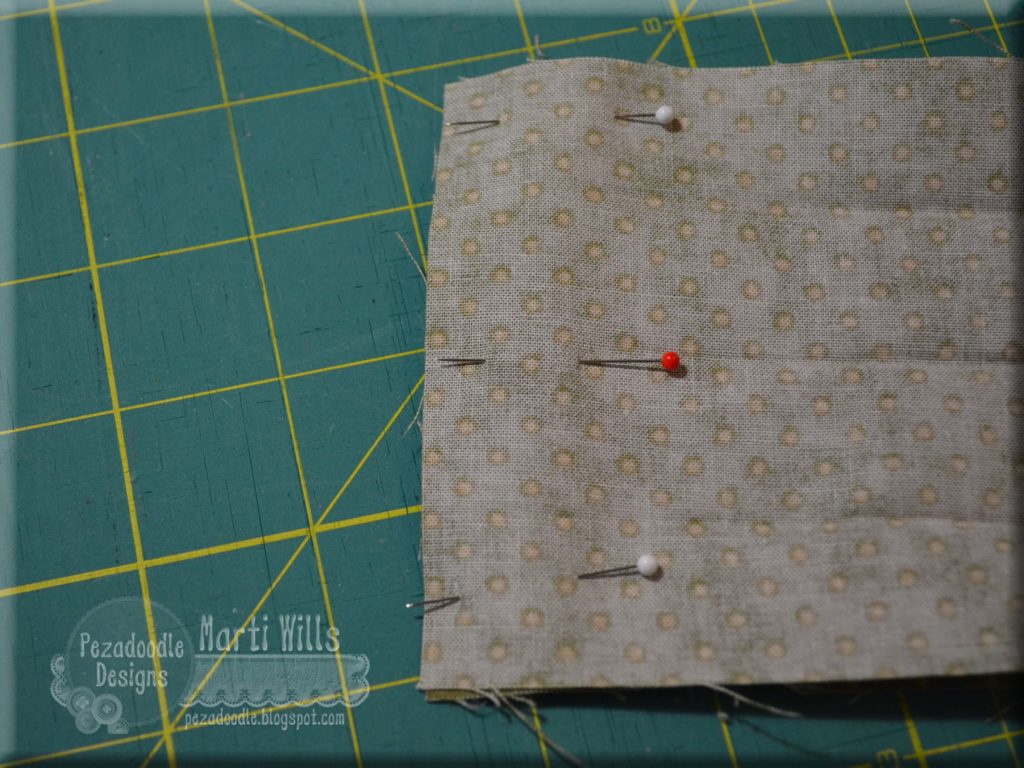
Your first cut will be to even up the frayed cut edge of your piece of fabric. Fold the fabric in half with the finished (selvage) edges together and hold it up in front of you. If you have the sides even you may notice the fabric isn’t flat – both sides touching each other. There is usually a bump or slight off-centeredness. Slowly slide your selvage edges one side to the left and one to the right until the fabric hangs straight.
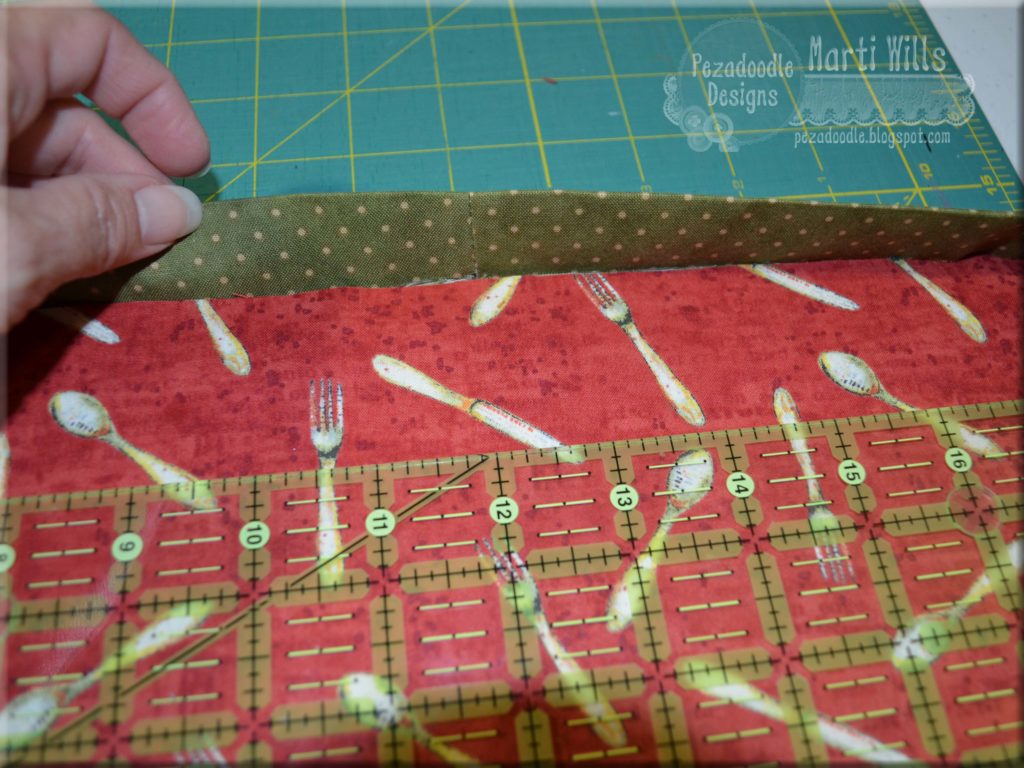
Now your cut edges are uneven so we need to trim one side. Lay it down on your mat – don’t pay attention to the ruler markings on the mat. Place your ruler down on top so that your folded edge is lined up straight along one of the markings – look at the bottom of the above pic – I have it lined up along the half-inch mark all the way across. Make sure your right side of your ruler (left if you are a lefty) is lined up along your uneven cut edge so that when you cut, you cut off all the unevenness. The above pic is AFTER I cut off the uneven edge.
Now take your rotary cutter and cut along the edge of your ruler making sure your ruler doesn’t slip side to side and your rotary cutter doesn’t stray from the edge of your ruler. And yes for some, like me, this might take some practice!
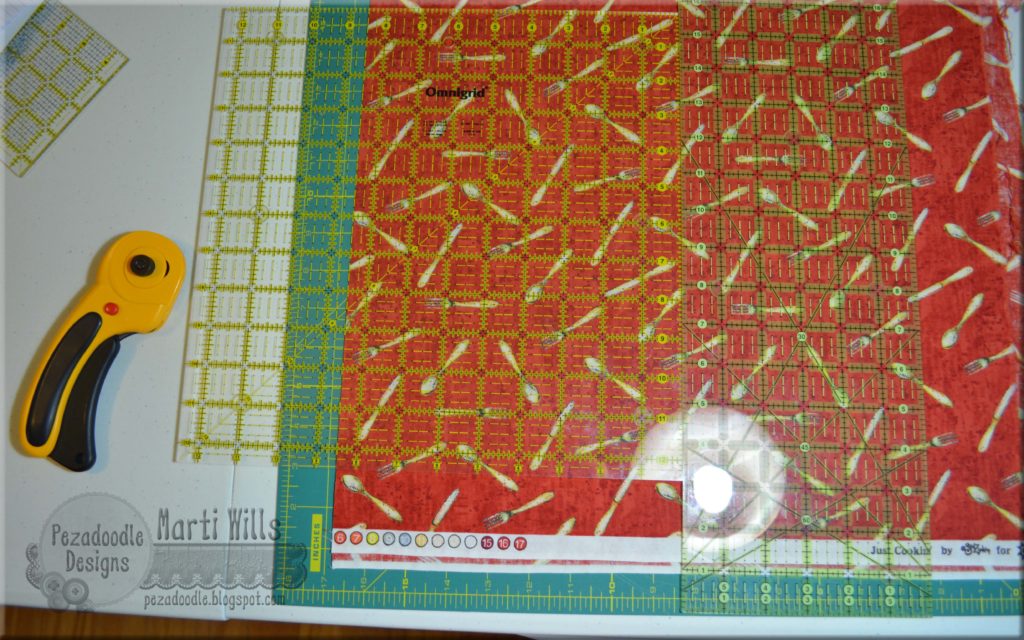
Now, don’t pick up the fabric and move it. Instead turn the mat itself around so your straight edge is now on the left (right if you are left-handed.) You are going to measure from your straight edge – 14 1/2″ – in this case, I need to use 2 rulers. To be sure you have a nice straight edge line up your ruler with the straight cut you made previously. This is the method used for all quilting, in case that is something you wish to embark on in the future. Once again, you can also measure 14 1/2″ with a ruler, draw a line and cut with scissors.
Regardless of how you choose to cut the fabric here are the sizes you will need:
- Main panel/body of apron – 28 1/2″ x 14 1/2″
- Larger pocket – 28 1/2″ x 14 1/2″
- Smaller front-most pocket – 28 1/2″ x 10 1/2″
- Tie – width of fabric x 4″ – 2 strips
- Apron backing – 28 1/2″ x 14 1/2″
All sewing is done using 1/4″ seam allowance.
Let’s begin with the tie. Trim off the selvage on each end of the tie strips. Place the 2 pieces right sides together on one short end. Sew them together. Press the seam open. On each sort side fold the fabric edge up 1/2″ and iron well. Unfold and fold it up again so the cut edge meets the fold line and iron. Finally, fold it back up a second time matching your initial crease so the cut edge is inside the fold and iron well.
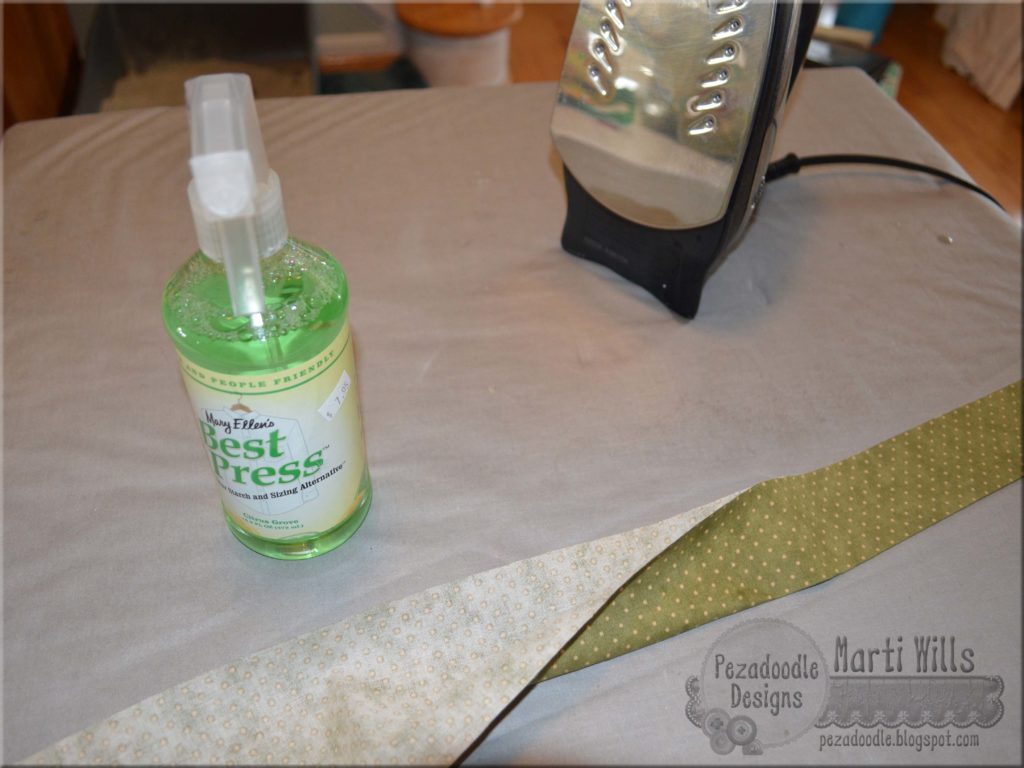
Fold the tie in half, wrong sides together and iron well – I find it helps to use the spray starch. You can see my favorite starch in the picture – Best Press.
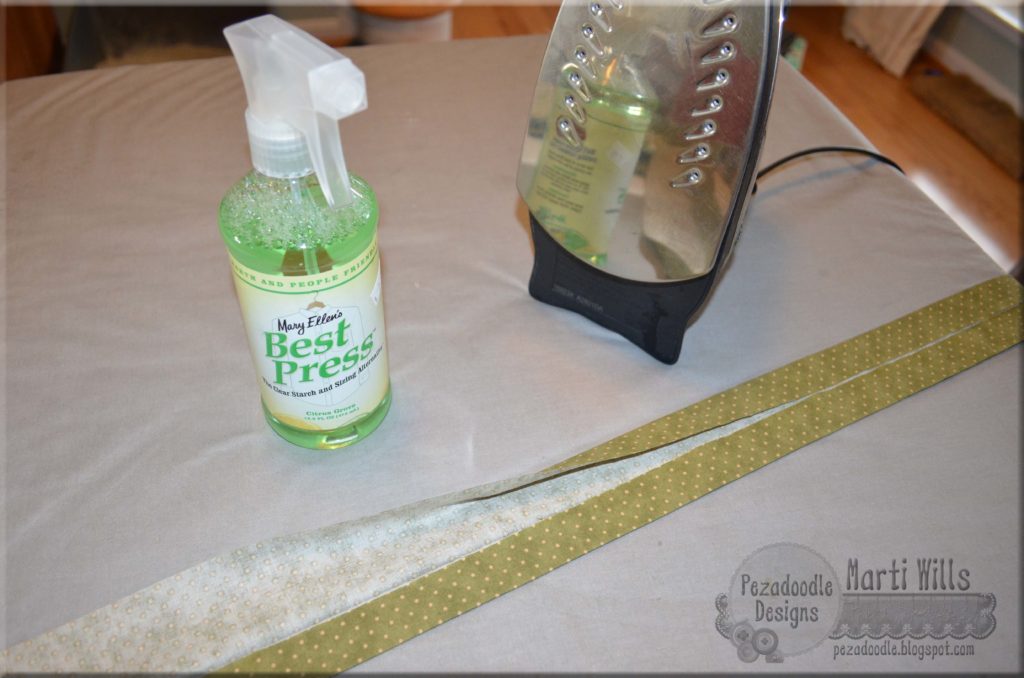
Next, unfold it and use that center fold line as a guide to fold up each cut edge to meet the center crease and iron well. Once each side is ironed, fold the tie in half again and give it one final ironing. Set the tie aside.
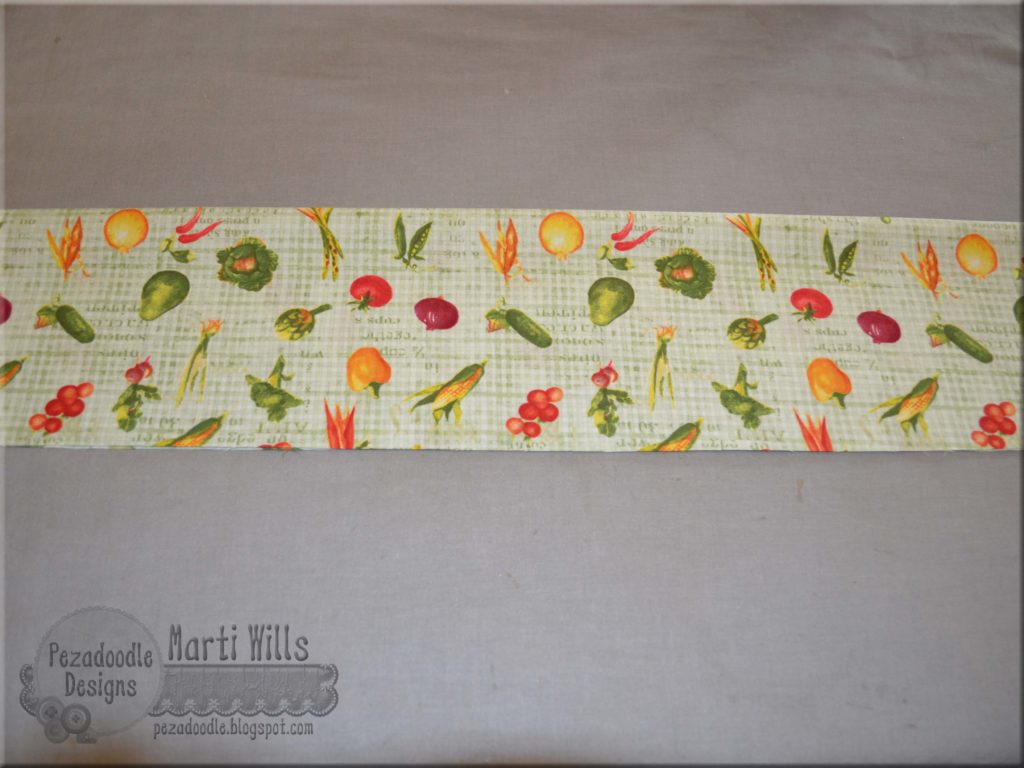
Now let’s work on the 2 pockets. Fold each pocket piece in half wrong sides together lengthwise and iron.
Lay the front piece of your apron down right side up. Lay the large pocket on top with the folded edge at the top and the raw edge lined up with the bottom raw edge of the apron front. Finally lay the shorter pocket on top of the larger one in the same way.
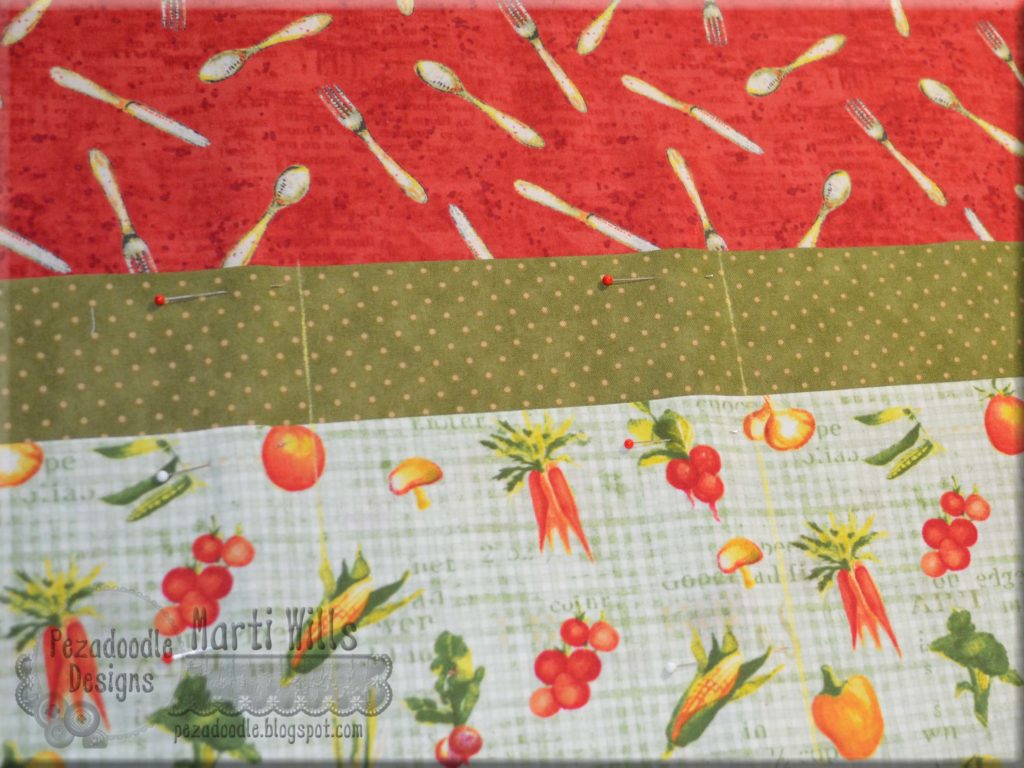
Pin the layers in place in a few spots so they don’t slip. Now you are going to sew some dividing lines to break up the pockets into compartments. Mine are divided into 5 pockets. I started by using a ruler and drawing a line with a chalk marker that divided the pockets into thirds. Then I divided each side section in half. Pin along each chalk line and sew. I like to back stitch and forward stitch a couple times at the top of each pocket to withstand the stress of putting things (and hands) in and out of them.
Lay the pieces back down right sides up. Lay the back-side fabric on top right side down. Pin around the sides and bottom edges making sure all edges are even.
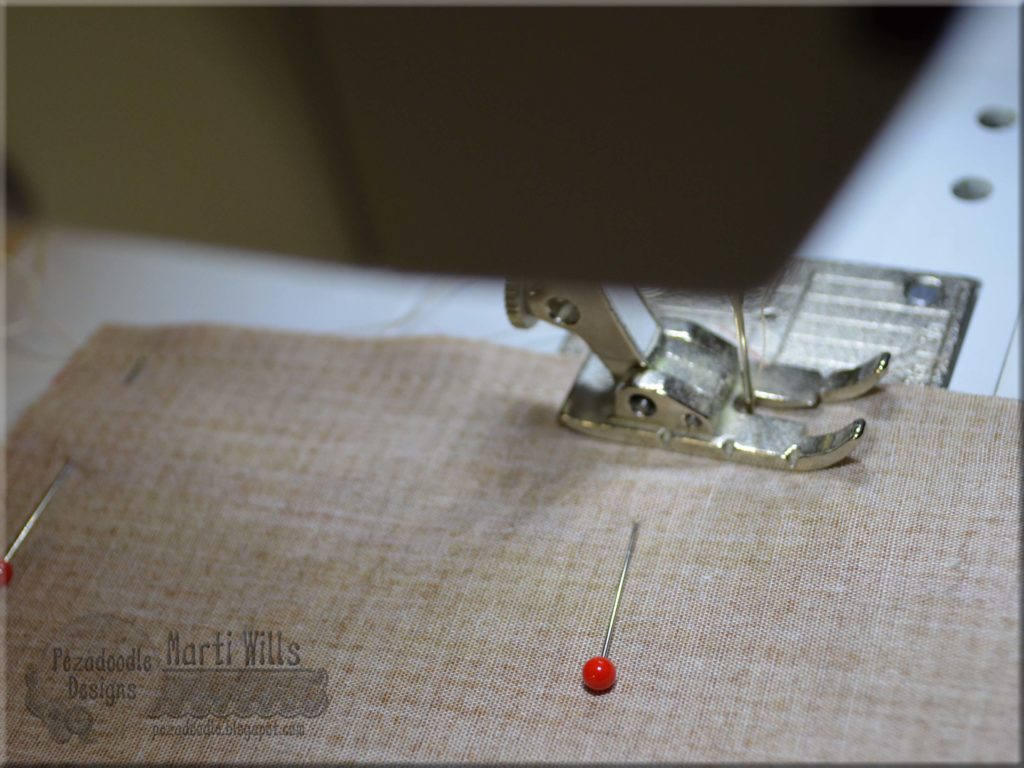
Make sure your needle is in the needle down position and begin sewing at the top of 1 side going all the way down, across the bottom and back up the other side. At the corners, stop sewing 1/4″ from the next side with the needle down in the fabric, lift your presser foot with the needle still in the fabric and turn so you can continue sewing the next edge.
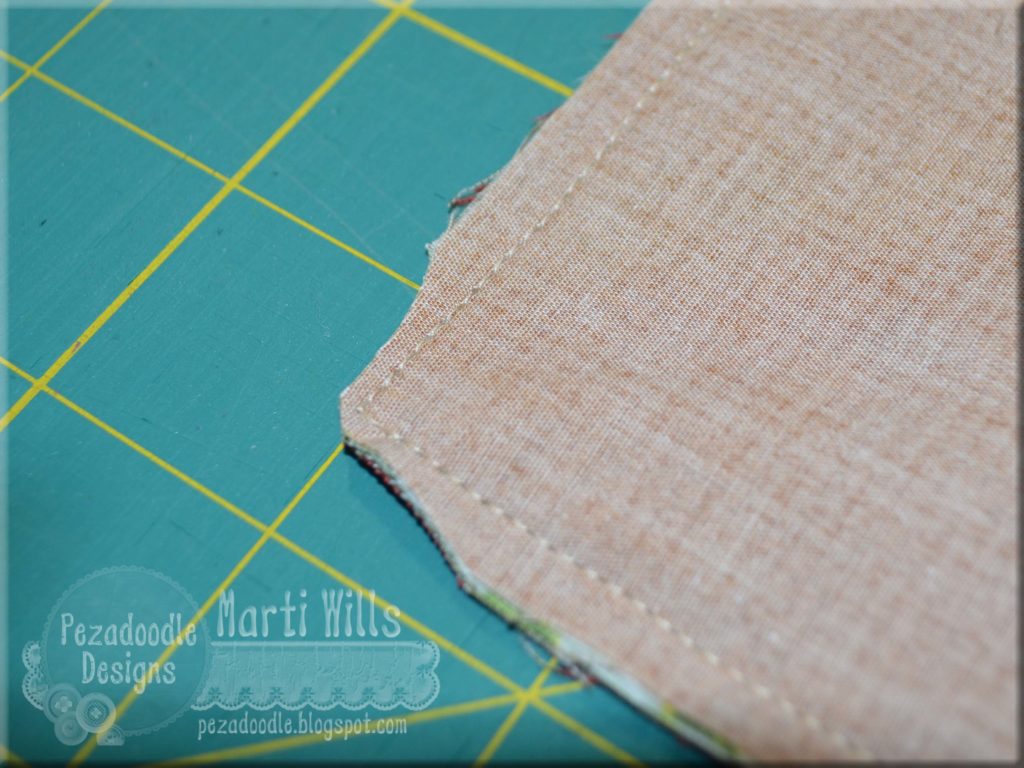
In order to make your corners “pointy” you need to trim them carefully to reduce the bulk of the fabric. Then turn it all right side out and push out along the seams and especially at the corners and iron well.
Now, with your needle still in the down position, top stitch along the side and bottom edge 1/8″ from the edge as shown above.
Now we are going to attach the tie to the top edge. Using a ruler determine the exact center of the apron so you can line up the center seam of your tie. Sandwich the apron layers between the layers of the tie so the raw edges are up against the inner fold of the tie. Pin in place on apron front and then all the way down to each end of the tie. On each short end of the tie be sure to pin so the hem you ironed in place at the beginning remains as you ironed it. Pin it too.
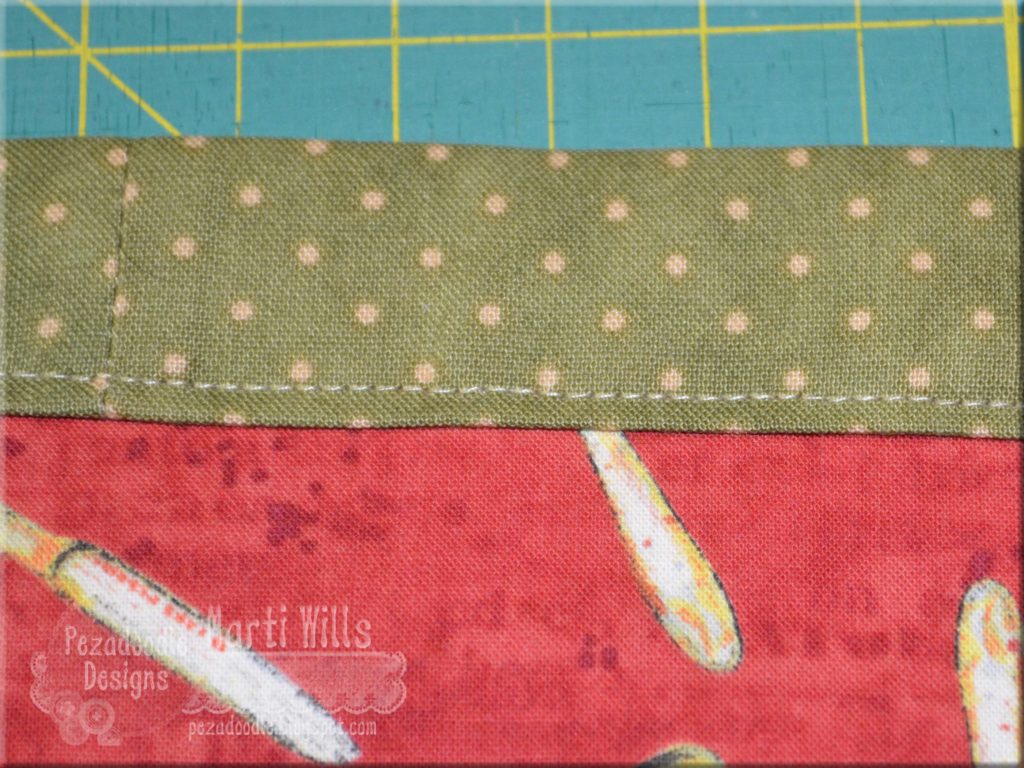
Now top stitch the tie 1/4″ from the edge. Start on one end, at the fold so you can close up the short edge, at the corner turn with needle down like before, continue all the way down the apron front and up the other short edge. Check to be sure you caught the back edge of the tie as well as the front.
Now wear it with pride!
Have fun with your fabric choices and make several! And, as always, we’d love to see your version! If you made one, share a picture with us on Facebook or tag us on Instagram.
by Tanner and Courtney | Jan 9, 2018 | Craft Tutorials
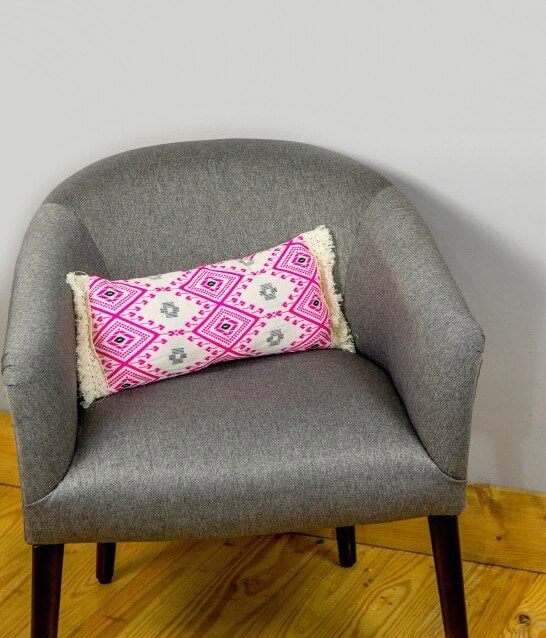
I could spend hours in Anthropologie and I would be lying if I said I haven’t. I like to wander around and pretend it’s my house and that all the customers are my friends who came over for an incredible dinner party. There is just something about that environment that makes the depths of my soul happy. I always want to bring a part of that home with me, but usually, my wallet stops me and tells me to DIY it. So that is what I do. This DIY Boho Pillow is inspired by Anthropologie but made out of a skirt from the thrift store.
Its cute but the big bonus is that it only cost a few dollars to make. Like $4 total. Isn’t that crazy?! Now I know that you want to make your own!
SEW Cute: DIY Boho Pillow Tutorial
Supplies:
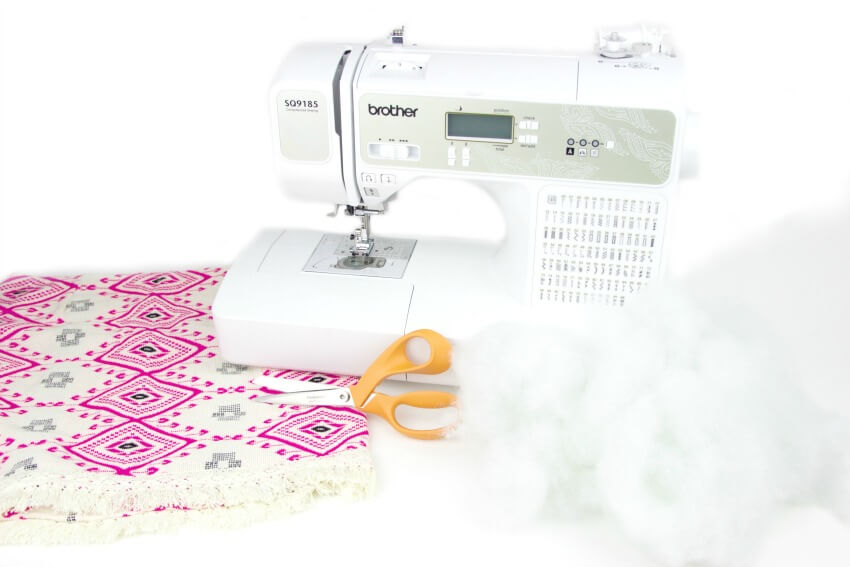
- boho pattern skirt
- sewing machine
- scissors
- seam ripper
- stuffing
- needle and thread
- lace fringe if the skirt doesn’t have any
Instructions:
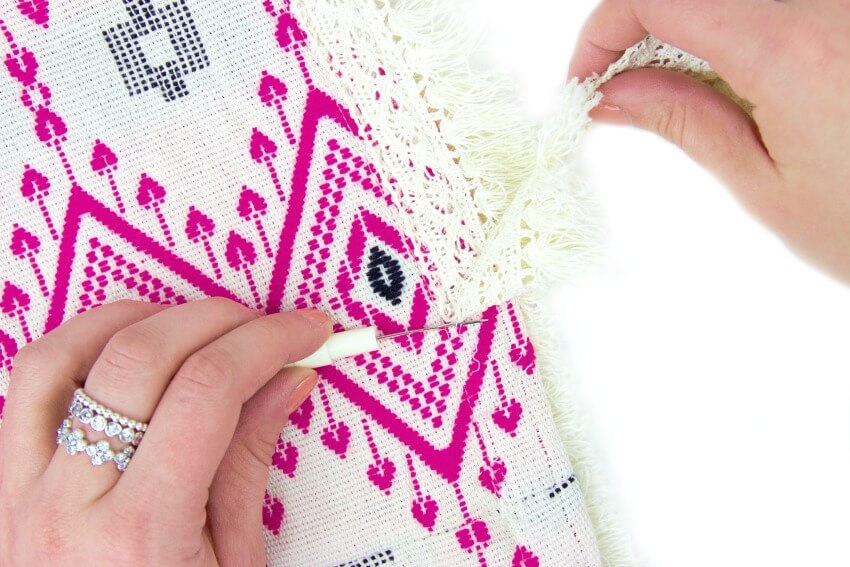
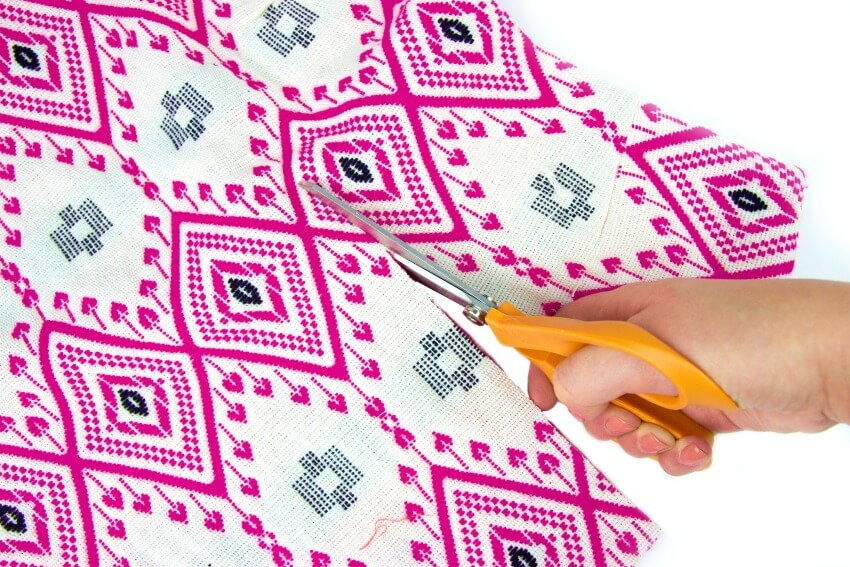
- Using the seam ripper, carefully remove the fringe from the bottom of the skirt.
- Lay your skirt so that one of the side hems is facing towards you. Then cut up the side so that it makes a 90-degree angle with the side of the skirt. Do the same thing to the other side so that you have 2 rectangles of fabric that are sewn on the 2 short sides.
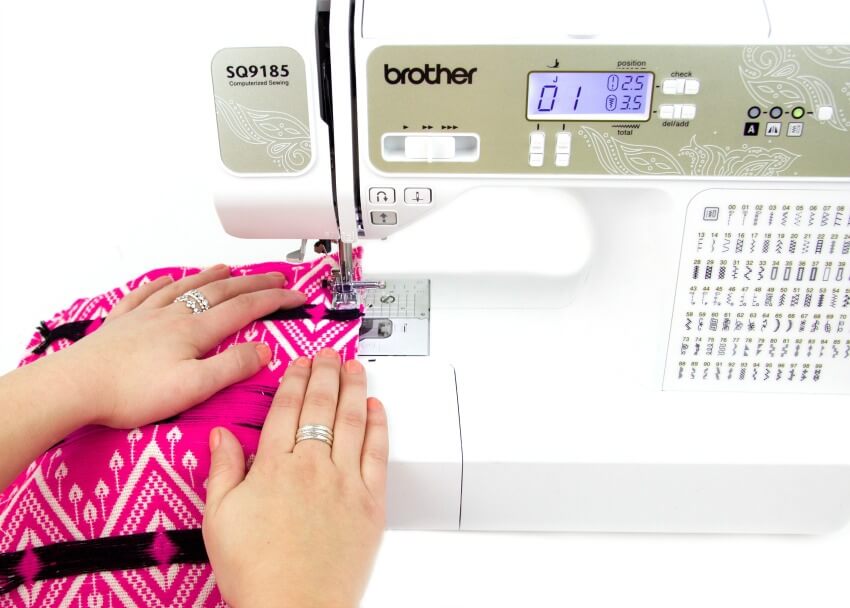
- Flip the fabric inside out and sew the two sides together with a 1/2 inch seam allowance. Be sure to leave a few inches unsewn.
- Step Four: Using the hole that you left unsewn, flip the fabric right side out.
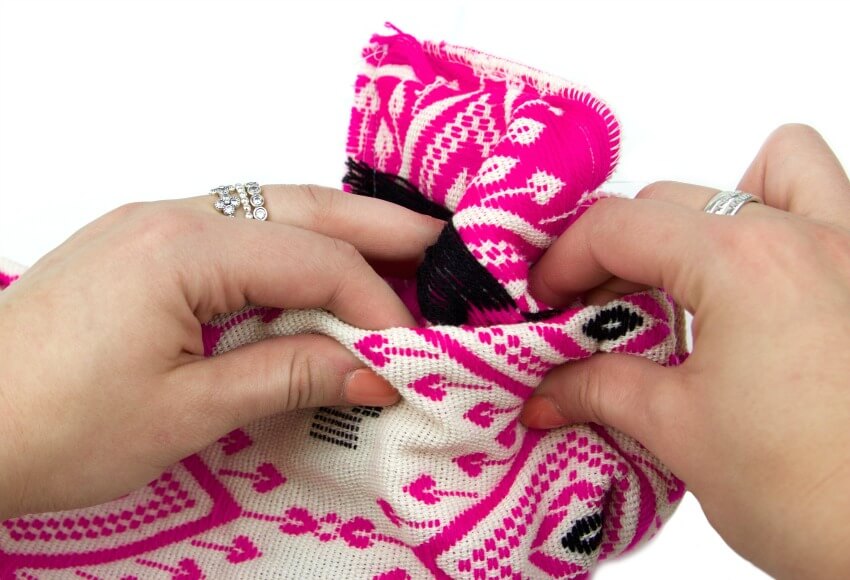
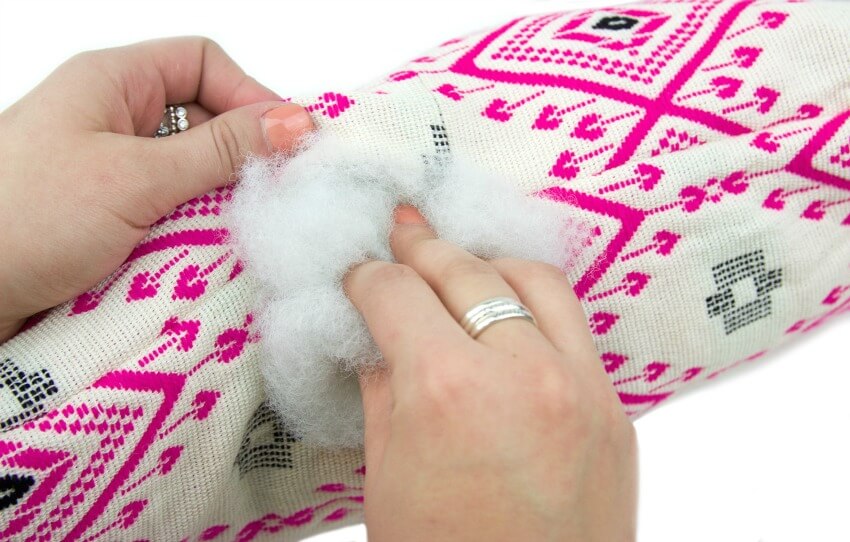
- Stuff your pillow with stuffing. I like my pillows really full so I used a lot, but you can play around with however much you prefer.
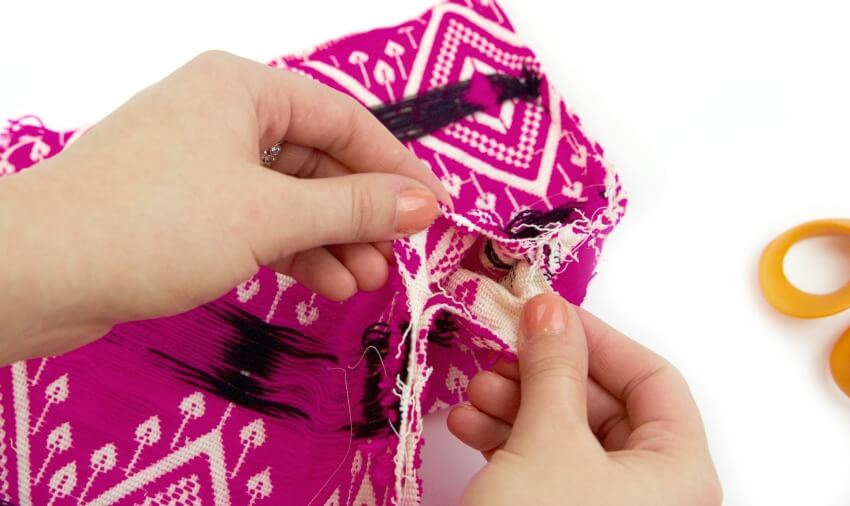
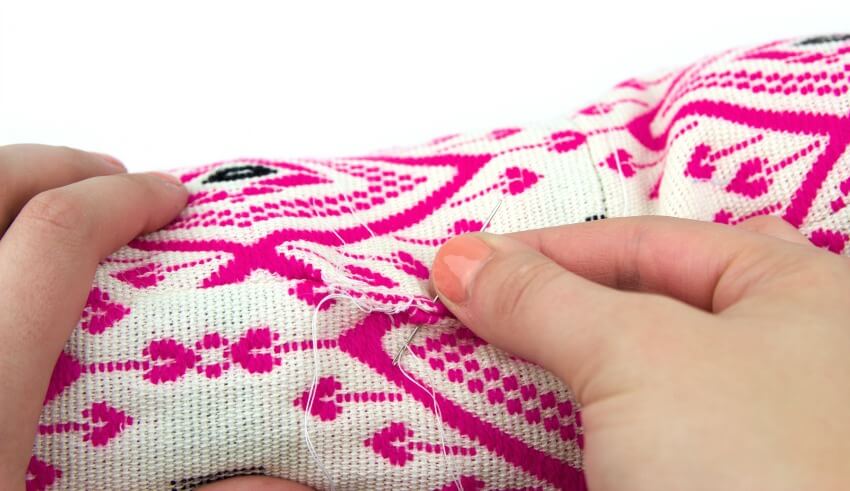
- Fold the raw ends of the small hole under and sew it closed.
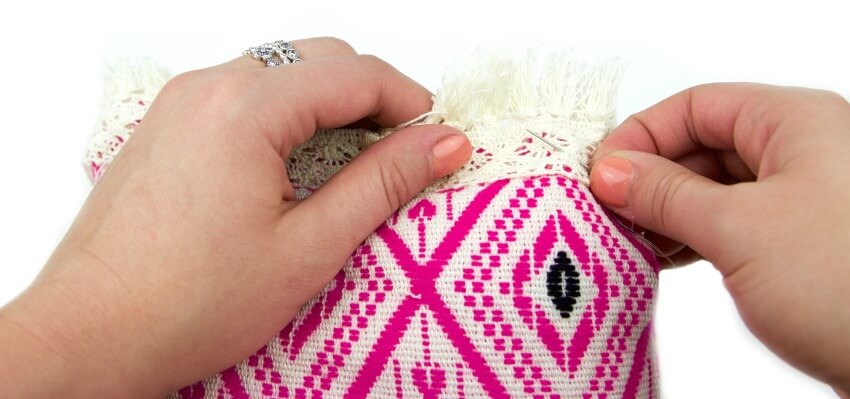
- Add your fringe along the two short sides. Handsewing is probably the best bet here because the lace is delicate.
I love this little DIY boho pillow in all of its boho and fringy glory. It is just so perfect and totally my style. It also provides the perfect amount of back support without taking up too much room on your chair. I hope you enjoyed this tutorial. Make sure to share a picture on Facebook or tag us on Instagram if you make your own!

by Angie Holden | Dec 19, 2017 | Craft Tutorials
We have another Christmas ornament to make for you today! Christmas has to be the best season of the year for crafting. There are so many cute things to make! DIY ornaments are definitely my favorite though.
This is a DIY Christmas ornament for music-loving families or cat owners! If you’re a family that loves a little noise, make a few extra of these handmade Christmas Ornaments for the kids to use as tambourines. Can you say hours of entertainment? If you’re a cat owner, you already know this ornament will save you so much broken glass since it can be used as a warning bell for when the cat is in the tree. You’re welcome.
Of course, these ornaments can also just stay on the tree because they are a beautiful addition to any Christmas decor. Let me teach you how to make some of your own with this Christmas ornament tutorial!
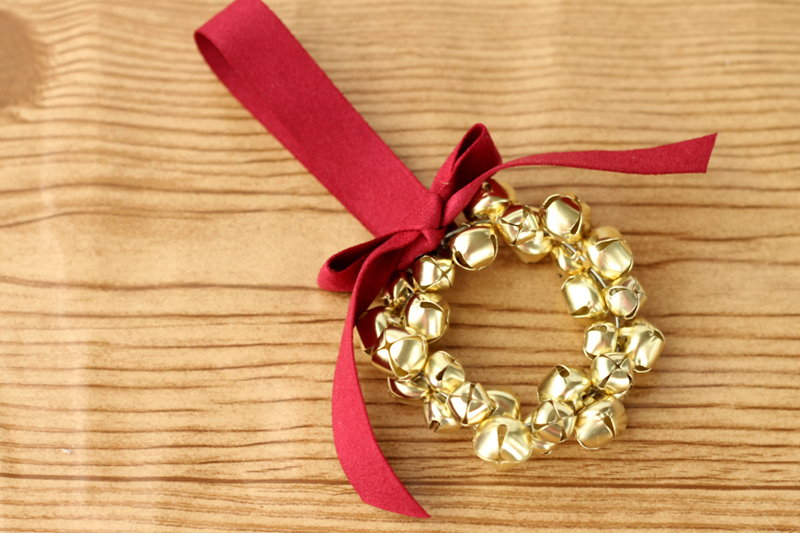
Jingle Bell Wreath Christmas Ornament Tutorial
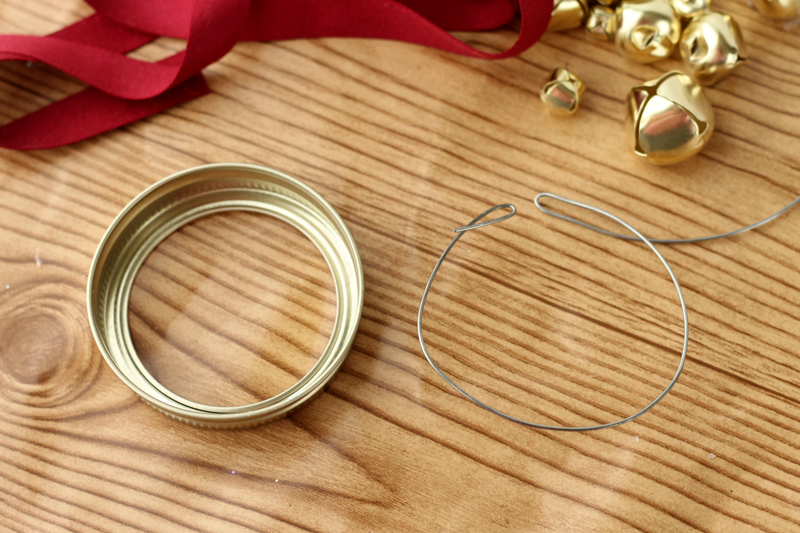
Supplies:
- Stiff wire
- Jingle bells
- Ribbon
- Glue
- Jar lid
- Scissors
- Wire cutters
Instructions
- Use a length of stiff wire and wrap it around a jar lid to form a circle. Bend a loop on both ends of the wire.
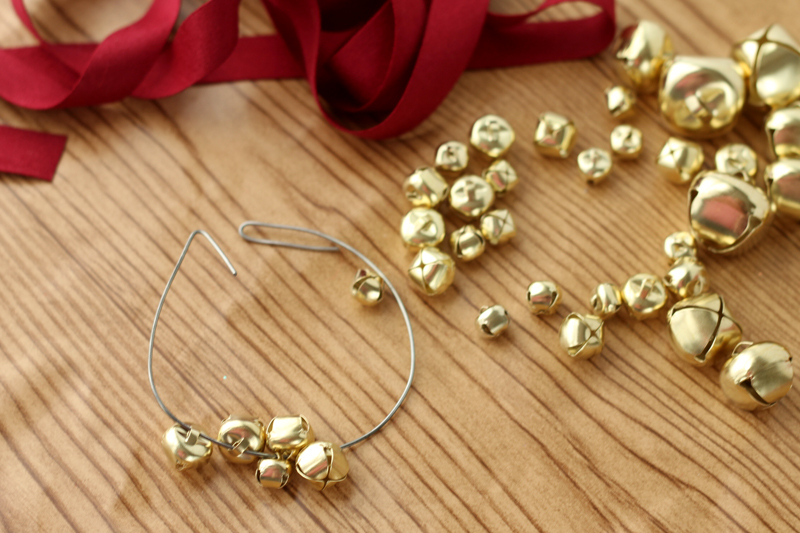
- Thread as many jingle bells as desired onto the wire as shown.
- When you are happy with the wreath, shape with your hands to get the desired shape. Tie loops on ends of the wire around one another and twist.
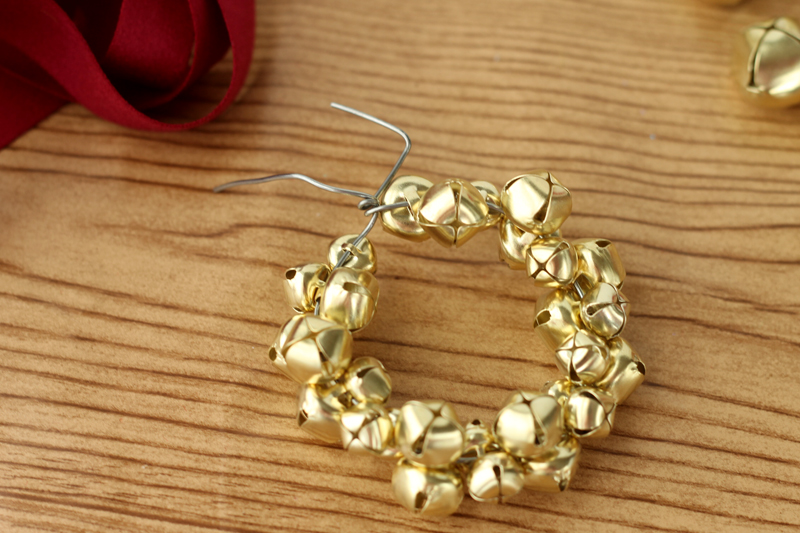
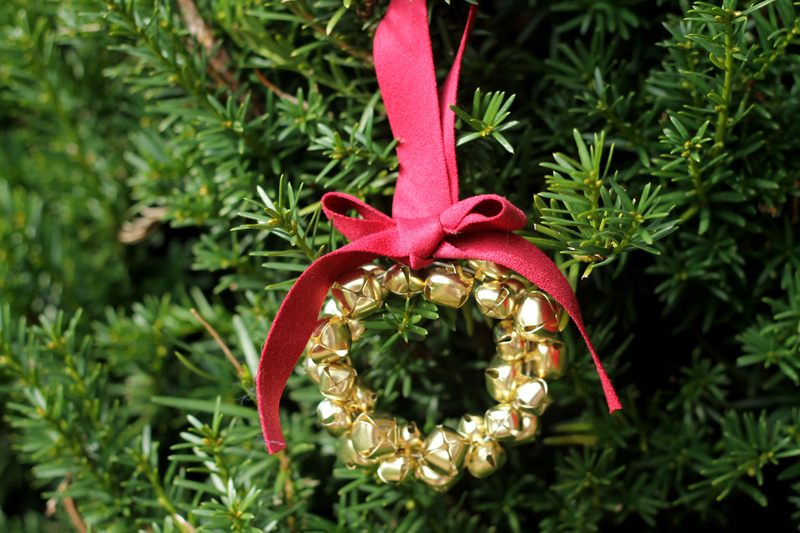
- Trim ends of wire if needed. Tie on a bow and piece of ribbon for hanging.
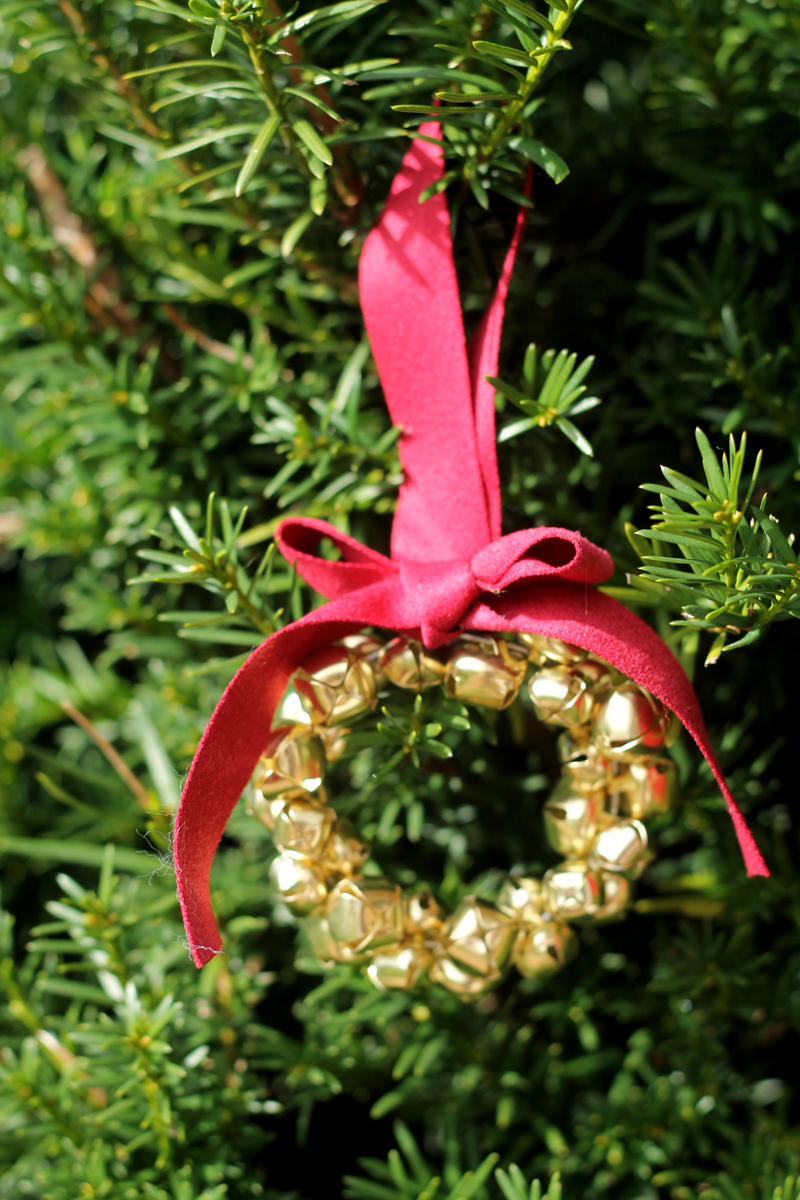
I love how the added touch of gold looks on my Christmas tree. For the jingle bell obsessed, it’s the perfect gift! I’ve also thought about making a giant version as a wreath for my door. What do you think? Too much jingling?
As always, we love to see your projects! If you made this project or another project you’d like to share with us, share a picture on our Facebook page or tag us on Instagram.

by Simone Collins | Dec 16, 2017 | Craft Tutorials
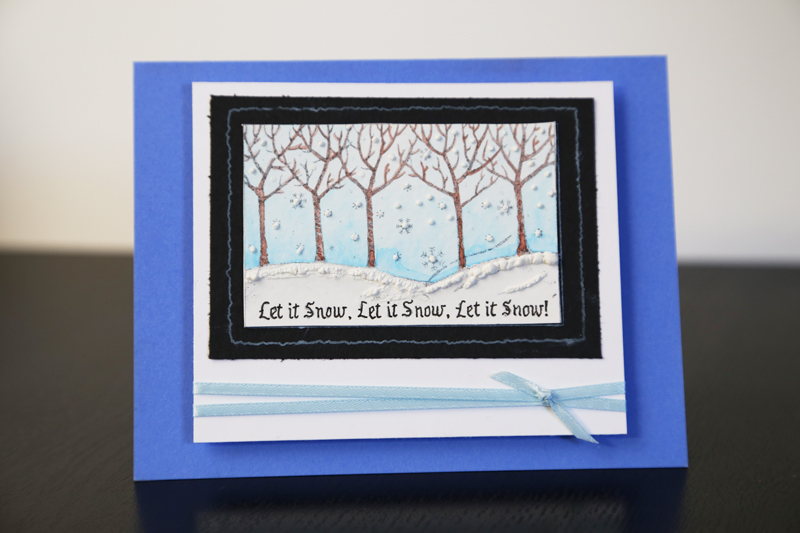
Tis the season! If you’re a paper crafter like me, you love Christmas. Is it the twinkling lights? No. Is it the cookies? Maybe. But mostly it’s an excuse to make lots and lots of cute cards! You know, you have to make a few samples before you know which ones you’re going to send. One of my samples was this Let it Snow Christmas card and I wanted to share with you guys how to make it. This card is so simple but turns out so cute because of this one little tool that I can’t live without, especially during the holidays, and that’s my Snow Marker.
If you haven’t used the Marvy Uchida Snow Marker, I am about to change your life. Let me fill you in. The Snow Marker is one of my favorite paper crafting tools because it does this cool white puffy effect you see below! All you need is the marker and a heat gun.
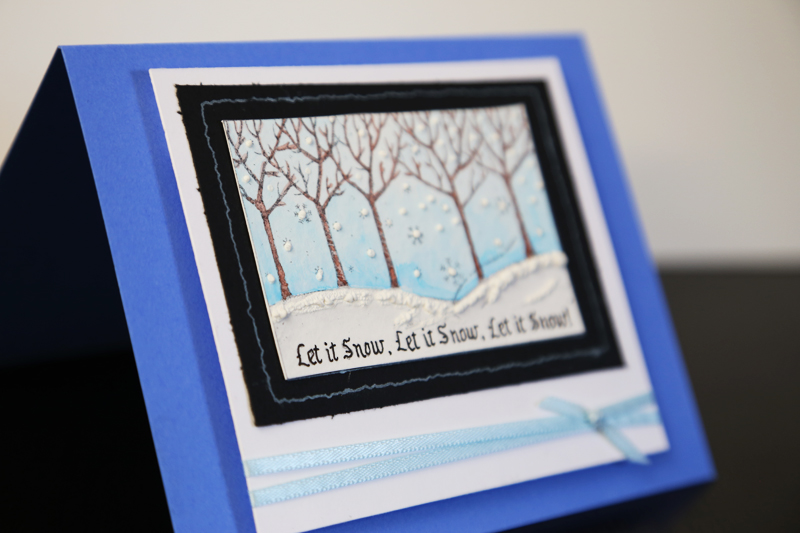
In full disclosure, I do work with Marvy Uchida, but this is not a sponsored post. I just genuinely like using this marker when making cards! Obviously, as the name suggests, it creates a textured, snowy effect on paper making it perfect for wintery cards or art projects. But it also looks like foam or fur, making it great for beer mugs, lattes, Santa hats, pom poms, clouds, or any fuzzy, fluffy, foamy thing that you can think of. Seriously, try it.
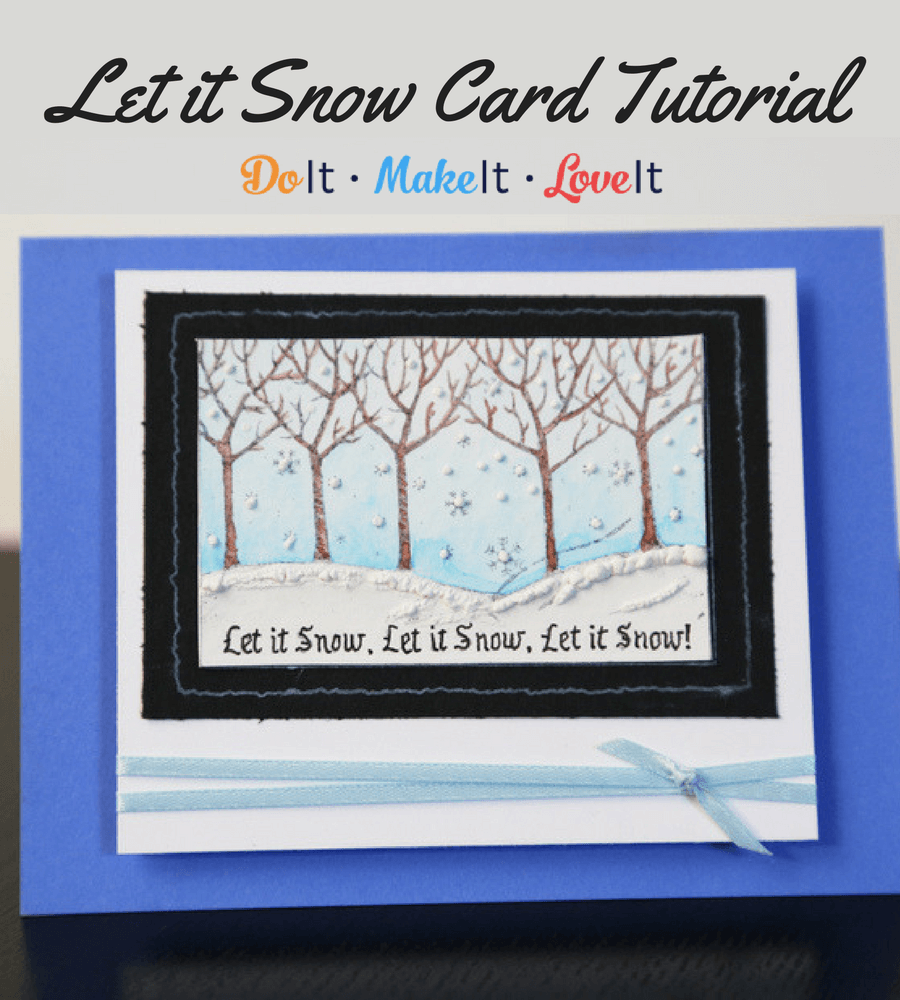
Let it Snow Christmas Card Tutorial
Supply List:
- Rubber Stamp
- Black Stazon Ink Pad
- White Ink Pad
- Cardstock – blue, white, black
Color In Markers
- Color In Water In Brush – fine
- Snow Marker
- Embossing Heat Tool
- Ribbon
- Dimensional Adhesive
Instructions:
- Cut blue cardstock to 5.5” x 8.5” and score at 4.25” for the card base.
- Cut two white cardstock pieces 4.25” x 3.5” and 2” x 3.25”
- Cut black cardstock to 2.75” x 3.75”
- Stamp the your image on the smallest white piece of cardstock in Black StazOn Ink.
- Stamp the same image on black with white ink.
- Color your image with Color In Markers using the Color In Water In Brush to watercolor. Allow to dry.
- Add Snow Marker to your dried image and heat with the Embossing Heat Tool until it puffs. Add more if necessary.
- Attach images together and add ribbon.
- Secure image to card base with dimensional adhesive.
How did your turn out? We’d love to see yours! Share a picture on our Facebook page or tag us on Instagram. Or if you’ve used my favorite marker before, leave your thoughts in the comments.

