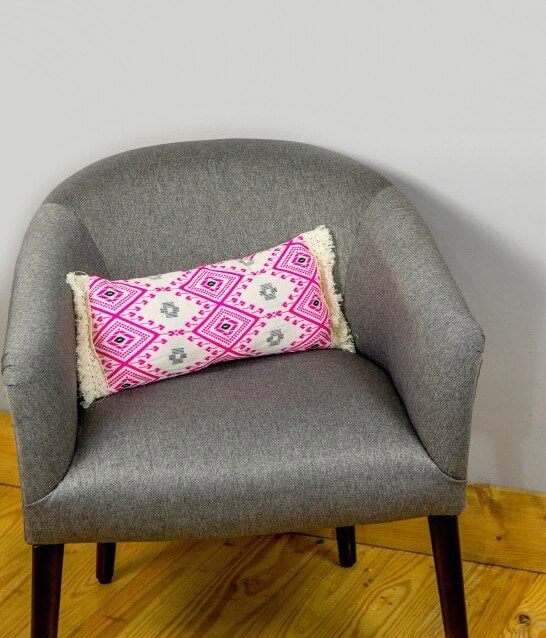
I could spend hours in Anthropologie and I would be lying if I said I haven’t. I like to wander around and pretend it’s my house and that all the customers are my friends who came over for an incredible dinner party. There is just something about that environment that makes the depths of my soul happy. I always want to bring a part of that home with me, but usually, my wallet stops me and tells me to DIY it. So that is what I do. This DIY Boho Pillow is inspired by Anthropologie but made out of a skirt from the thrift store.
Its cute but the big bonus is that it only cost a few dollars to make. Like $4 total. Isn’t that crazy?! Now I know that you want to make your own!
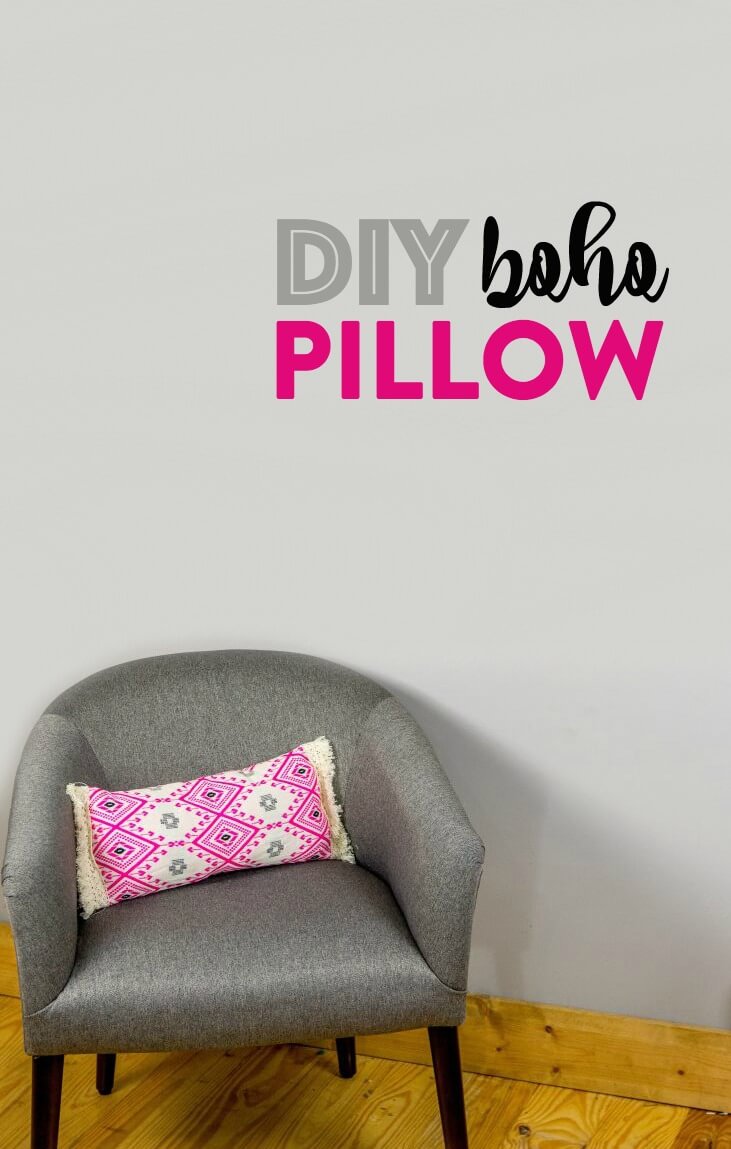
SEW Cute: DIY Boho Pillow Tutorial
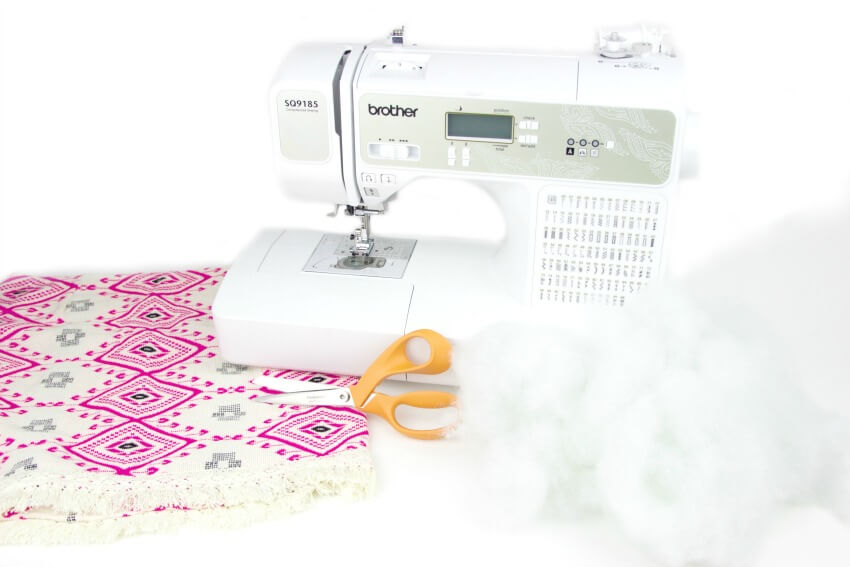
Supplies:
boho pattern skirt
sewing machine
scissors
seam ripper
stuffing
needle and thread
lace fringe if the skirt doesn’t have any
Instructions:
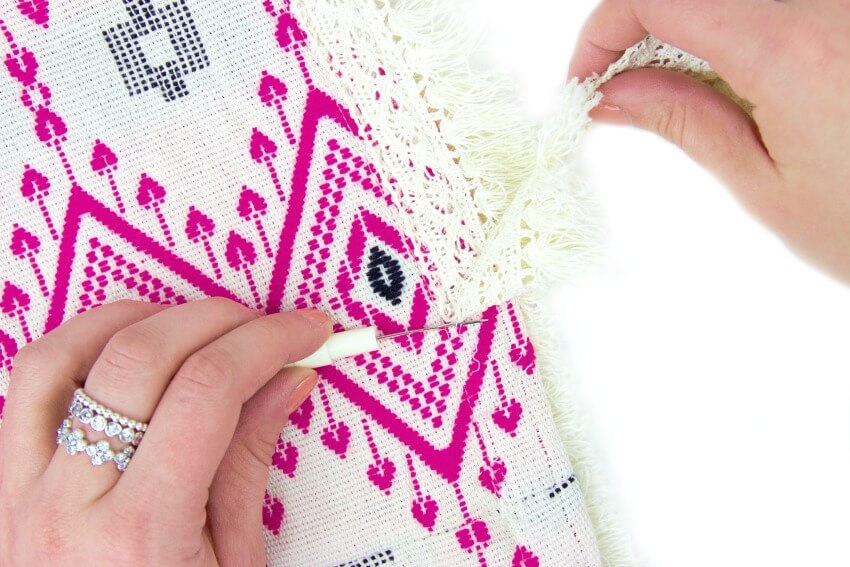
Using the seam ripper, carefully remove the fringe from the bottom of the skirt.
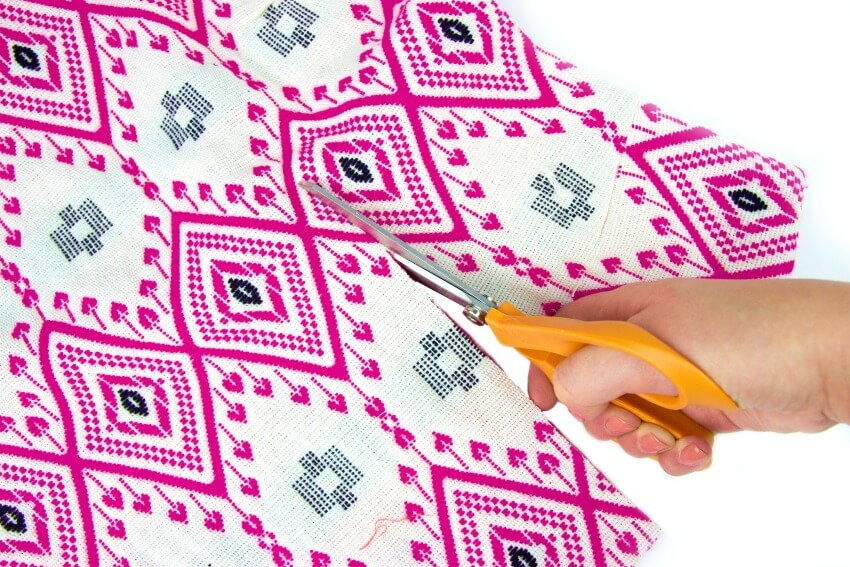
Lay your skirt so that one of the side hems is facing towards you. Then cut up the side so that it makes a 90-degree angle with the side of the skirt. Do the same thing to the other side so that you have 2 rectangles of fabric that are sewn on the 2 short sides.
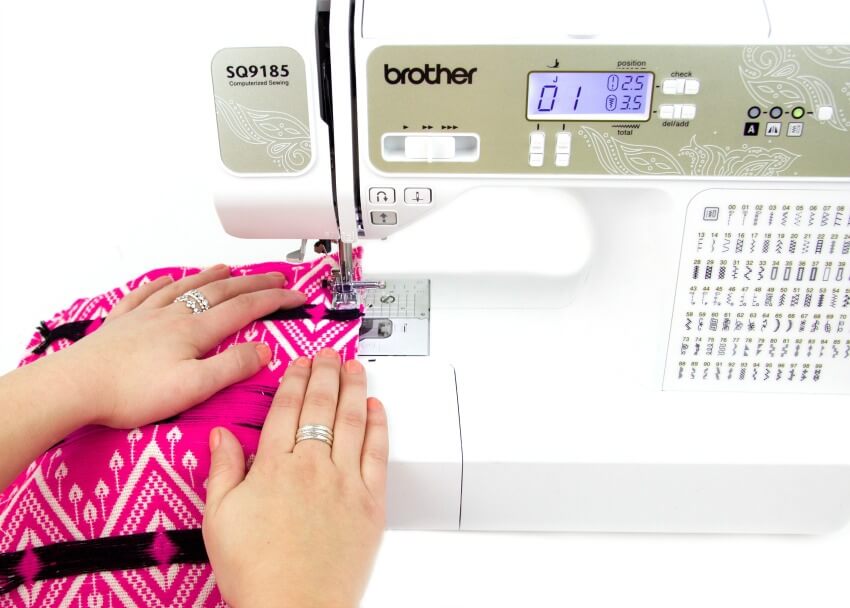
Flip the fabric inside out and sew the two sides together with a 1/2 inch seam allowance. Be sure to leave a few inches unsewn.
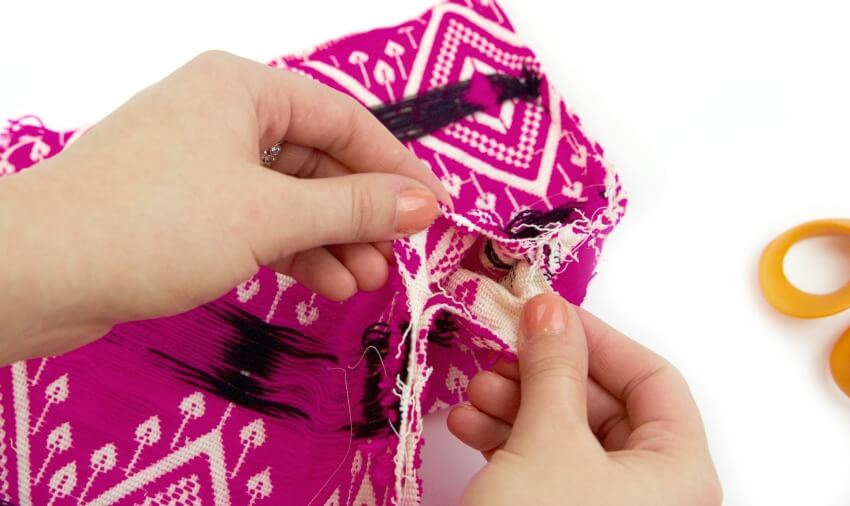
Step Four: Using the hole that you left unsewn, flip the fabric right side out.
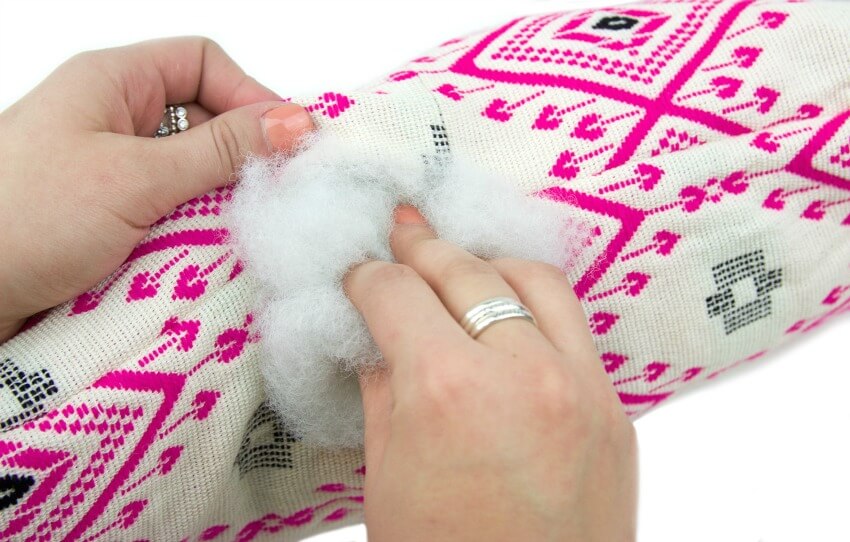
Stuff your pillow with stuffing. I like my pillows really full so I used a lot, but you can play around with however much you prefer.
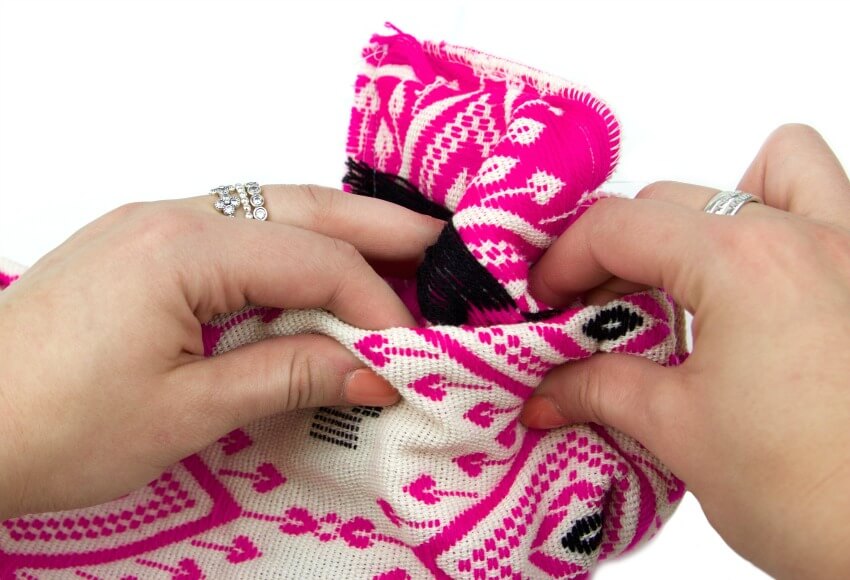
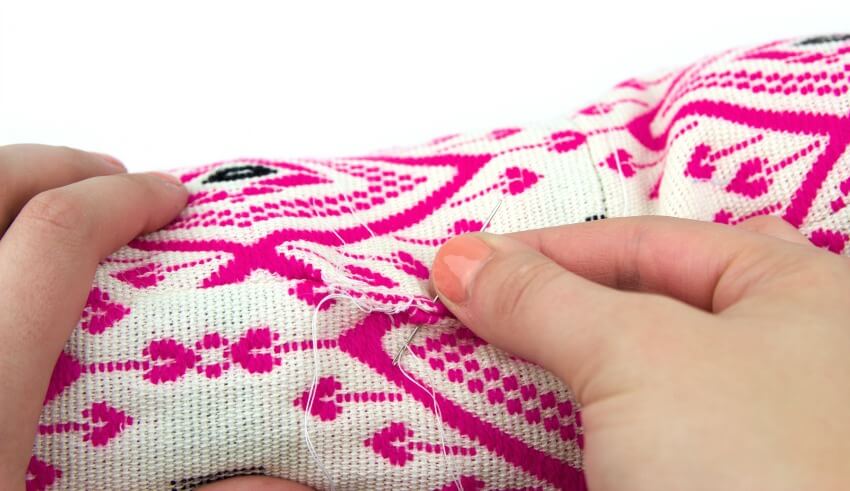
Fold the raw ends of the small hole under and sew it closed.
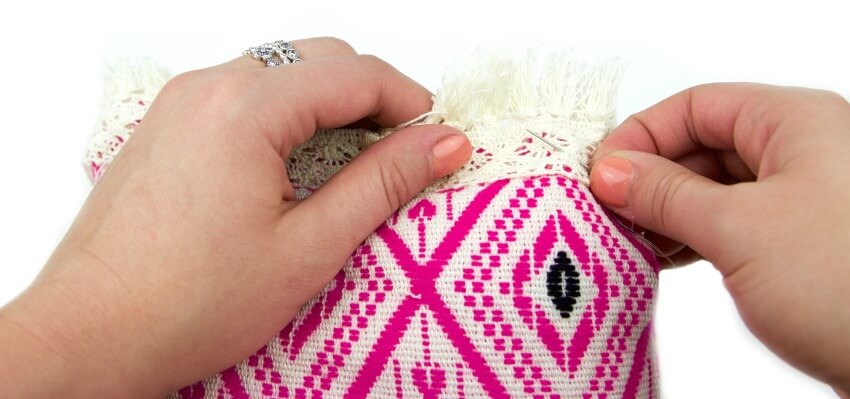
Add your fringe along the two short sides. Handsewing is probably the best bet here because the lace is delicate.
I love this little DIY boho pillow in all of its boho and fringy glory. It is just so perfect and totally my style. It also provides the perfect amount of back support without taking up too much room on your chair. I hope you enjoyed this tutorial. Make sure to share a picture on Facebook or tag us on Instagram if you make your own!
This recipe is super delicious, and you won’t believe it takes less than thirty minutes to prepare! Who doesn’t love quick and easy meals for a busy weeknight, or to whip up for some surprise guests? I guarantee you’ll get hooked on this Broccoli Tortellini Alfredo recipe and crave it like I do! You can even make it your own by adding some of your other favorite ingredients like grilled chicken, mushrooms, or bell peppers. No matter how you prepare it, you’re sure to love it.
If you’ve never tried this easy dinner recipe before, you’ll seriously be wondering what you’ve been doing this whole time when you see how quick it is to make. After coming home from a long day or work, this will be the only thing you’re thinking about making. Don’t believe us? Check out the video! (It’s only a minute long, so you know it’s easy.)
Easy Dinner Recipe: Broccoli Alfredo Tortellini
Seriously, stock your freezer and buy a couple jars of alfredo sauce for those nights you’ve been running around and all you want to do is binge watch Netflix and eat on the couch as fast as possible. Don’t love broccoli? No biggie, try swapping out the broccoli with your favorite veggies or add in some grilled chicken to really make it the perfect meal.
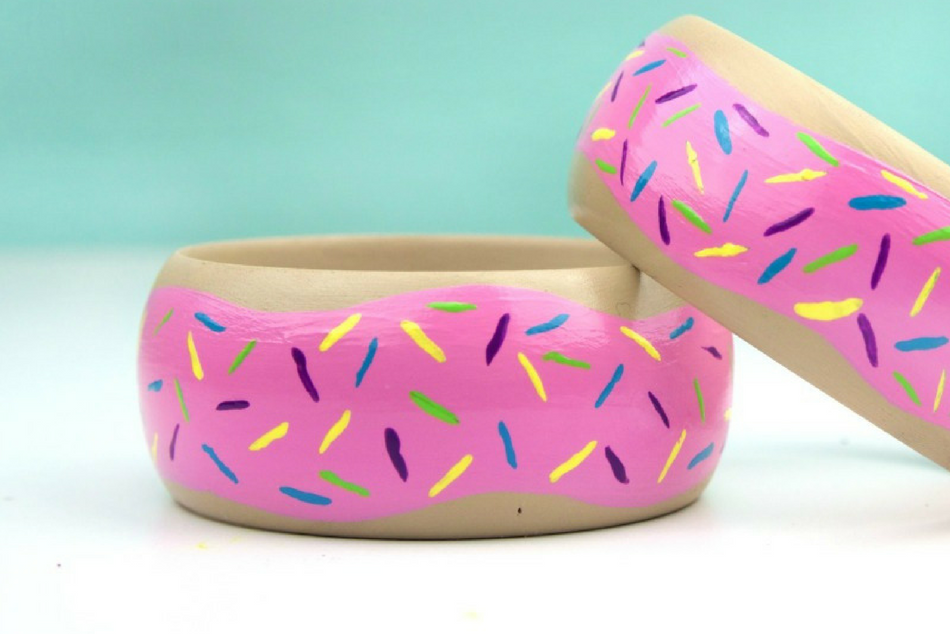
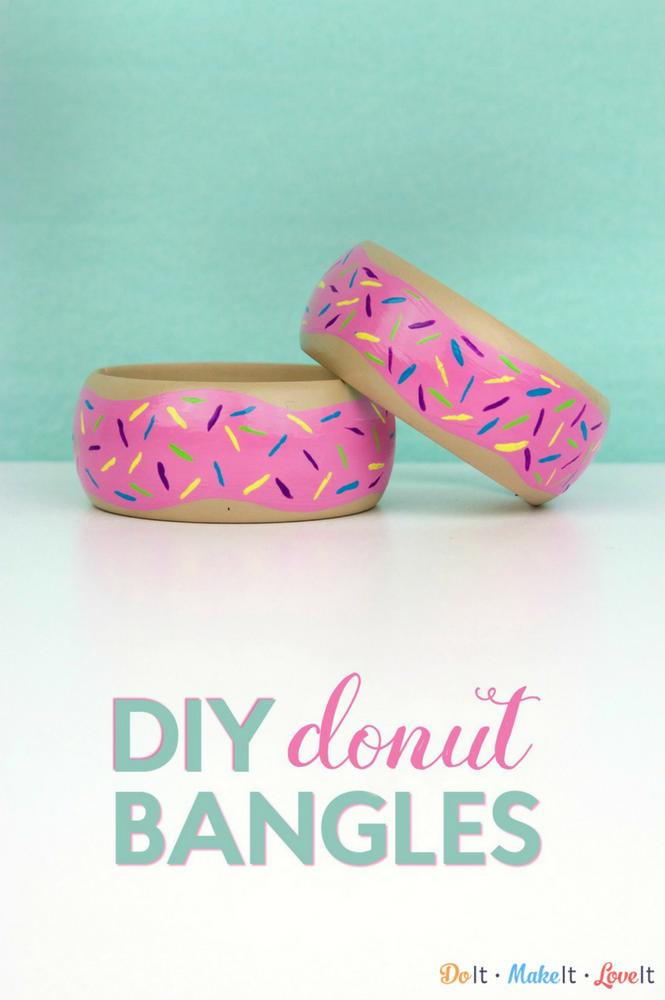
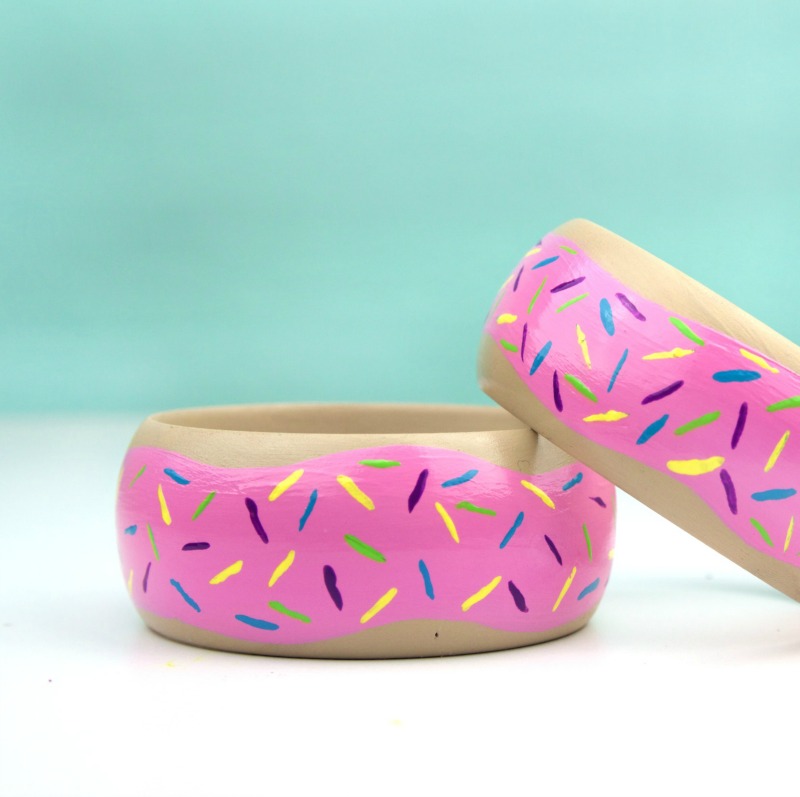
Hey guys, let’s talk about an amazing DIY that I made for you all today. It’s something that I know everyone loves and you’ll want to wear them all the time. They’re DIY Painted Donut Bangles that everyone will be so jealous of, so you have to make them! Who doesn’t love donuts? They’re so sassy and stylish, you’ll wear them with everything. Especially when you see how easy these are to make. You’ll just need a few simple supplies and you’ll have a new DIY fashion accessory to show off.
DIY Painted Donut Bangles
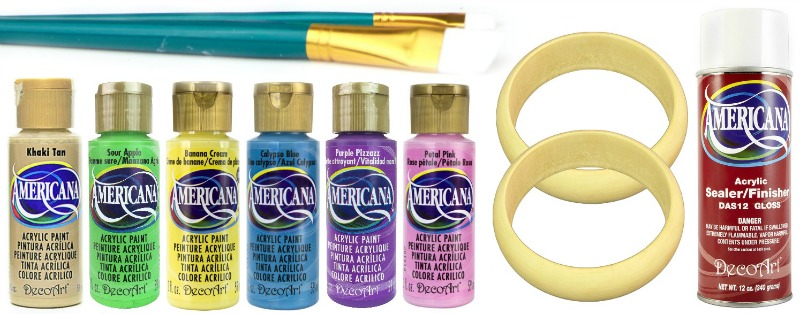
The supply list to make your own DIY painted bangles is super simple. Here is what you will need: We’ve included links to our favorite supplies to make it easier for you to shop! If you purchase from these links, we’ll make a little money. Check out our disclosure and privacy policy.
Supplies:
Craft paint in tan, light pink, and bright colors (we used DecoArt Americana)
Step One: Paint the entire wooden bangle with tan paint.
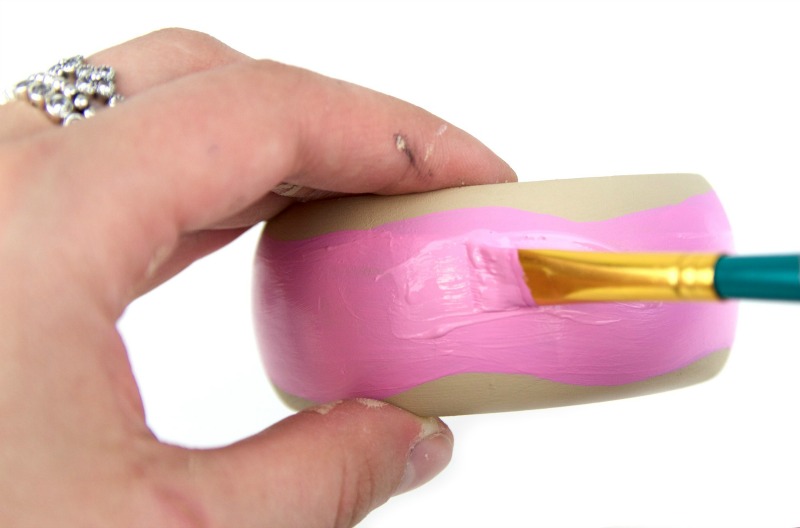
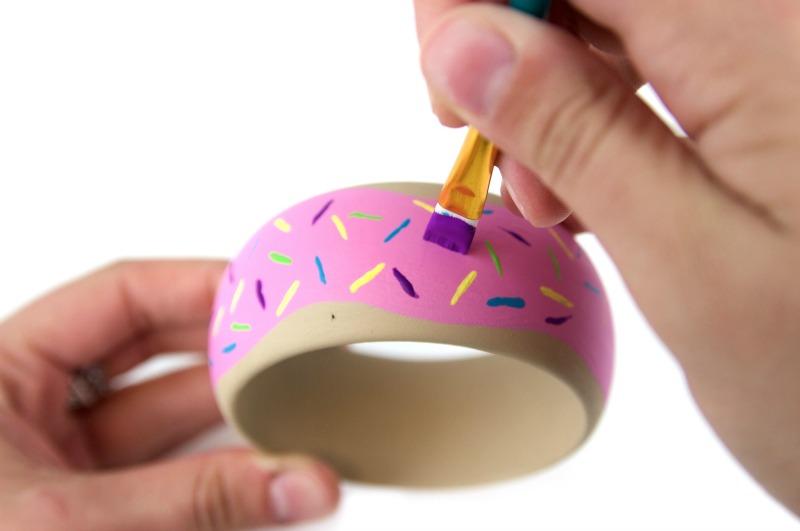
Step Two: Paint a thick wiggly line in pink or your favorite icing color around the bangle to be the icing. Step Three: Add sprinkles in all the other colors. Use a flat paintbrush and just touch it to the bangle to make perfect sprinkles.
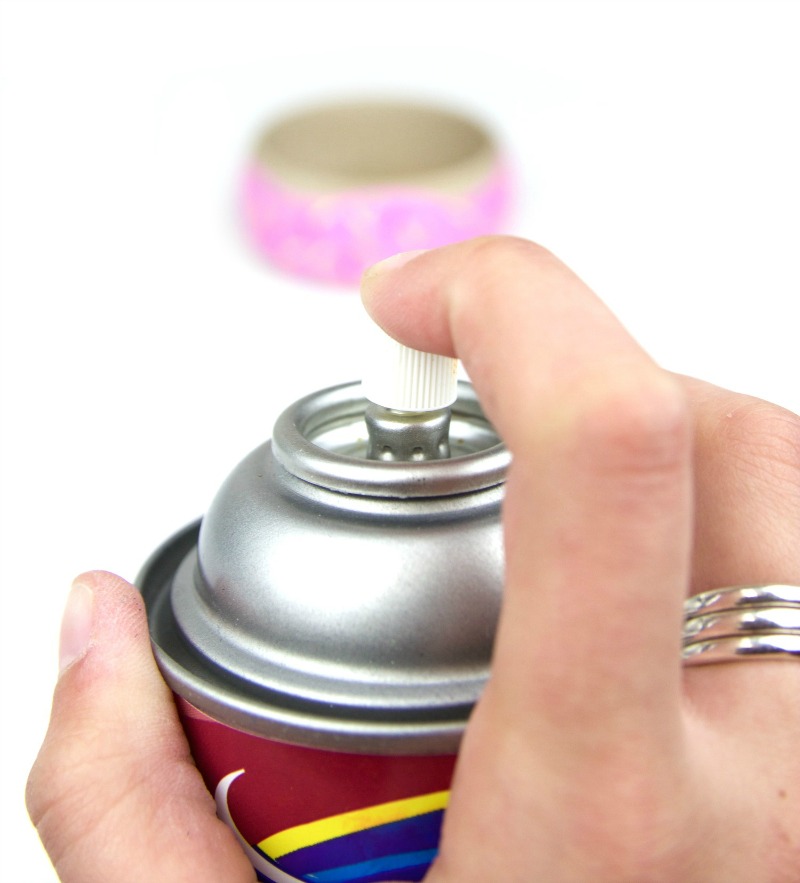
Step Four: Seal the bangles with a spray sealer to protect them from wear and tear. Let dry overnight and you’re good to go!
Don’t you love these donut bangles?! They look good enough to eat! When everyone asks where you got them, you’ll be so proud to say they were a DIY. You’ll be making them for all your friends and family so you can all have amazing matching bangles. I hope you enjoyed this tutorial! Share pictures of your finished bracelets on our Facebook page!
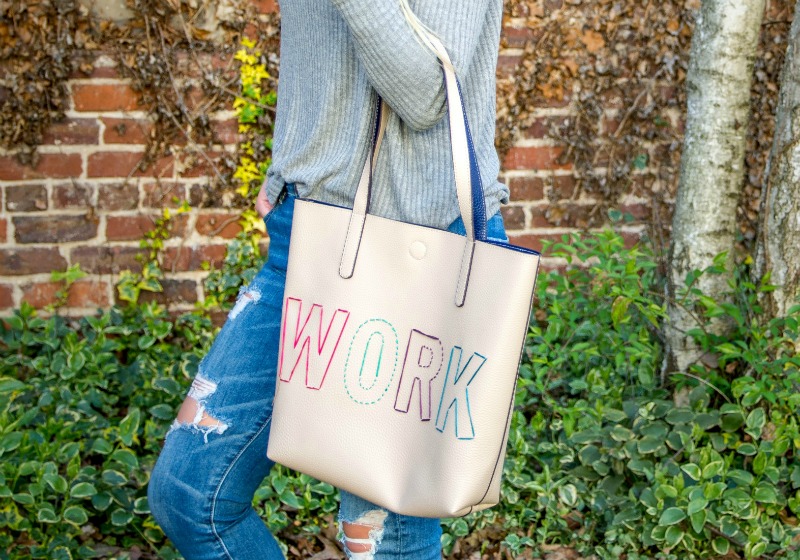
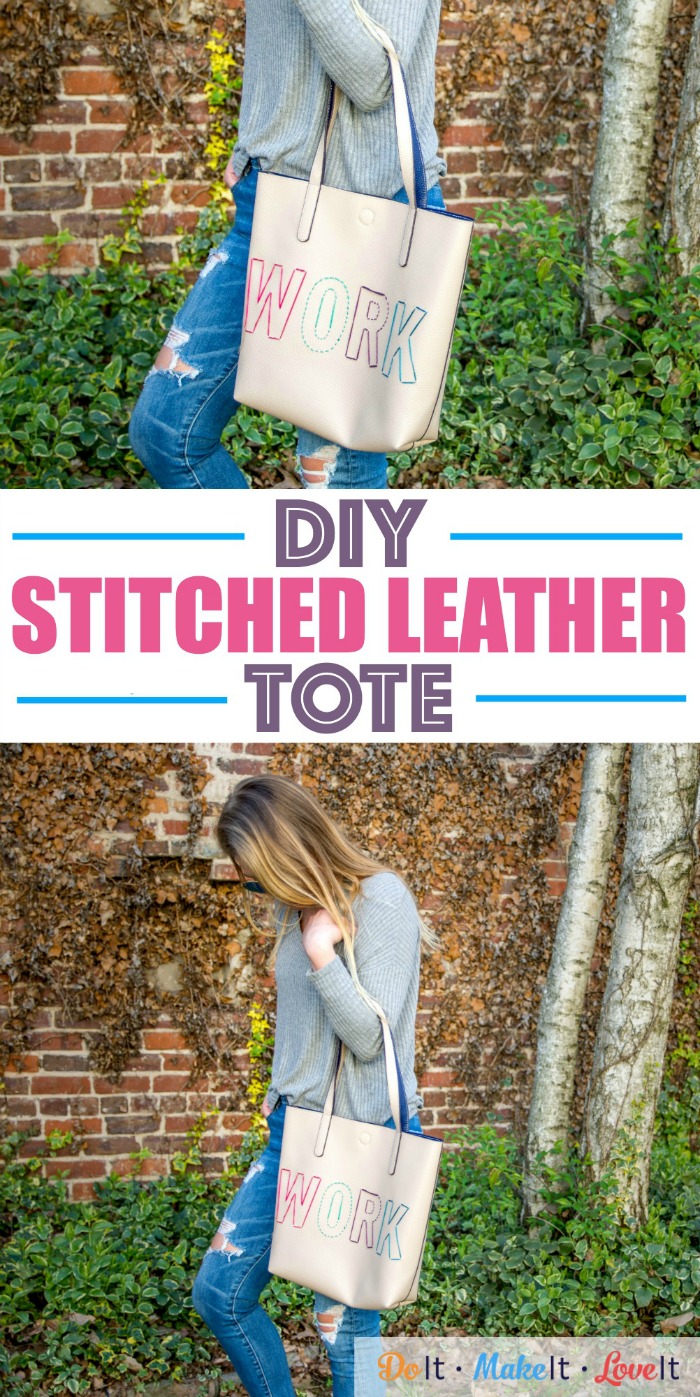
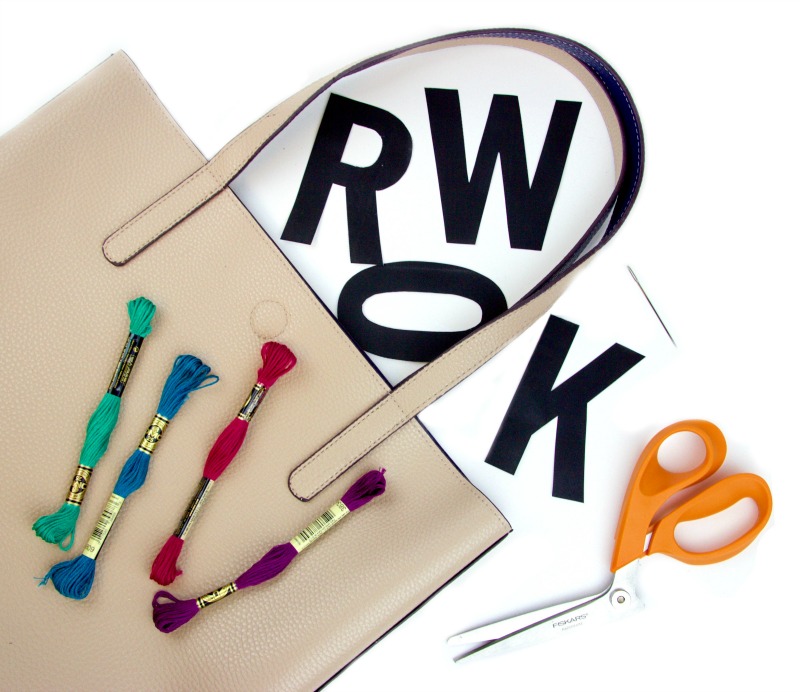
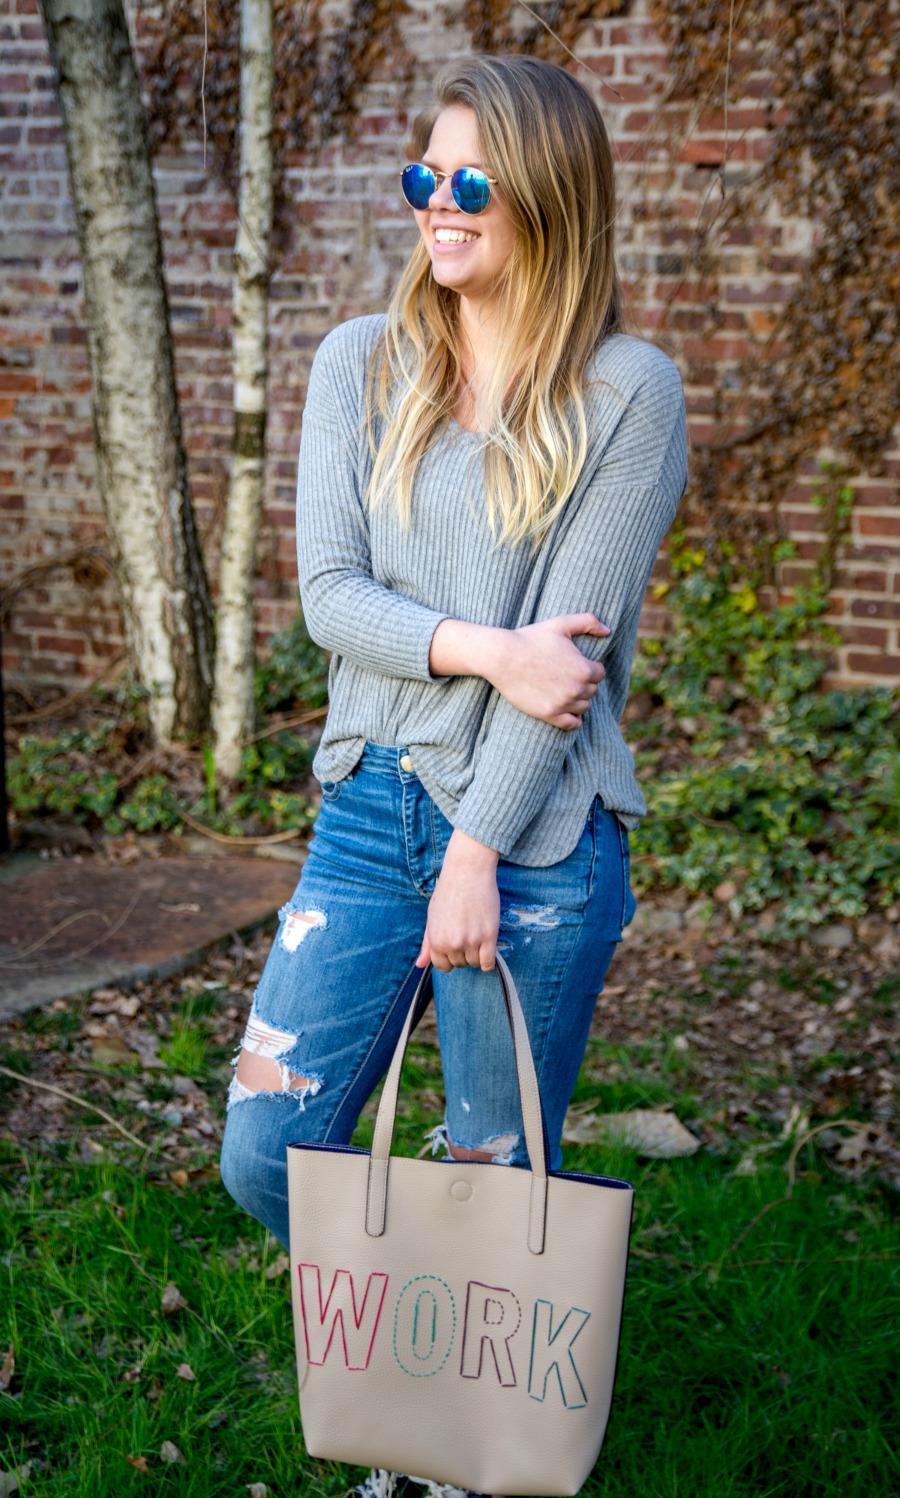
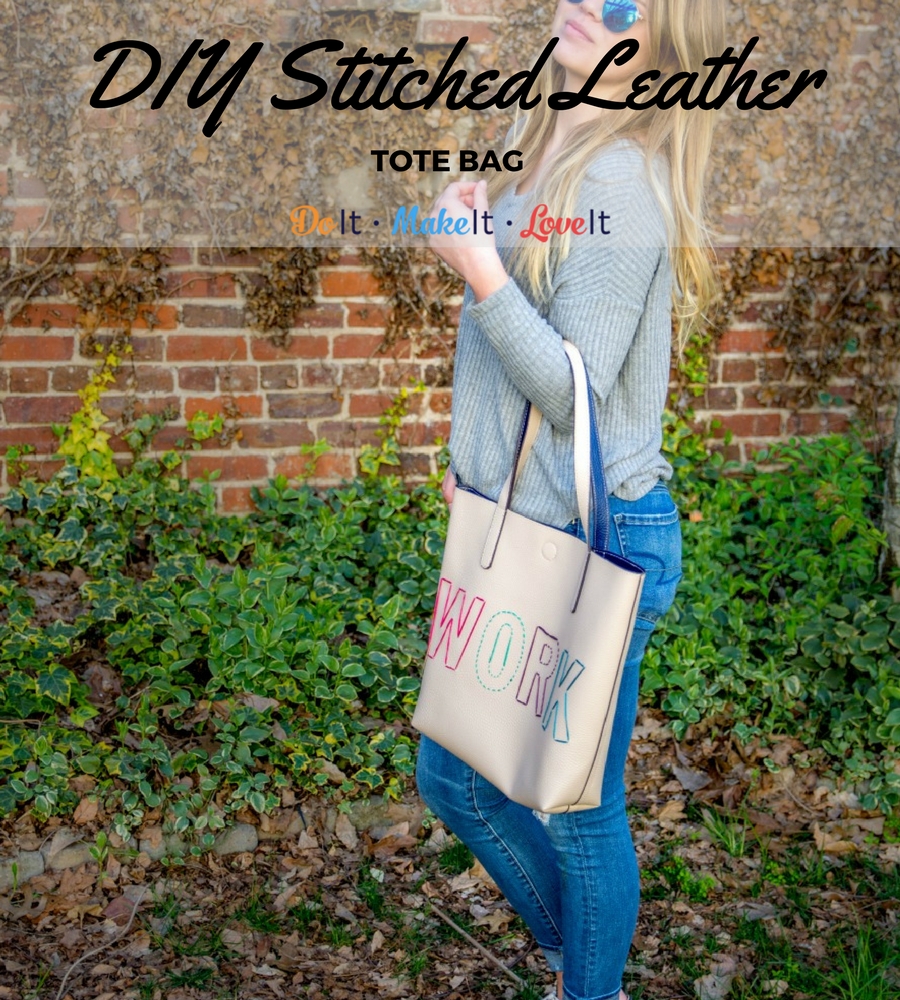
I know we all have that one tote bag collecting dust in the back of our closet that we bought thinking it would match everything and have years of use. Well, today you can give new life to that plain old tote bag with this easy fashion DIY. This project for a DIY Stitched Leather Tote Bag will save that bag and show your personality and style! With a simple template and some embroidery thread, you can customize your own perfect tote bag in minutes. Making personalized items like this one is a great way to get away with cute, crafty gifts for your friends too! Matching bags for your besties? Perfect!
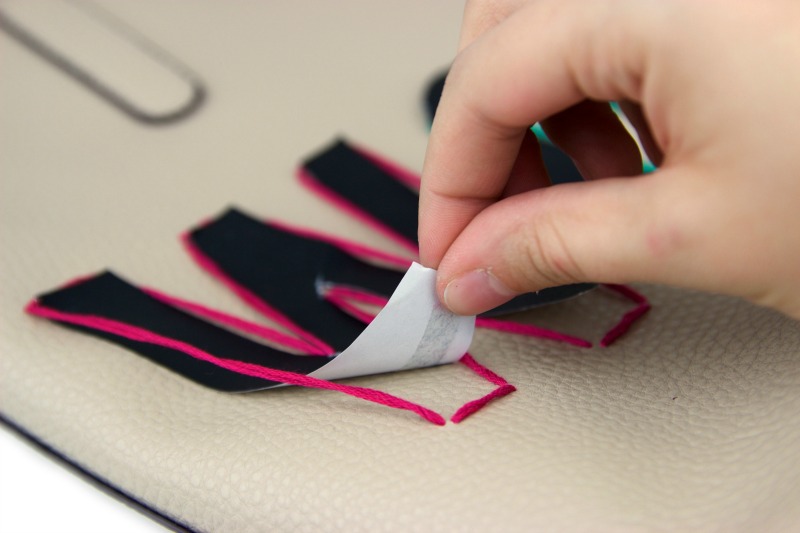
Step One: Cut out the letters from the printable and arrange them on the front side of the tote bag. You may want to use some removable adhesive to keep them attached during the stitching process.
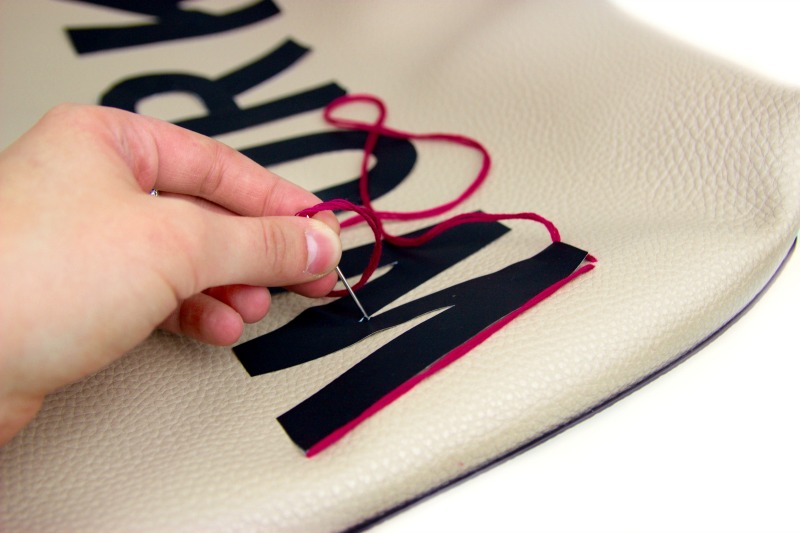
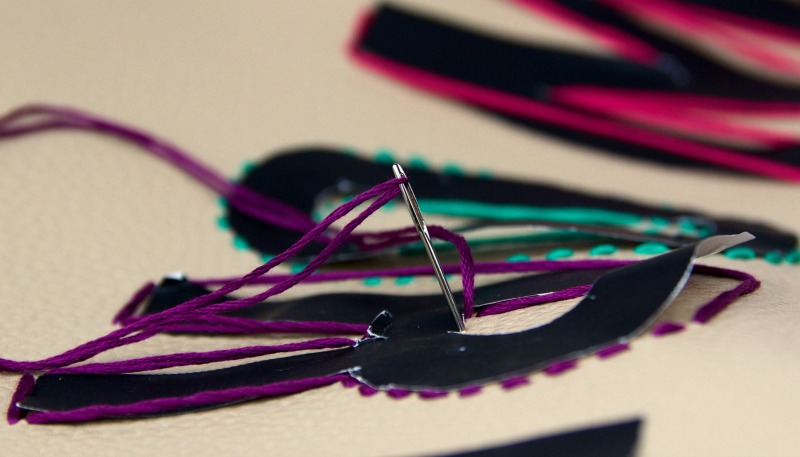
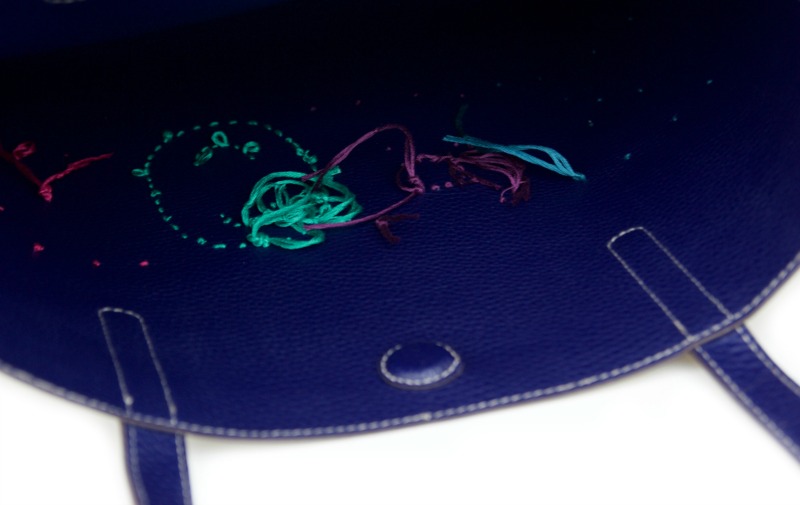
Step Two: Thread the large needle with the first color of embroidery floss. Pick a place to start on the W and do your first stitch from the inside of the bag to the outside. I chose to use the longest possible stitches that still maintained the shape of the letter. You could also do a bunch of short stitches- it is up to you! Step Three: Continue stitching around each letter using a different color embroidery floss for each one. Be sure to start and end with knots on the inside of the bag.
Step Four: Remove the paper letter cutouts to reveal your finished design. Step Five: Cut any excess embroidery floss off from inside the bag.
And you’re done! See how easy that was. We totally don’t blame you if you end up making 5 more of these ASAP. Just write out your words in a doc and print them out or find good examples online! It’s so easy.
We know you’re digging out your old bag right now. You won’t believe how much of a difference this simple embroidery DIY makes on your tired tote bag. You’re sure to get tons of compliments on your amazing DIY abilities. We hope you enjoyed this tutorial and when you finish up your first bag, share your pictures on our Facebook page!
Follow Us!
Looking for something?
Categories
Sign up for our newsletter and get a FREE Weekly Meal Planner Printable!
Your information will never be shared or sold to a 3rd party.


 We’ve included links to our favorite supplies to make it easier for you to shop! If you purchase from these links, we’ll make a little money. Check out our
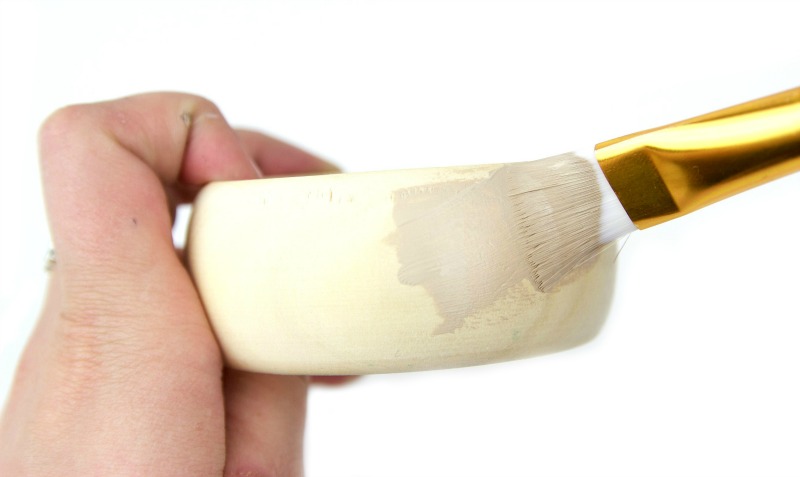

