by Angie Holden | Dec 19, 2017 | Craft Tutorials
We have another Christmas ornament to make for you today! Christmas has to be the best season of the year for crafting. There are so many cute things to make! DIY ornaments are definitely my favorite though.
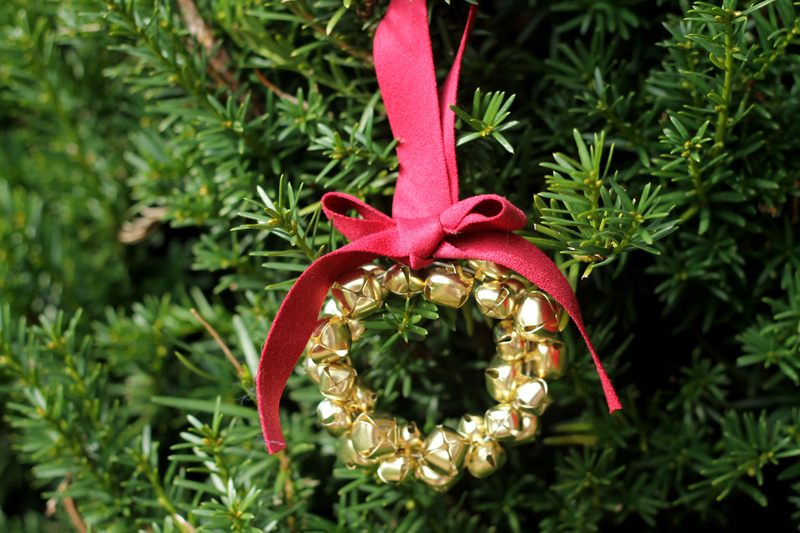
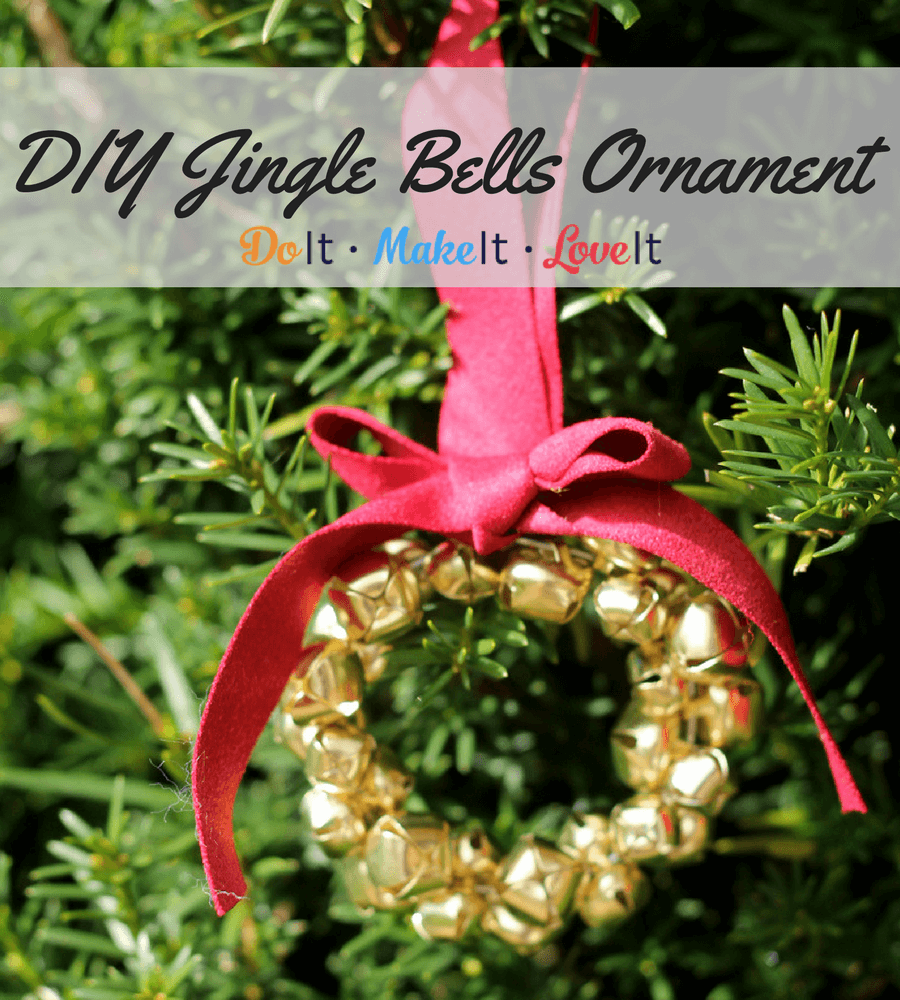
This is a DIY Christmas ornament for music-loving families or cat owners! If you’re a family that loves a little noise, make a few extra of these handmade Christmas Ornaments for the kids to use as tambourines. Can you say hours of entertainment? If you’re a cat owner, you already know this ornament will save you so much broken glass since it can be used as a warning bell for when the cat is in the tree. You’re welcome.
Of course, these ornaments can also just stay on the tree because they are a beautiful addition to any Christmas decor. Let me teach you how to make some of your own with this Christmas ornament tutorial!
Jingle Bell Wreath Christmas Ornament Tutorial

Supplies:
- Stiff wire
- Jingle bells
- Ribbon
- Glue
- Jar lid
- Scissors
- Wire cutters
Instructions
- Use a length of stiff wire and wrap it around a jar lid to form a circle. Bend a loop on both ends of the wire.
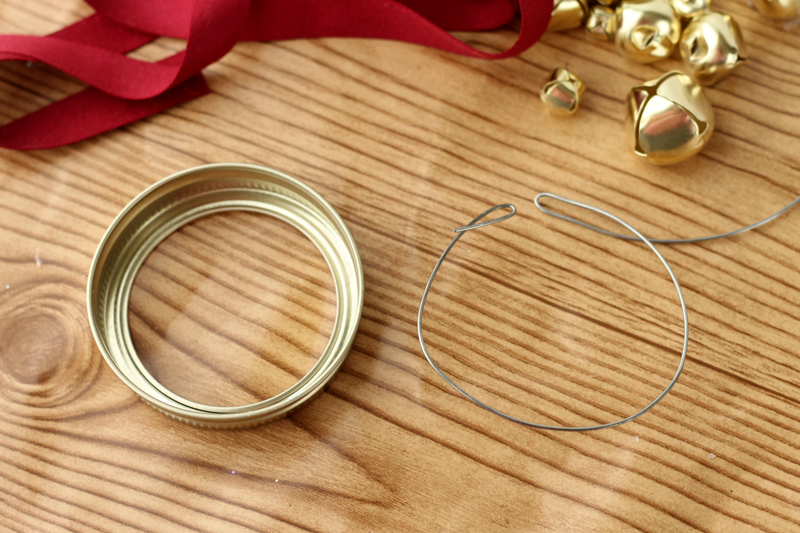
- Thread as many jingle bells as desired onto the wire as shown.

- When you are happy with the wreath, shape with your hands to get the desired shape. Tie loops on ends of the wire around one another and twist.

- Trim ends of wire if needed. Tie on a bow and piece of ribbon for hanging.
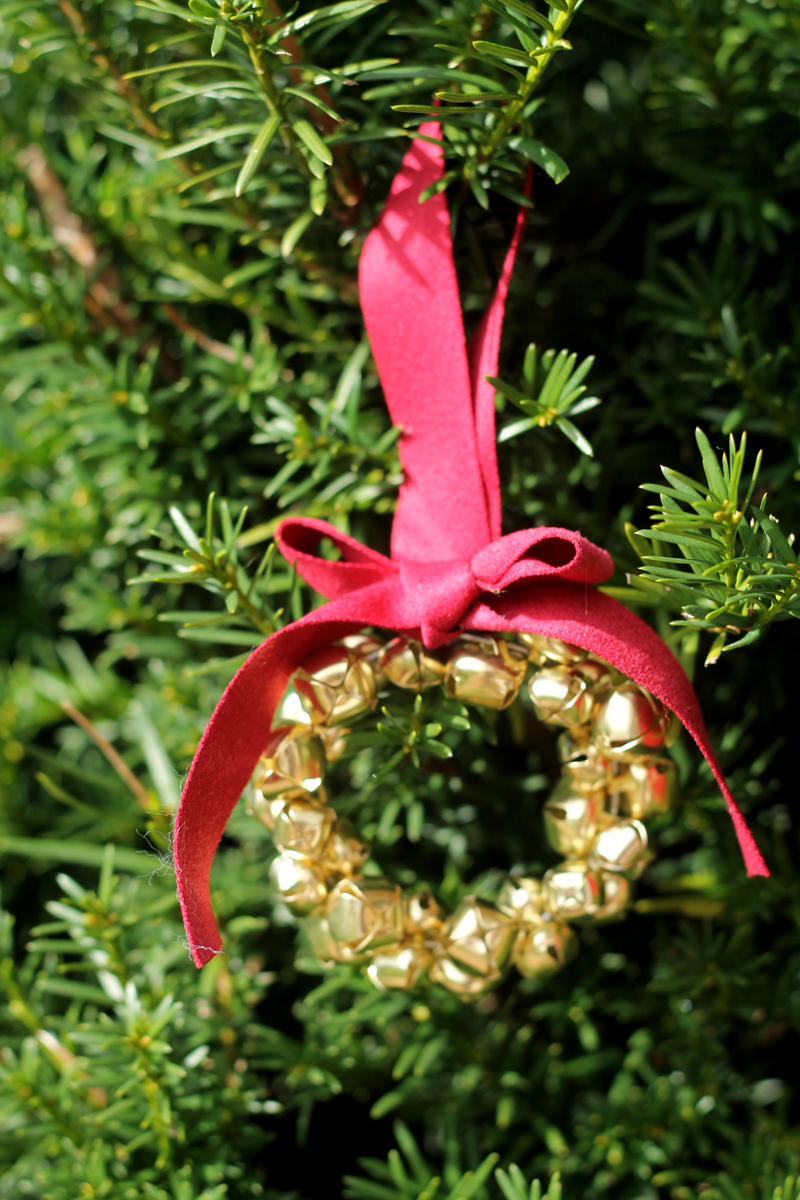
I love how the added touch of gold looks on my Christmas tree. For the jingle bell obsessed, it’s the perfect gift! I’ve also thought about making a giant version as a wreath for my door. What do you think? Too much jingling?
As always, we love to see your projects! If you made this project or another project you’d like to share with us, share a picture on our Facebook page or tag us on Instagram.

by Angie Holden | Dec 9, 2017 | Craft Tutorials
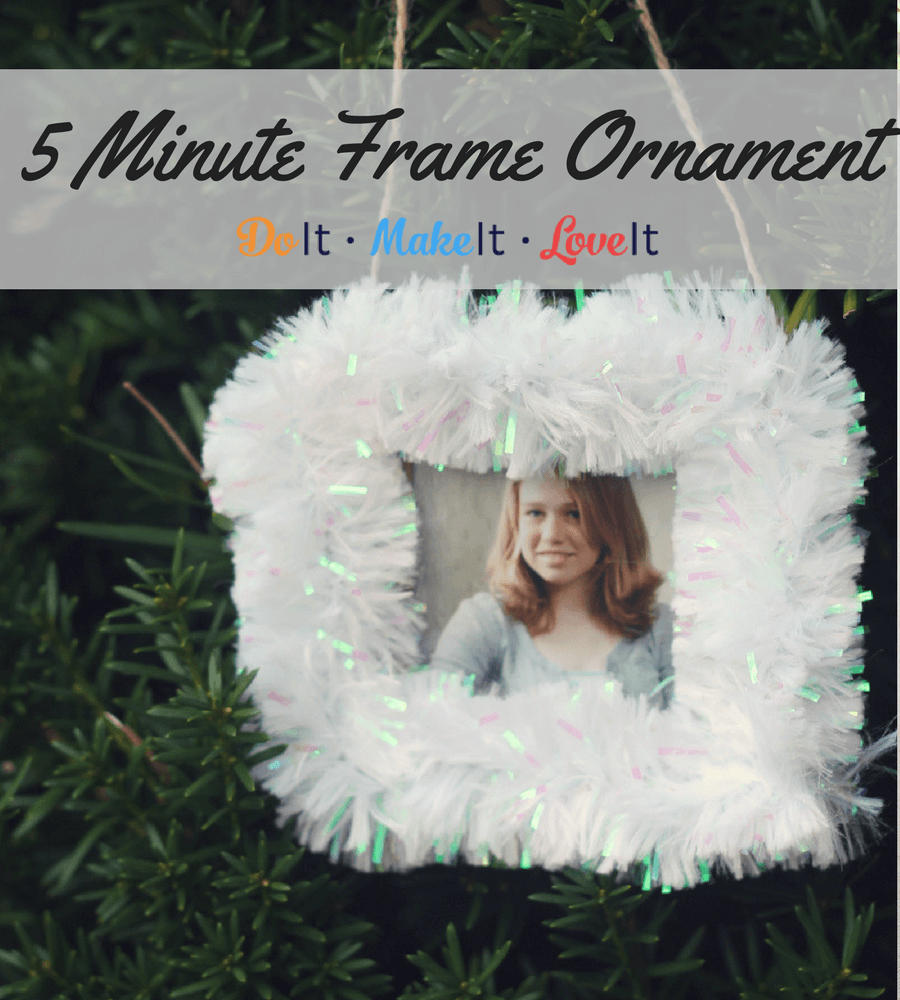
What’s better than embarrassing your nearest and dearest with old photos on the biggest family holiday of the year? Hanging those photos from the Christmas tree, that’s what! Of course, if you’re not into embarrassing family members, it’s also nice to add them to part of your holiday decor. Use this adorable DIY frame ornament to decorate your tree with faces you love!
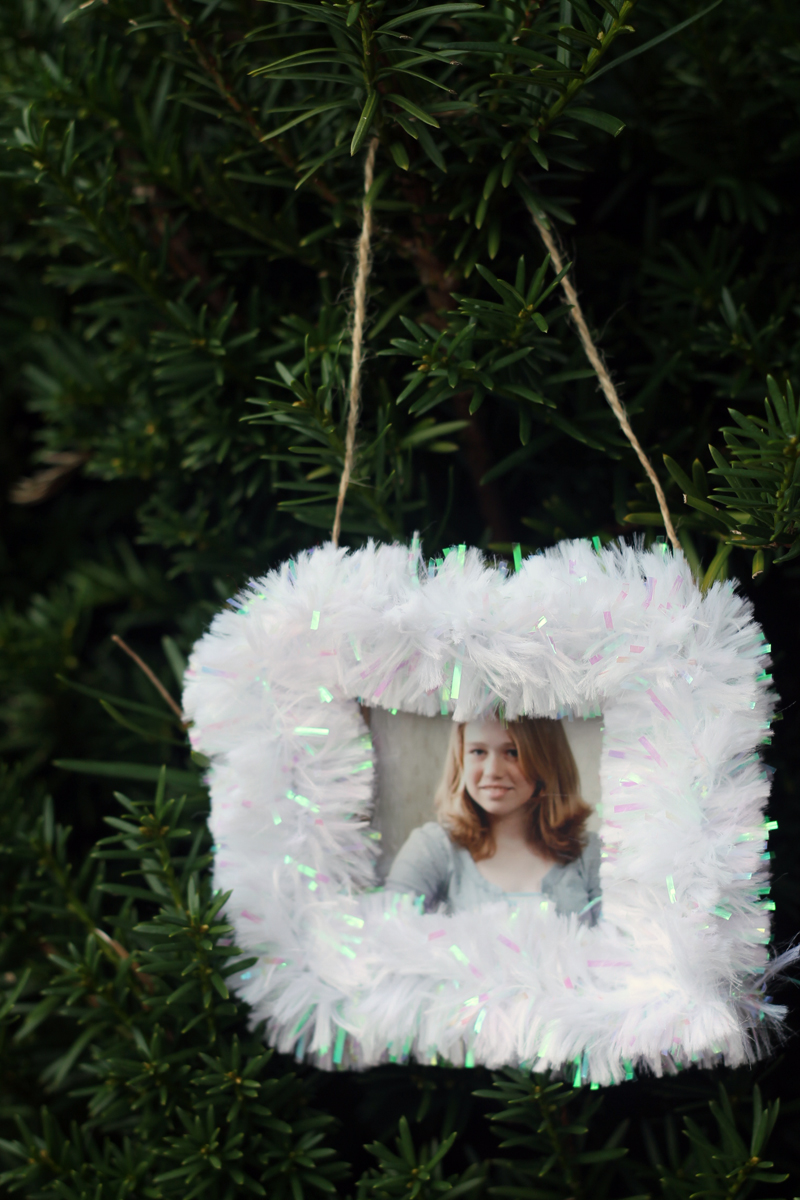
This simple and sweet handmade Christmas ornament can be made in any colors that match your tree decor because they are decorated with pipe cleaners! You can even make each frame in that person’s favorite color. We opted for the sparkly white because it felt the most like Christmas!
Is your tree already so full of ornaments that it’s going to topple over? You can also use these as creative gift tags. Writing out name tags is so expected. Just make a few of these simple pipe cleaner frames and add a photo of the recipient, tie or tape it to the package, and give your gift with a little panache. If you have a photo printer handy, making lots of these at one time is a breeze.
Simple Pipe Cleaner Frame Ornament
Supplies:
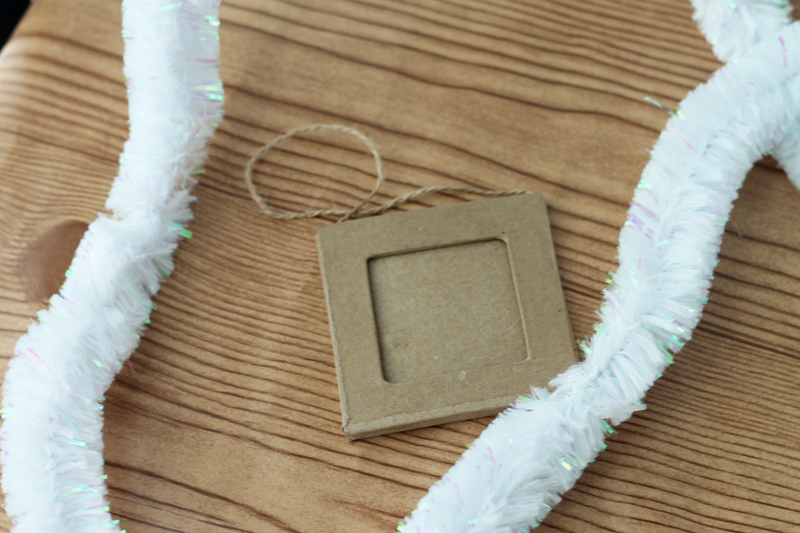
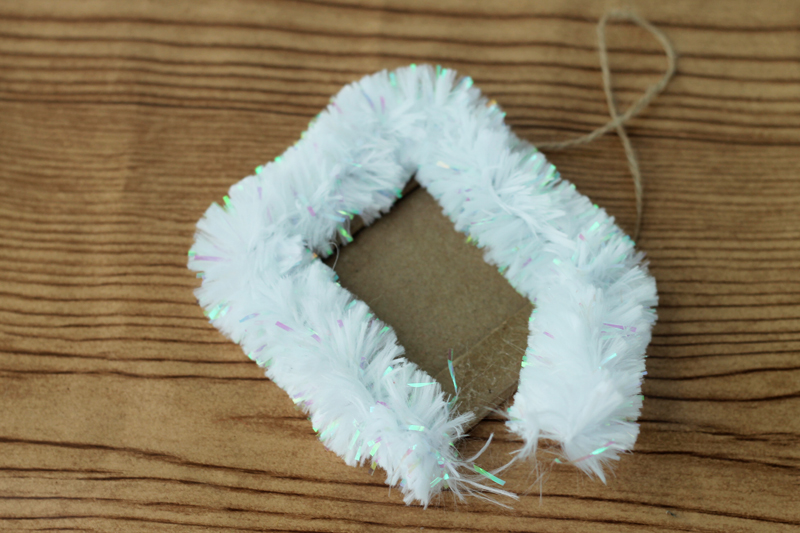
- Extra large chenille stems
- Plain frame ornament
- Glue
- Scissors
Instructions:
- Wrap the chenille around the frame bending at the corners. Trim to length with scissors.
- Glue the chenille to the frame and allow to dry. Add a picture before hanging on the tree.
Did we say it was easy or what? DIY Christmas tree ornaments that are easy like this are perfect for kids crafts too. Get the whole family involved this Christmas by making a bunch of DIY ornaments. You and the kids can even have a small tree dedicated to the ornaments you make together and that they can grow up with!
We’d love to see what you’re working on! If you made this project or another project you’d like to share with us, share a picture on our Facebook page or tag us on Instagram.
by Angie Holden | Dec 5, 2017 | Craft Tutorials
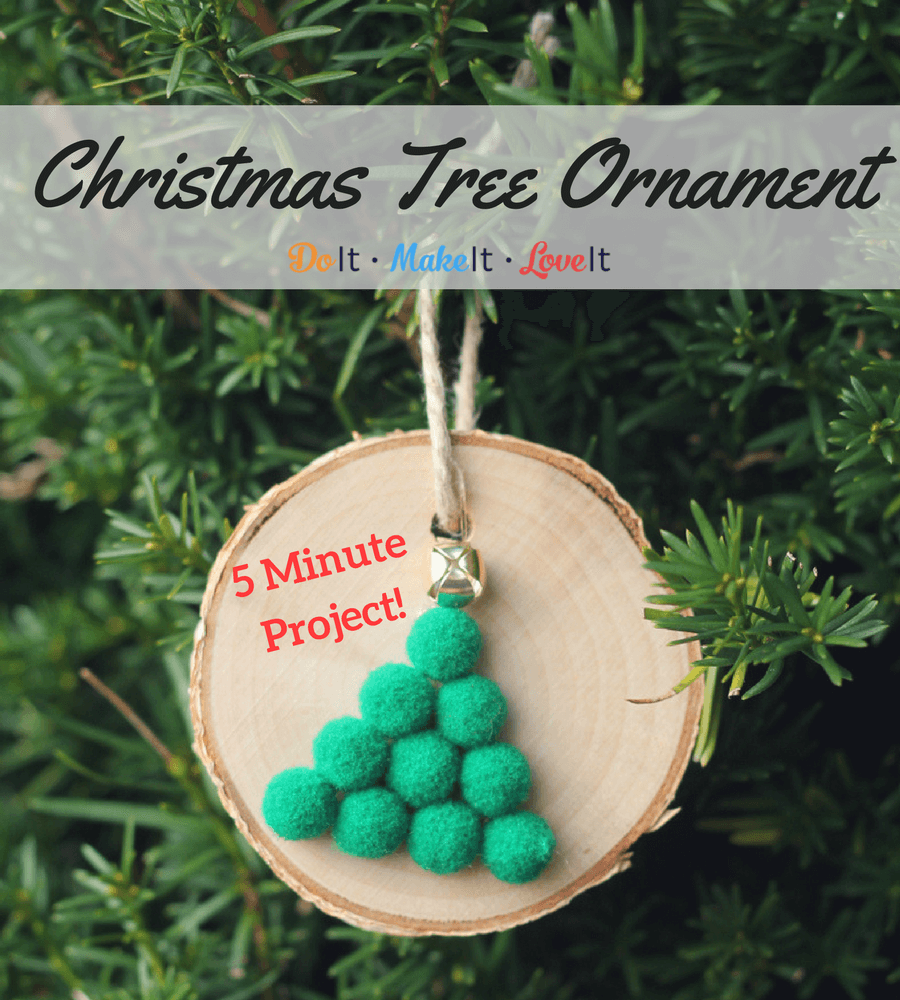
It’s a magical time of year! Doesn’t it seem like the holidays just inspire creativity? Even people who don’t craft 340 days out of the year start to feel the urge come December 1st. This DIY Christmas ornament tutorial is perfect for those who love super easy projects. This project only takes a few minutes to complete. The longest part of making these DIY Christmas ornaments is the glue drying time! You can make a whole set for yourself, to gift, or write your guests names on them and use them as table settings.
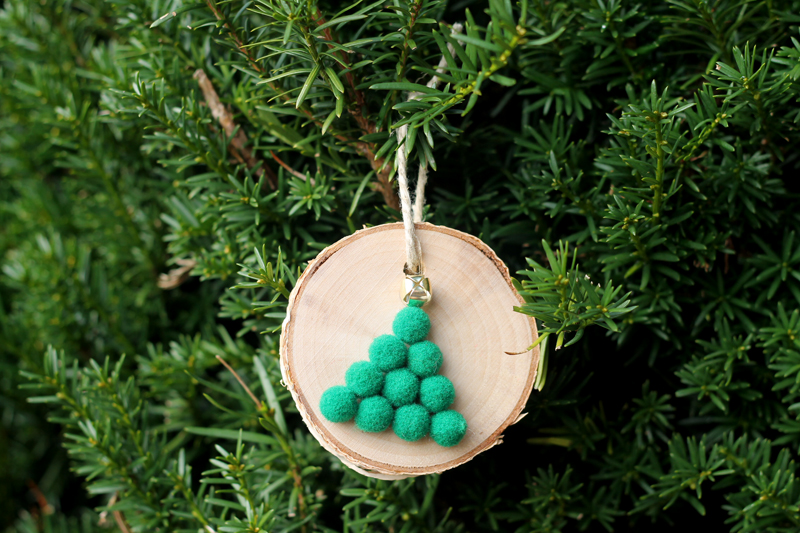
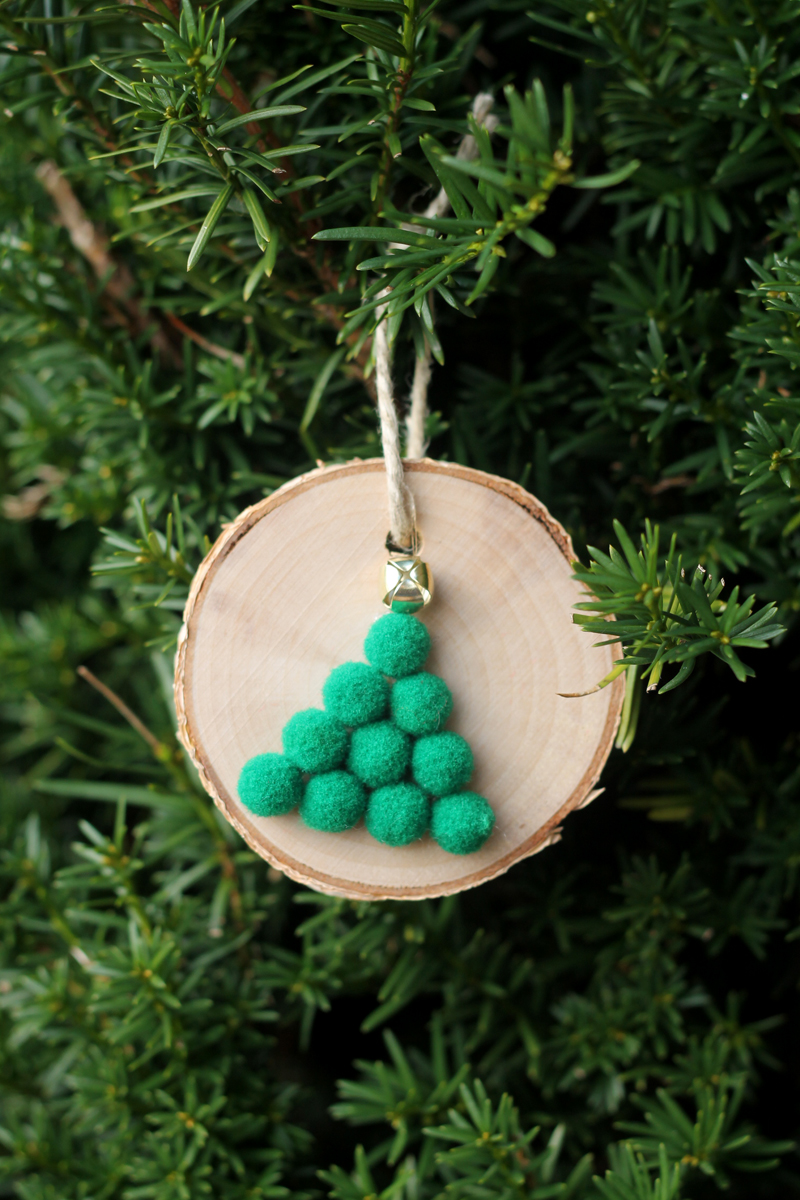 Wood slice ornaments can be found at most craft and hobby stores. They have the bark left on them for a rustic touch. They also have the twine hanger already added which makes crafts like these super simple. We seriously love these. They are so easy to customize and always look so professional when finished. They go so well with any color scheme, but if you’re looking for that white/gold nordic minimalist look that’s so popular this year, this is it!
Pick up a few of these and you can decorate your whole Christmas tree by adding your creativity to these rustic ornaments. You can even change it up by creating pom pom trees in purple or blue! Add your favorite colors to the mix for a pretty ornament set.
Wood Slice Tree Ornaments Tutorial
Supplies:
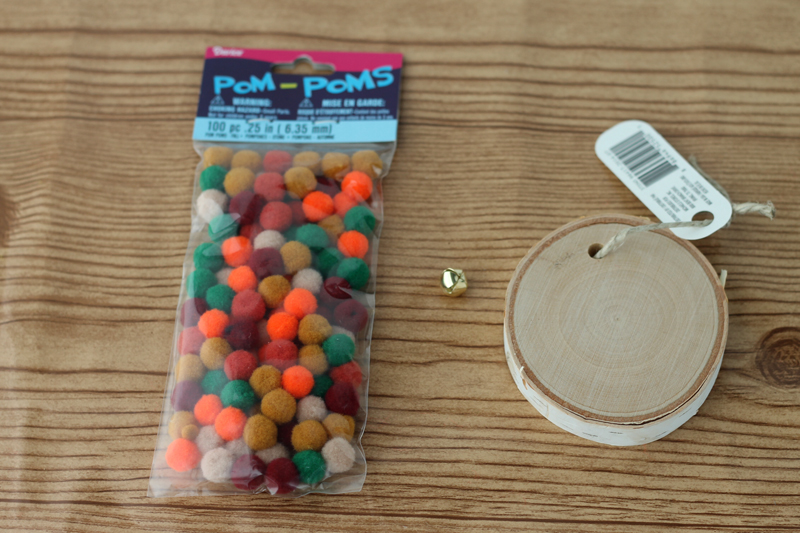
- Wood slice ornaments
- Pom poms
- Gold bells
- Glue
Instructions:
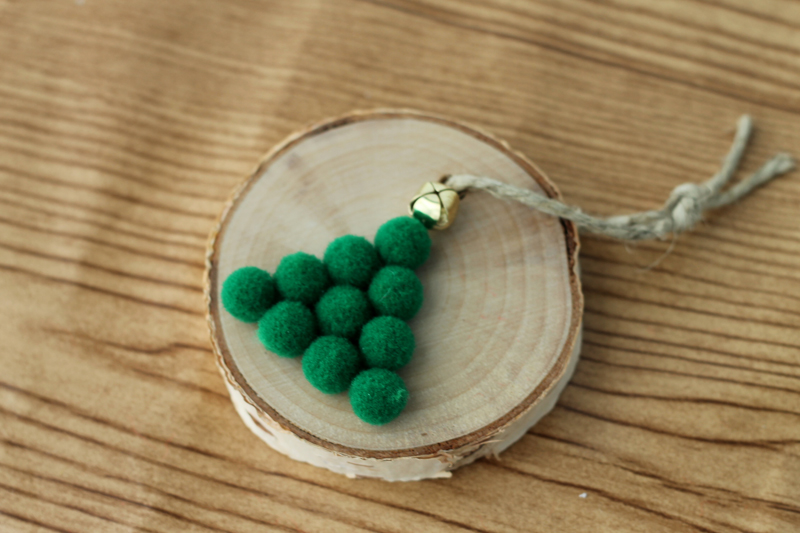
- Pick out 10 green pom poms.
- Arrange the pom poms in a tree shape on your wood slice. Move it around and center it however you like!
- Glue the pom poms in place. Let dry per glue instructions.
- Optional: use small pom poms or paint to add colorful dots to your tree branches to look like lights or ornaments.
- Glue your gold bell to the top of the tree. Let dry and add your new creation to your Christmas decor.
How easy was that? Now, these make great ornaments, but they’re also a fun kids craft idea to keep little hands busy and they also work as adorable table settings. You can write the names of your guests on them with a marker for a rustic, charming place setting. Experiment with laying the pom poms out in other shapes and with other colors as well! Christmas is about creativity, right? 😉
As always, we love to see your projects! If you made this project or another project you’d like to share with us, share a picture on our Facebook page or tag us on Instagram.
by Angie Holden | Nov 23, 2017 | Craft Tutorials
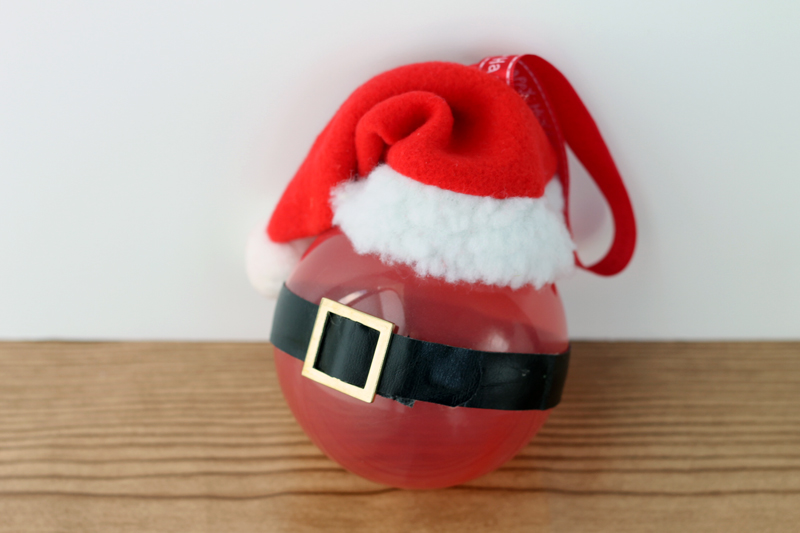
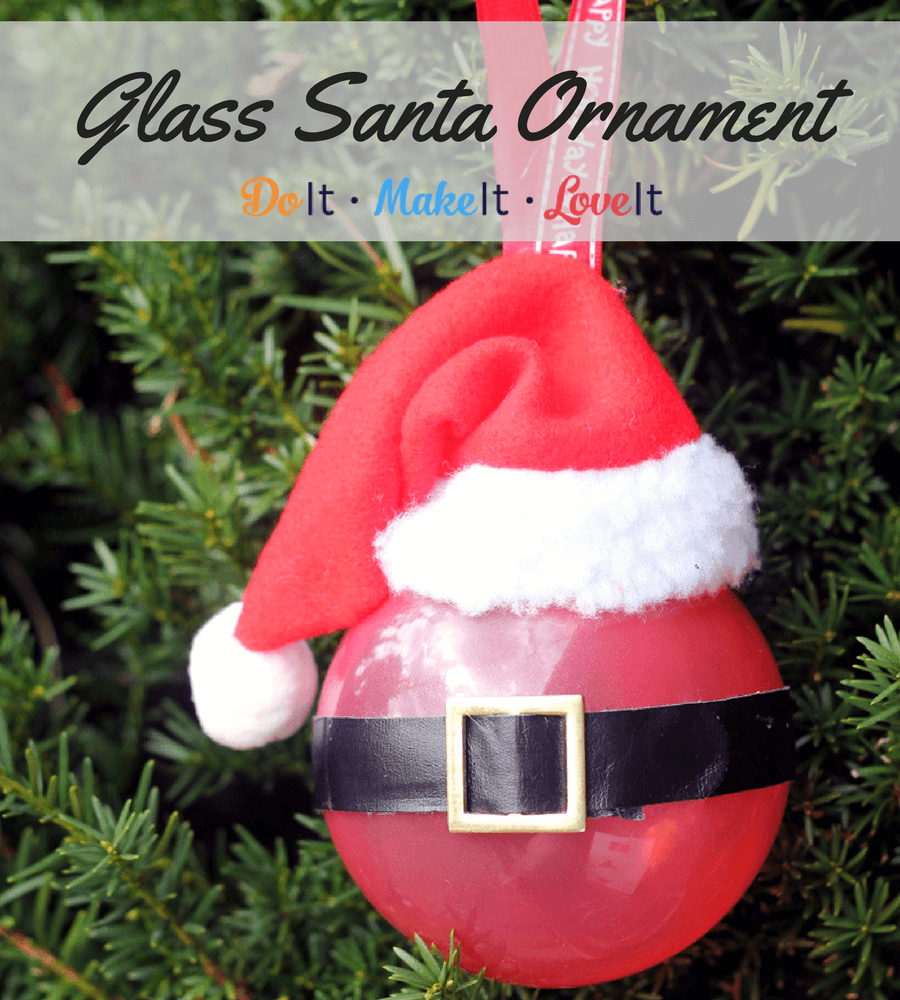
My friend’s daughter is obsessed with Santa. It’s the cutest thing. She just gets so excited about everything Santa Claus that I wanted to make her a simple ornament to remember this year. Of course, it had to be a Santa ornament! I really wanted this one to be special so I decided to go with a glass Santa ornament that can be shared year after year. Want to make your own? Learn how to make this cute glass Santa ornament below!
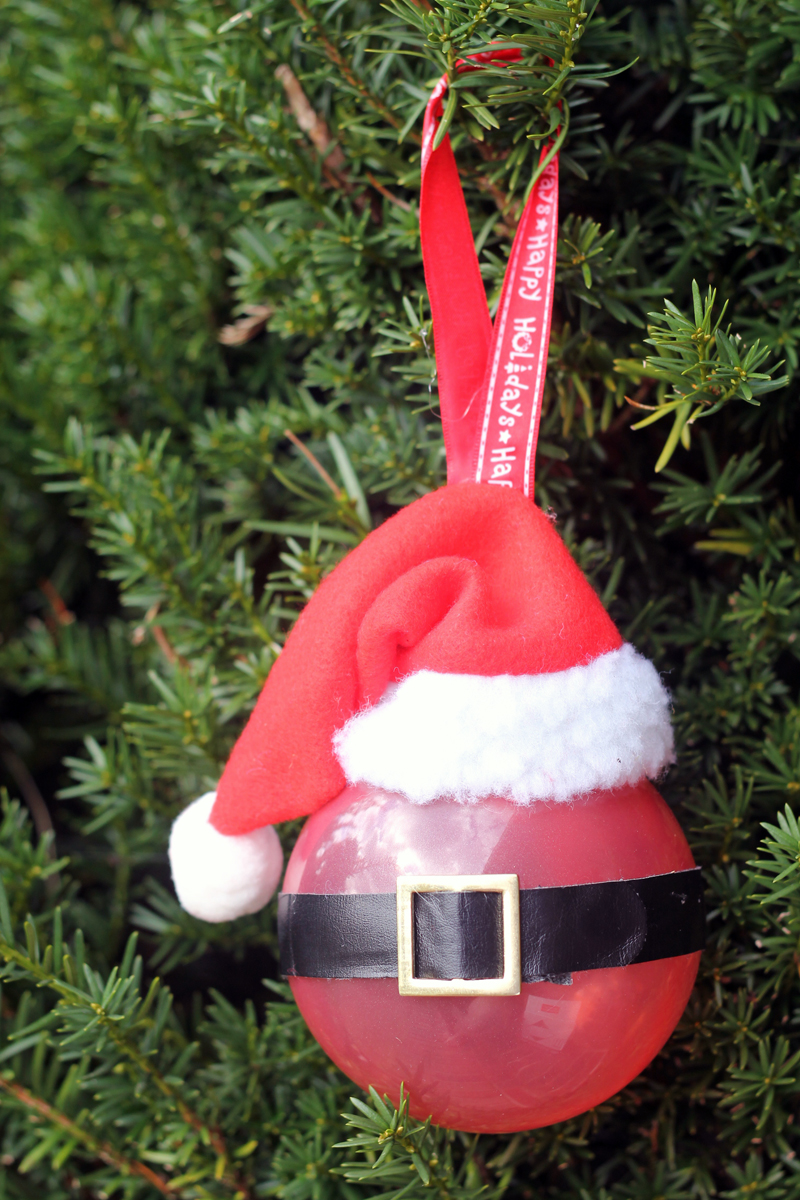
This simple Christmas ornament tutorial is handy to have around because of the glass stain technique! You can even make your own simple colored glass ornaments using this stuff. Since plain glass ornaments are so easy to find nowadays, it’s easy to create your own color scheme with the glass stain. Here I used it for Santa’s belly!
How to Make a Glass Santa Ornament

Supplies:
- glass ornament
- glass stain
- ribbon
- glue
- mini Santa hat
- mini belt
Instructions:
- Pour glass stain into the ornament and swirl around to cover the entire inside. Glass stain will make your ornament slightly translucent. Paint can also be used. Add enough to the inside of the ornament to get complete coverage.
- Turn upside down to dry and support. This way all of the excesses will run out and the ornament will dry faster.
- Carefully replace ornament top
- Glue on hat and belt
- Add ribbon to hang on the tree
My friend loved the Santa ornament for her little girl. This year she had her write down her hopes and wishes for next year and put them inside the ornament on little strips of paper so Santa can sprinkle some magic on her dreams when he stops by to drop off gifts. Cute idea!
We love to see what you made! Share pictures with us on our Facebook page or let us know on Instagram.
by Angie Holden | Nov 20, 2017 | Craft Tutorials
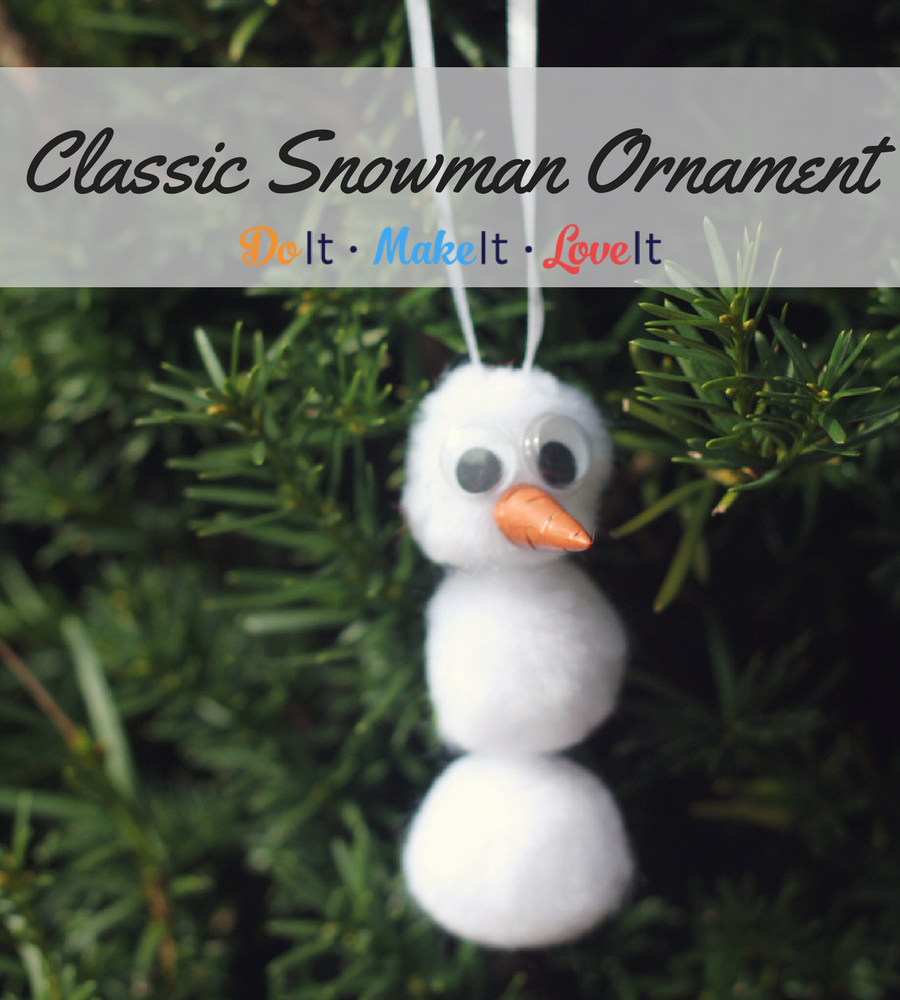
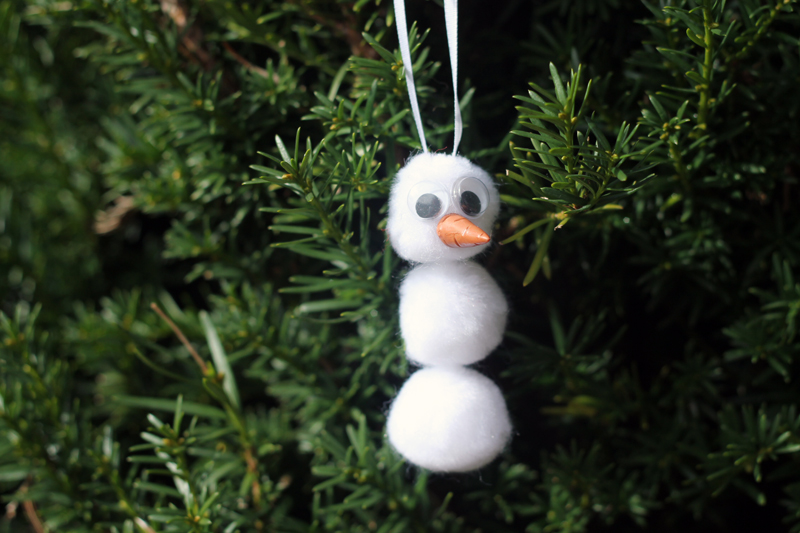
My mom was one of those moms that kept everything I ever made for her. So I fondly remember this little pom pom ornament hanging on the tree for years, long after I had even remembered I made it. She always knew I was destined to be a crafter 😉
This year, I just had to remake my little pom pom snowman to keep the tradition going. It’s such a fun and easy tradition to start with your kids, that I couldn’t pass it up. Making these DIY snowman ornaments is so simple and mostly mess-free, which makes it a great activity to do with the kids while waiting for cookies to finish baking!
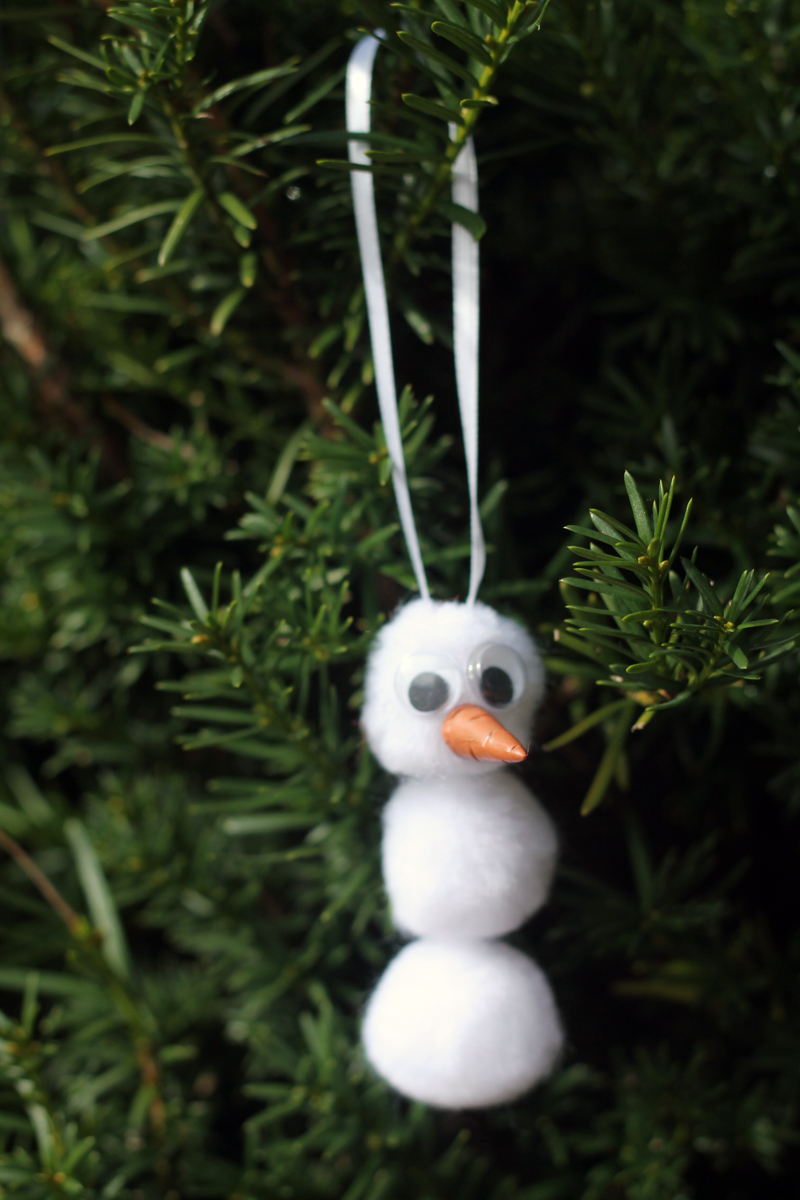
This DIY Christmas ornament is just too cute to pass up. Come on, google eyes?! The kids went crazy for it. Best thing is the supply list is short and cheap. If you can’t find a miniature nose try snipping off a small piece of orange chenille stem and gluing it in place. Works just as well!
DIY Snowman Christmas Ornament
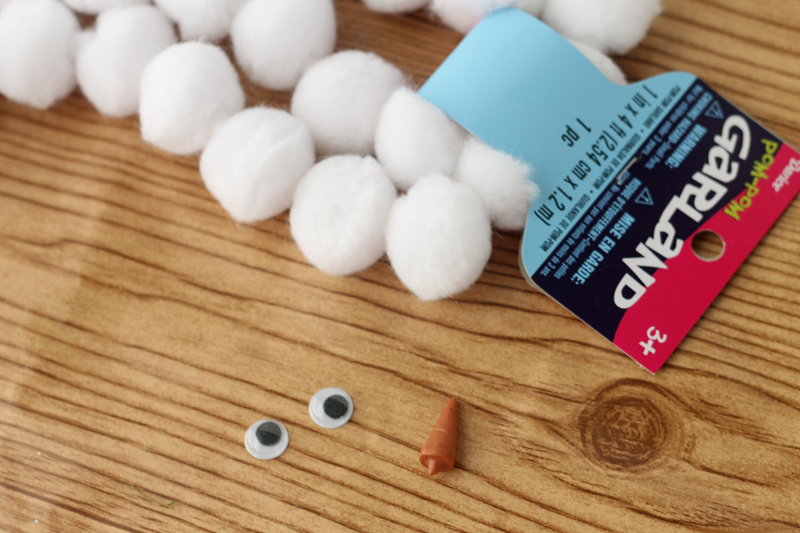
Supplies:
- Pom pom garland
- Ribbon
- Google eyes
- Miniature nose or orange pipe cleaner
- Glue
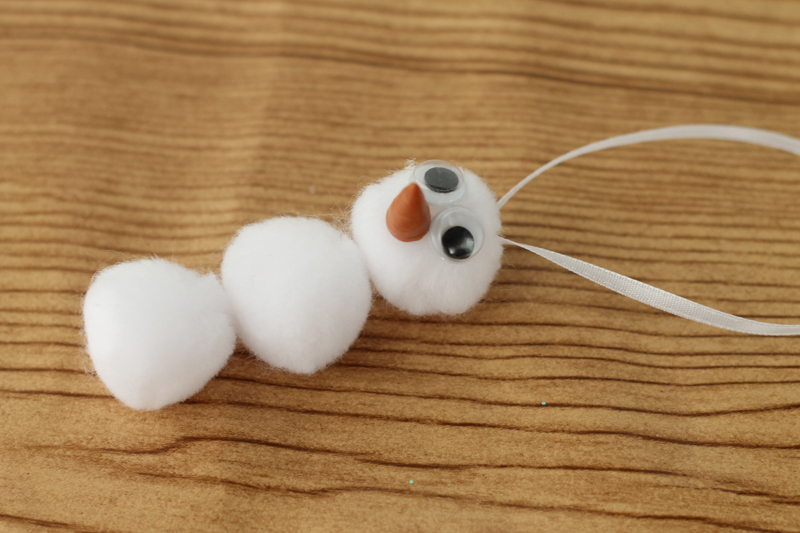
Instructions:
- Cut off a strand of three pom poms.
- Glue on eyes and a miniature nose.
- Add a ribbon to the top to hang.
Simple, right? It’s so simple, in fact, that I think we accidentally ended up making about 40 of them. Whoops. That’s what happens when you buy “extra” craft supplies. So I guarantee your kids will have a blast making these too. If you end making way too many, like I did, try adding them as an added piece of decor to your gifts or turning them into magnets! Just glue one magnet to the back of each pom pom and viola! Now you have every inch of your home decorated for Christmas. Does it get any better?
Do you have any other creative ideas for too many snowmen? Share them with us on our Facebook page or let us know on Instagram.