by Angie Holden | Nov 7, 2017 | Craft Tutorials
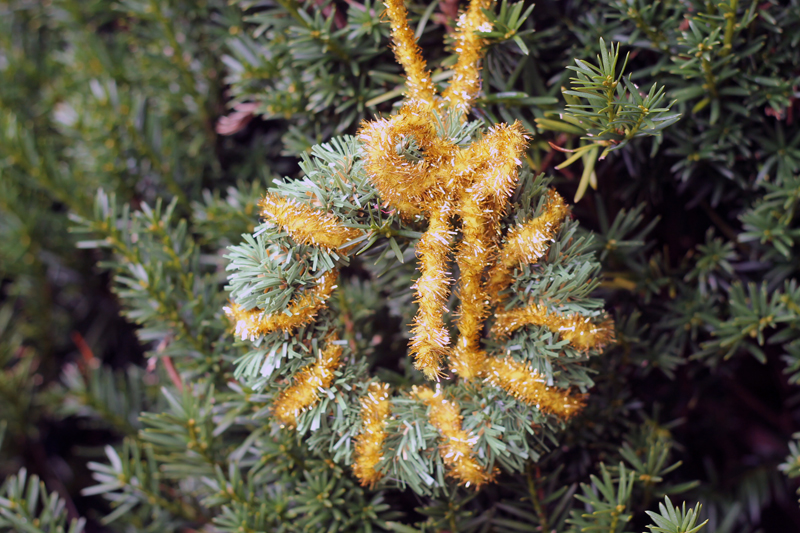
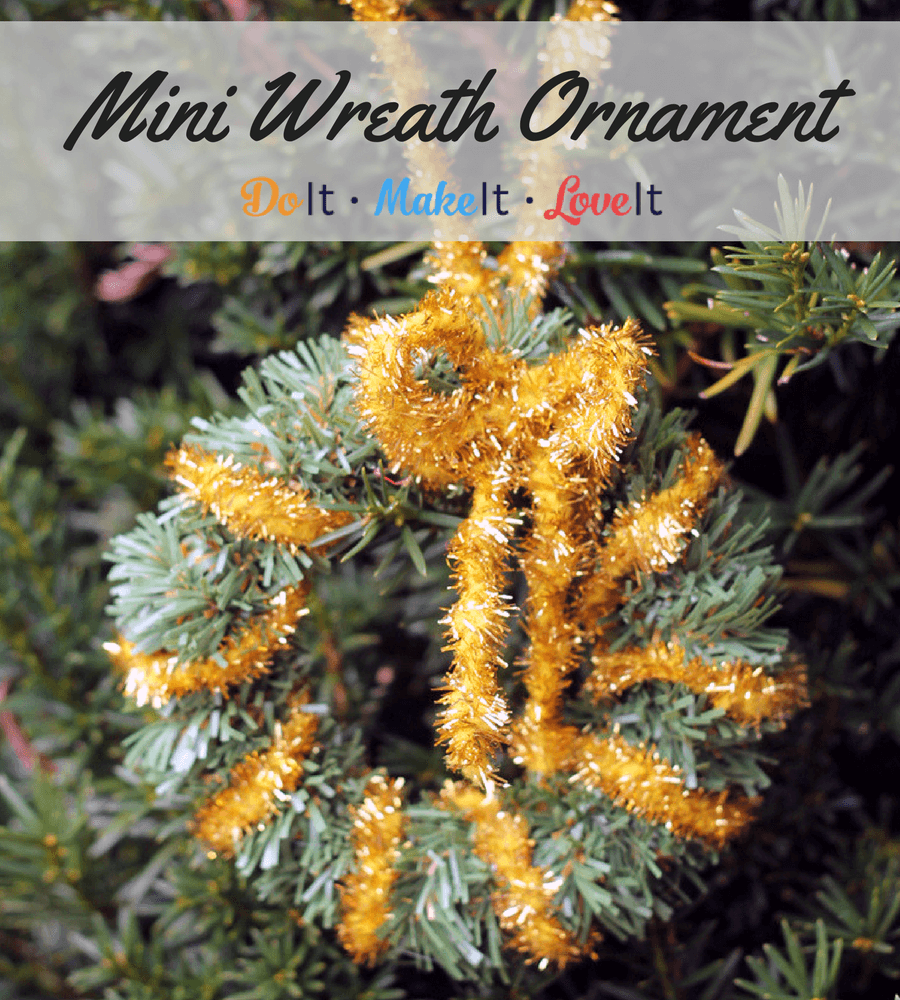
I just love wreaths. They are so pretty and fun to make, I have one for every season and definitely a few options for Christmas. When I found this evergreen chenille in the craft store, I could not pass up the chance to make mini wreaths! How cute right? This mini wreath Christmas ornament is an easy way to show off your love of wreaths and add a little shimmer to your green. Bonus if you have a white or colorful Christmas tree. add a little touch of classic charm to your modern tree with these mini wreaths!
This DIY Christmas ornament is another great kids craft idea! It’s so simple to make, you better set a limit or you’ll end up with 400 mini wreaths. Unless that’s what you want, then go for it! Making ornaments and other holiday crafts is a great way to create lasting memories without breaking the bank. Plus you get great ornaments to hang on the tree. A few minutes of crafting time and maybe a cup of hot cocoa are all you need for a family afternoon that will be long remembered.
Mini Wreath Christmas Ornament Tutorial

Supplies:
- Evergreen chenille
- Gold chenille
Instructions:
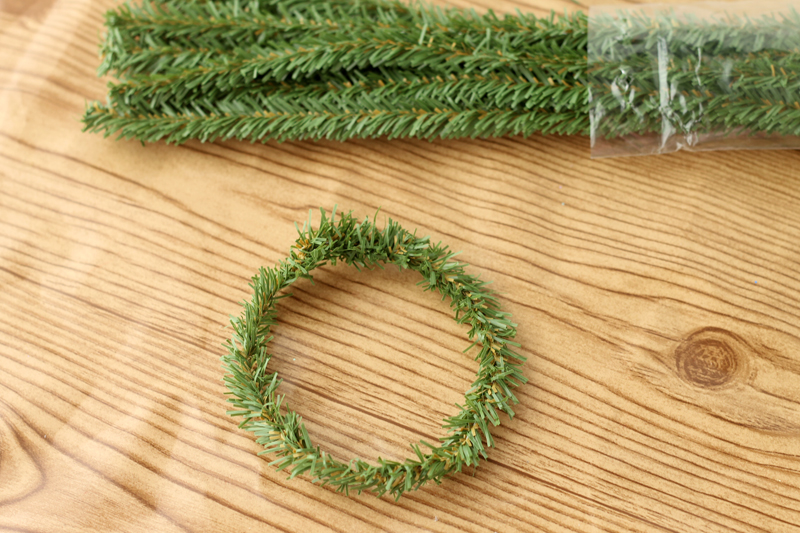
- Start with one evergreen chenille stem and form it into a circle as shown. Just wrap the ends around each other to secure.
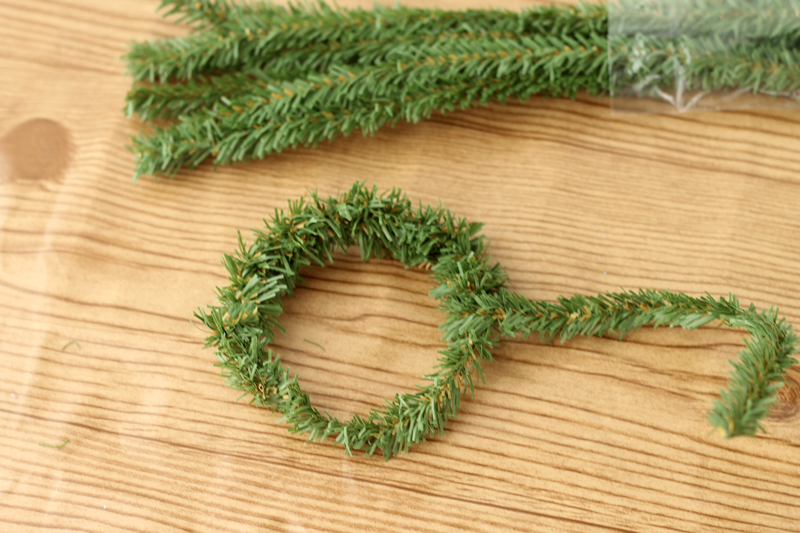
- Take additional evergreen stems and wrap them around the first tightly. To get a fuller wreath, I went around my wreath twice.
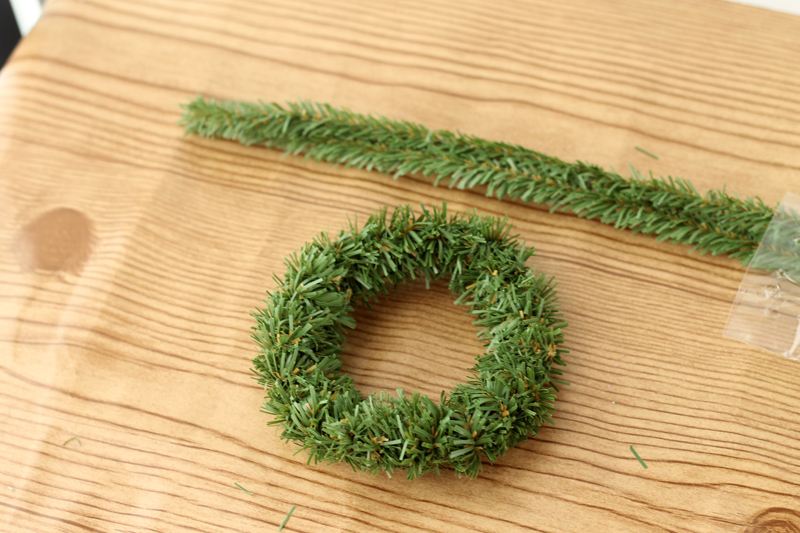
- No glue is needed for these steps just wrap to secure. One package of the evergreen stems is more than enough for one wreath ornament.
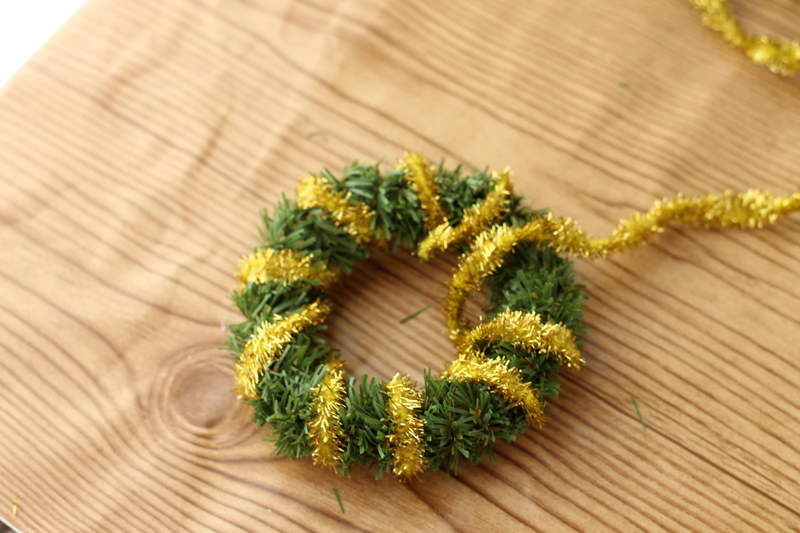
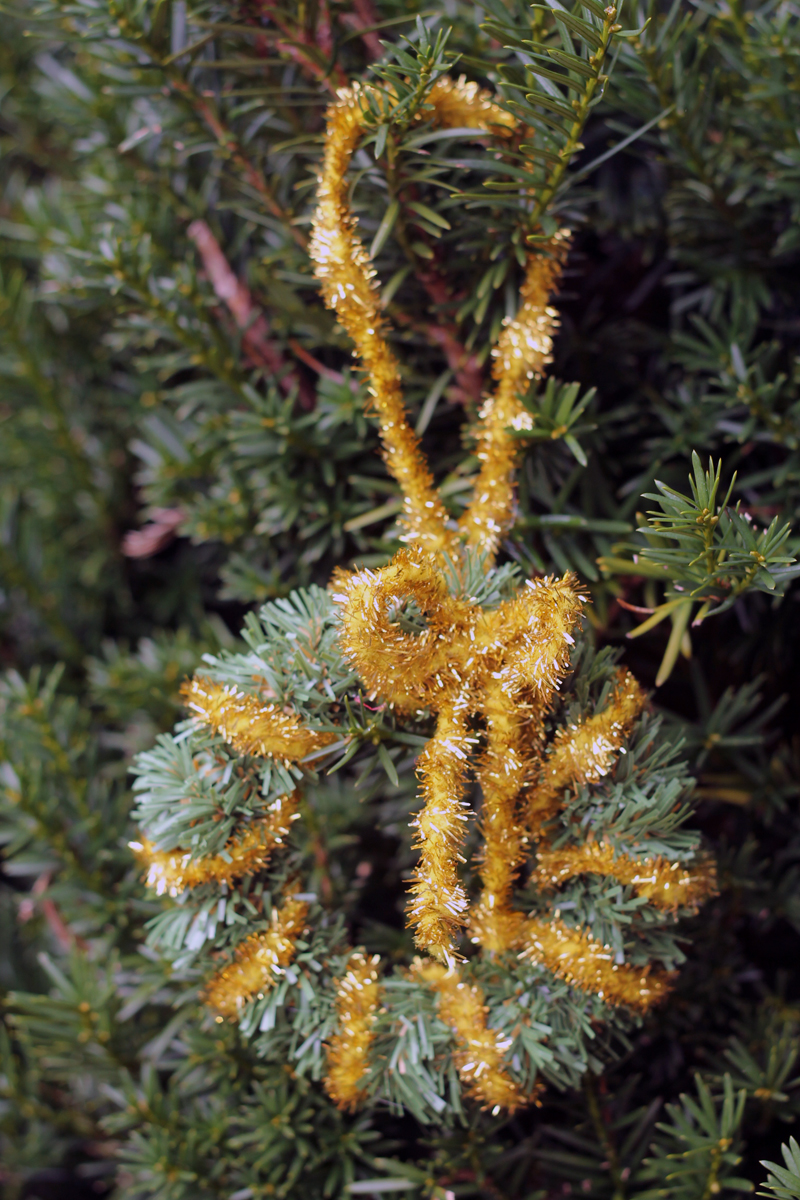
- Wrap the gold chenille around the wreath. This will have to be secured with glue.
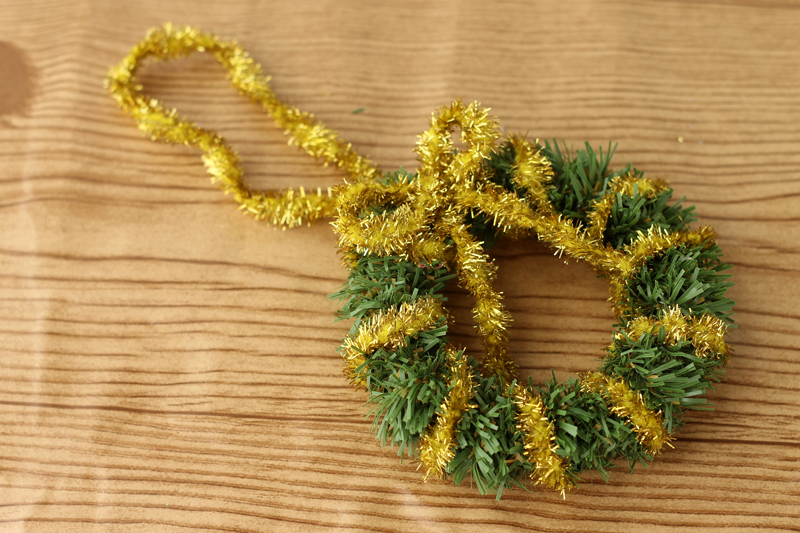
- Add a bow and a loop to hang. Secure these with glue as well.Glue
Make too many? Since these are so light they make a cute addition to your gift wrapping too! You could even tape one to the box and write the person’s name inside the wreath. So many cute ideas!
by Angie Holden | Nov 3, 2017 | Craft Tutorials
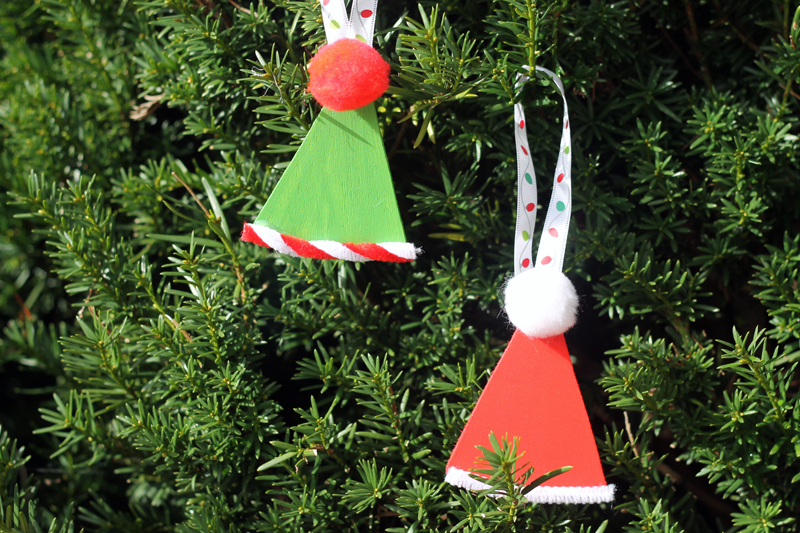
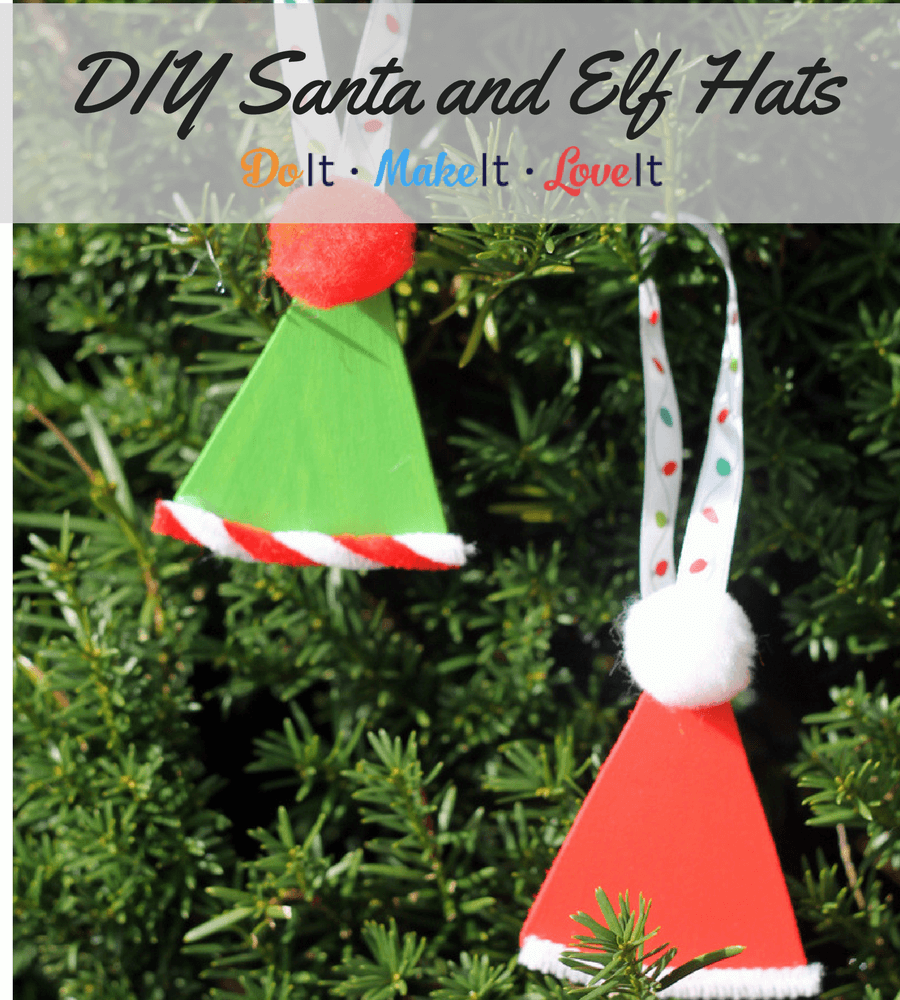
You can find some great stuff digging through the sale section at your craft store, especially after a holiday! These cute Santa hat Christmas ornaments were actually made from candy corn wood slices! With a little creativity, they’re cute elf and Santa hats for your tree. This is why it always pays to shop the bargain bin. These Santa hat ornaments are so easy to make and they’re lightweight so you can even use them as gift tags.
You will want to stock up on these wood candy cane shapes when you find them because this ornament is a whole lot of fun to make and you’ll want to make TONS of them. Since they are so simple to make and relatively mess-free, they’re great for kids too! I love having easy craft projects handy around the holidays. When the kids are out of school but it’s too cold to play outside and you have a mile long to-do list, simple craft projects are my lifesaver! This Christmas ornament craft is a good one because they can make as many as they want and in all kinds of styles and you can hang them up on a pretty piece of yarn as garland.
DIY Santa Hat Ornaments
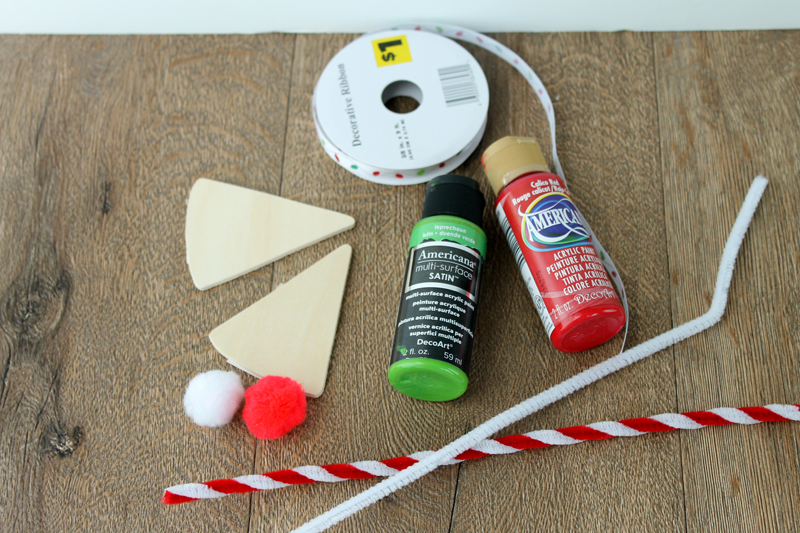
Supplies:
- wood candy corn shapes
- pom poms
- pipe cleaners
- paint
- ribbon
- glue
Instructions:
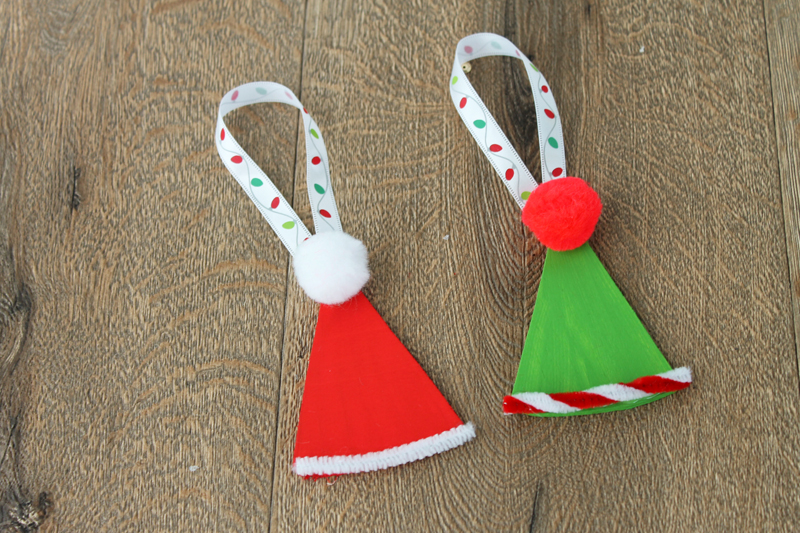
- Paint the candy corn first with the color of your choice. Allow to dry.
- Glue on pom poms, pipe cleaners, and ribbon as shown to complete the hat ornament of your choice.
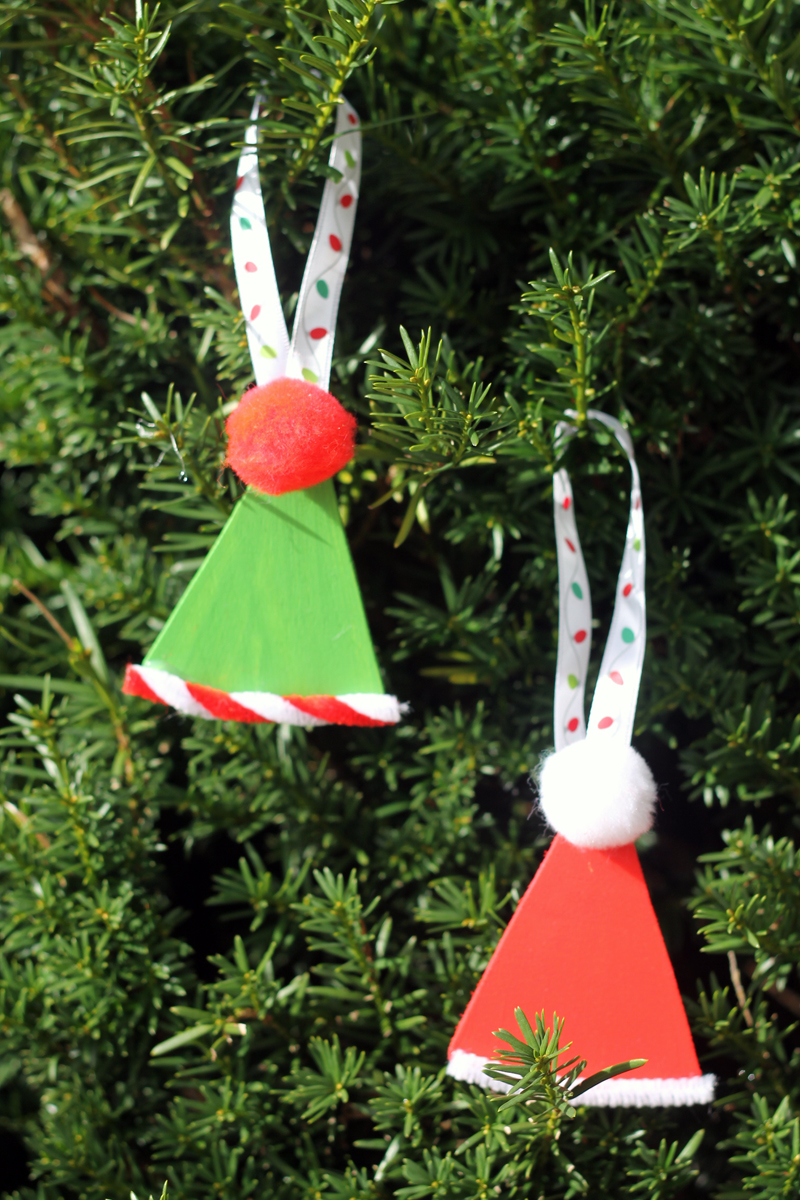
Wood candy corn shapes work perfectly for these ornaments because of the rounded edges. Change up the pom pom and pipe cleaner fringe for any Christmas character you can imagine. This same idea can be used for Christmas trees so be sure to stock up on the shapes when purchasing!
What kind of hats did you make? Share them with us on our Facebook page or let us know on Instagram.
by Angie Holden | Jun 23, 2017 | Craft Tutorials
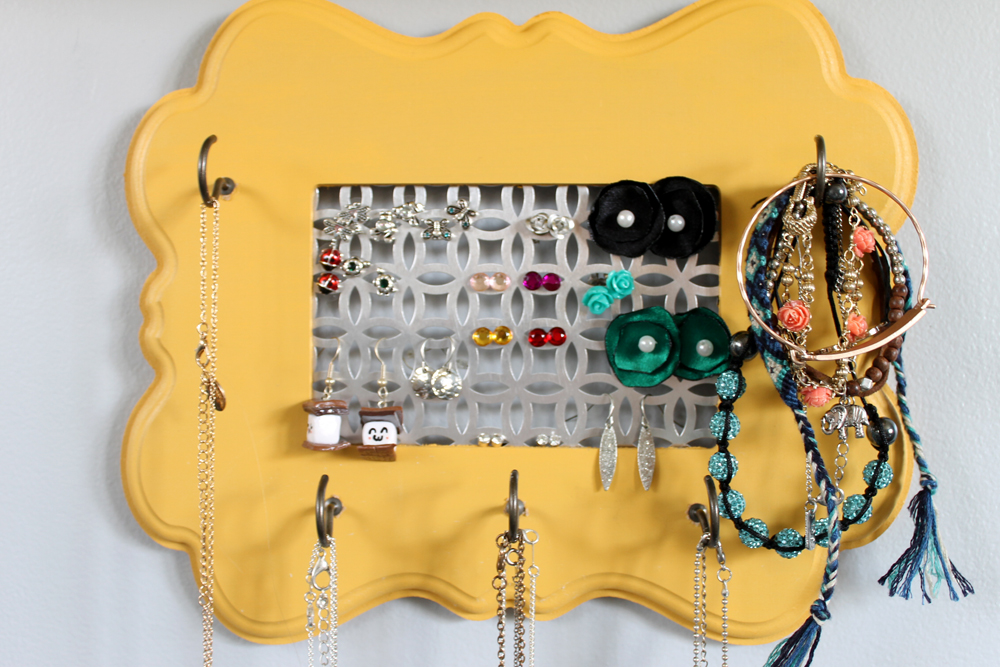
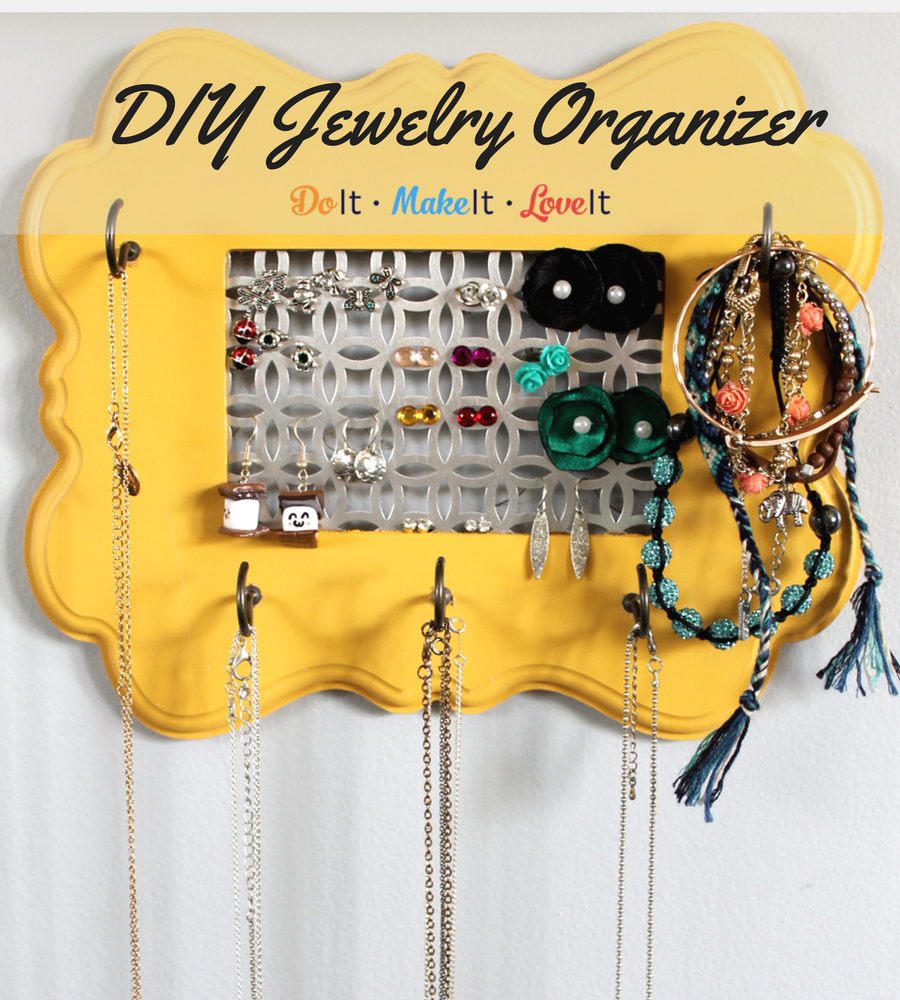
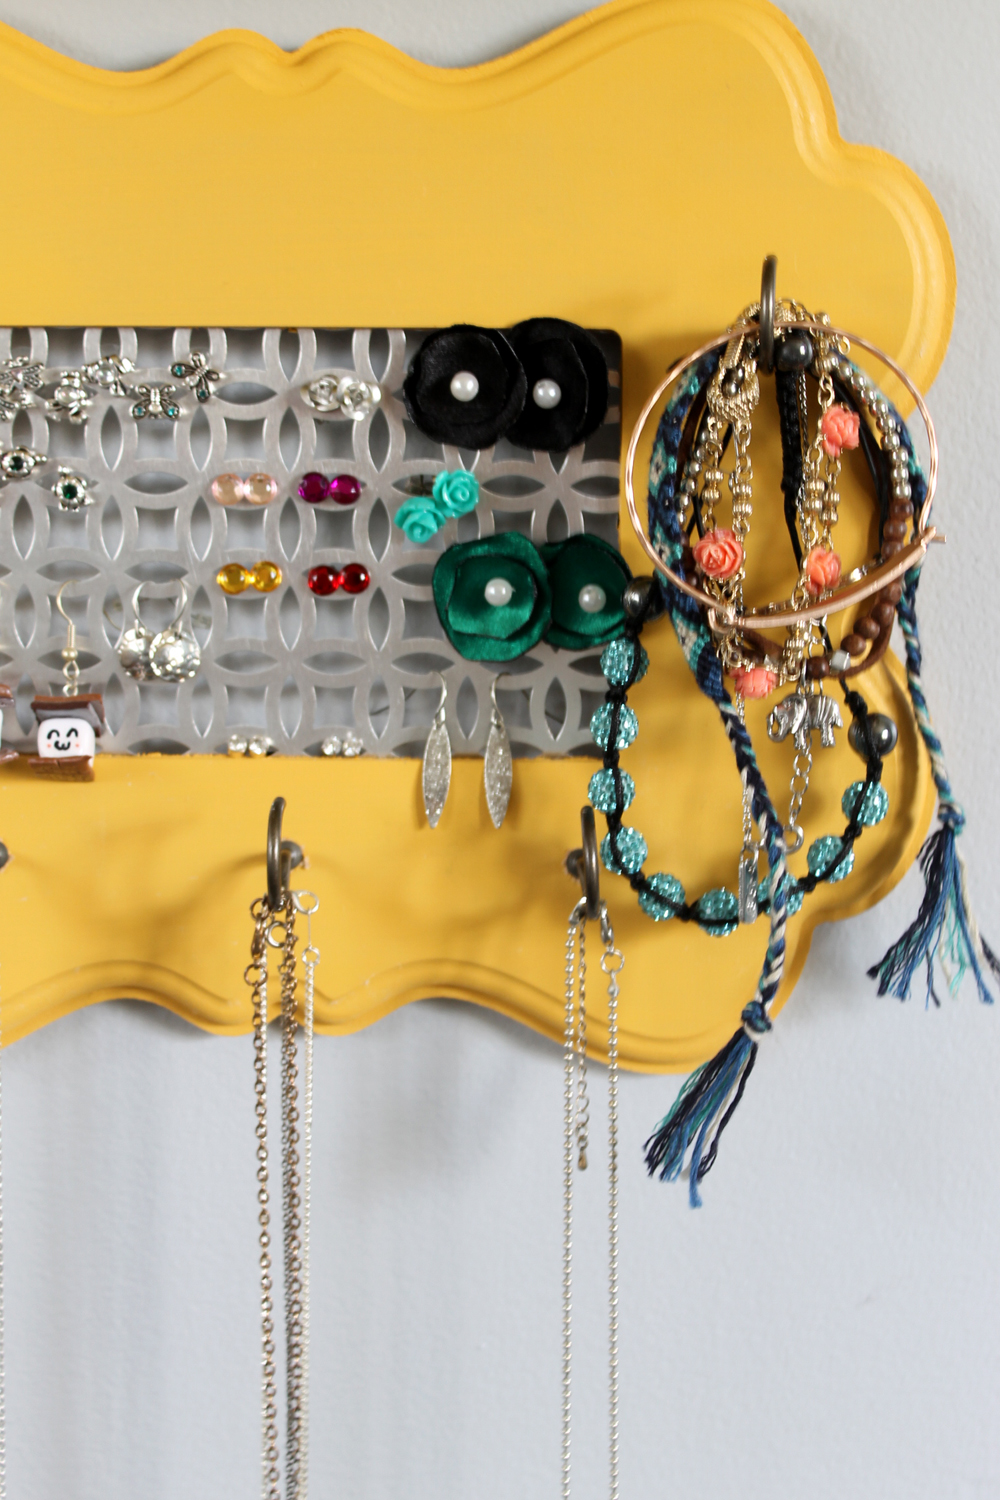
I have to admit, I’m a sucker for little trinket dishes to hold jewelry, but those things are really only good for rings or a couple of earrings. If you have a bigger collection than that or hate untangling your necklaces, then they just aren’t the best option for storing your accessories. I found a lot of cute jewelry organizer options online but I thought I could make my own. I think my DIY jewelry organizer turned out great! It’s just the right size for me, but you can always make a bigger handmade jewelry organizer by buying a bigger frame – easy! Making your own jewelry organizer means that you can customize it to your style. Pick out the perfect frame and color to compliment your bedroom.
How To Make a Simple Jewelry Organizer
This tutorial for how to make a jewelry organizer will give you something to help get all your necklaces and earrings in one place and make them easier to find all from parts you can find at your local hardware store. No more untangling!
We’ve included affiliate links to our favorite products below! Check out our disclosure and privacy policy.
Supplies:
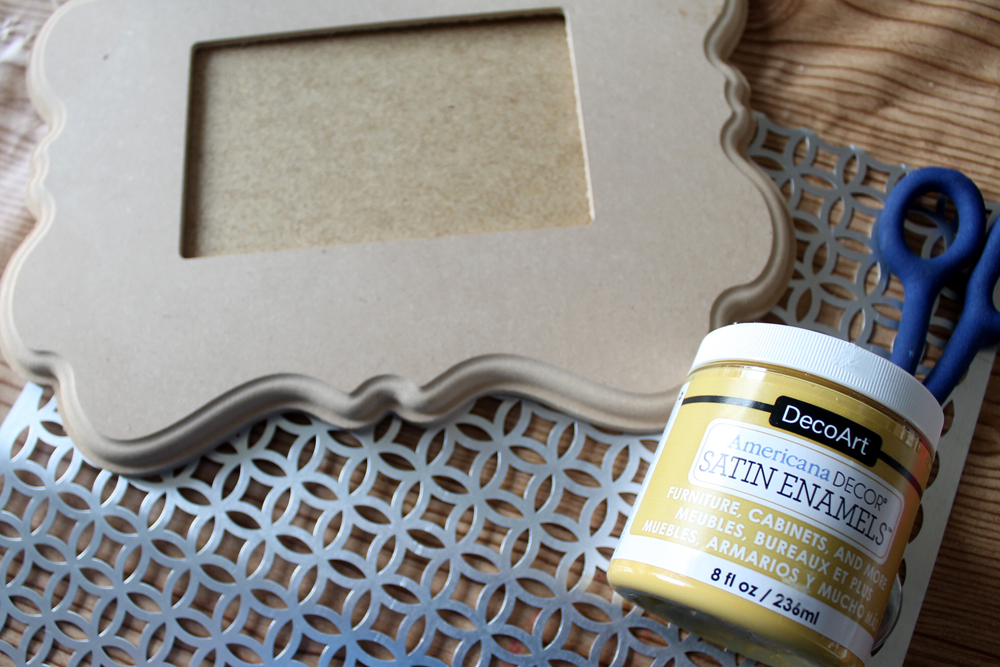
- Wood Frame like one of these options
- Craft Paint – we love Decoart Satin Enamels
- Perforated Metal
- Metal Shears
- Strong Adhesive – we like JB Weld for projects like this one, but any clear, strong adhesive will work!
- Paint Brush
- Hammer
- Nail
- Hooks
- Marker
Instructions
- Paint frame with a few coats of craft paint and allow to dry completely. TIP:Use extra bottles of paint to lift your frame from the work surface when painting. This will eliminate excess paint sticking to your surface.

- Trace the insert that comes with the frame onto the perforated metal with a marker.
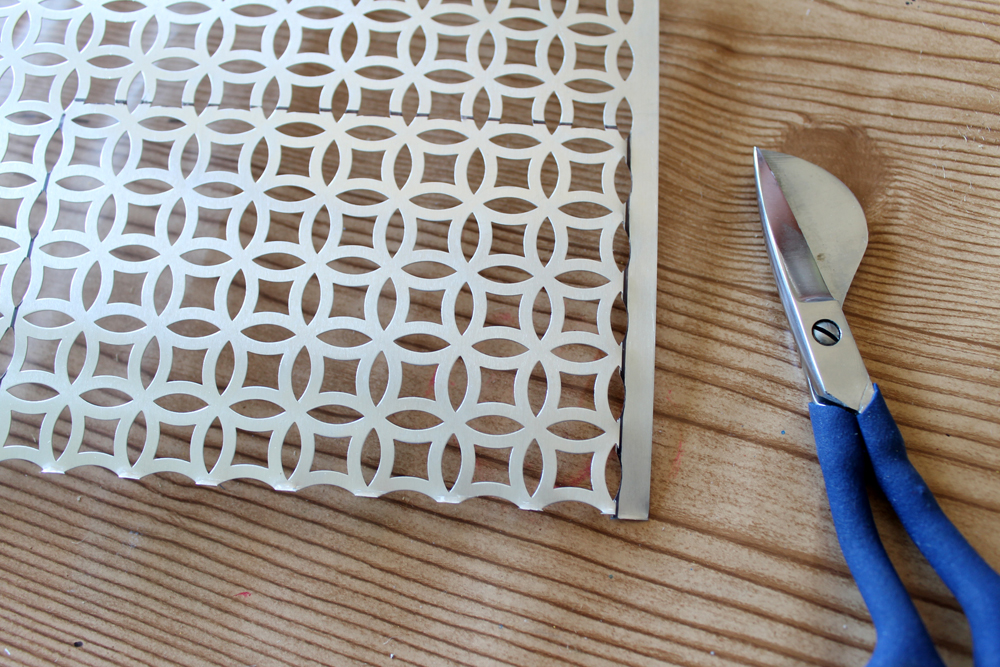
- Use metal shears to cut the metal to size.

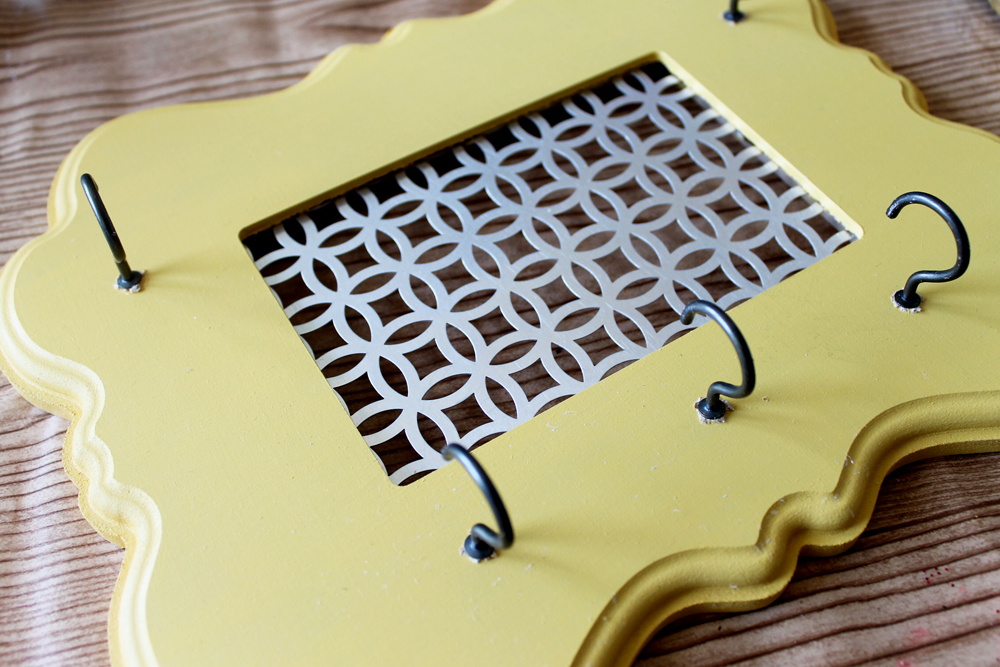
- Add metal to frame and secure with a strong adhesive around all edges as shown below. Allow to dry completely.

- Use a nail and hammer to start a hole anywhere a hook will be placed. The nail should be smaller than your hook.
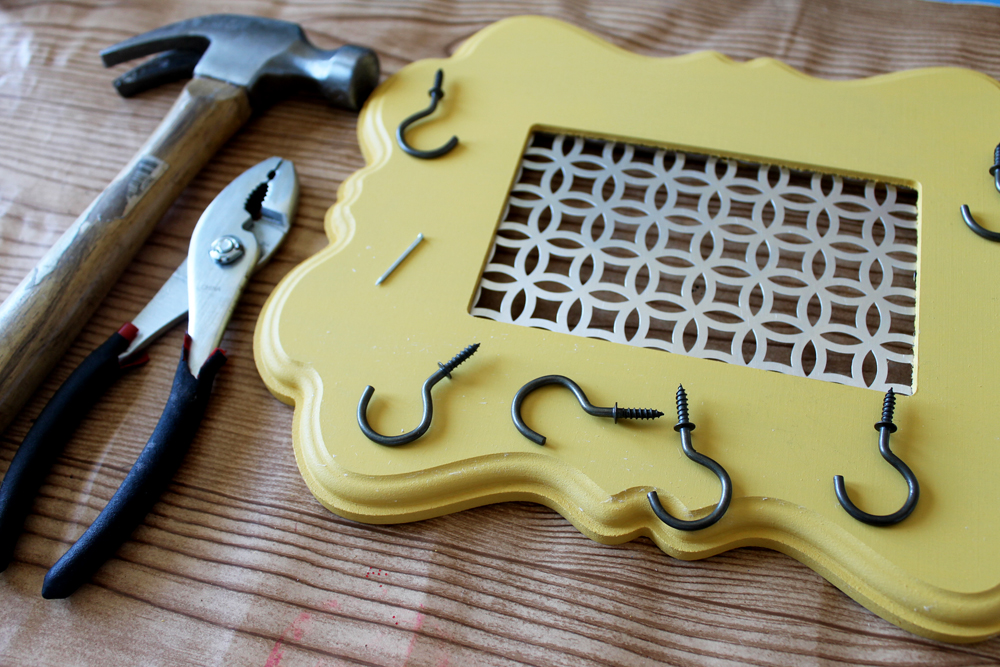
- Screw the hooks into your nail holes in any desired locations.
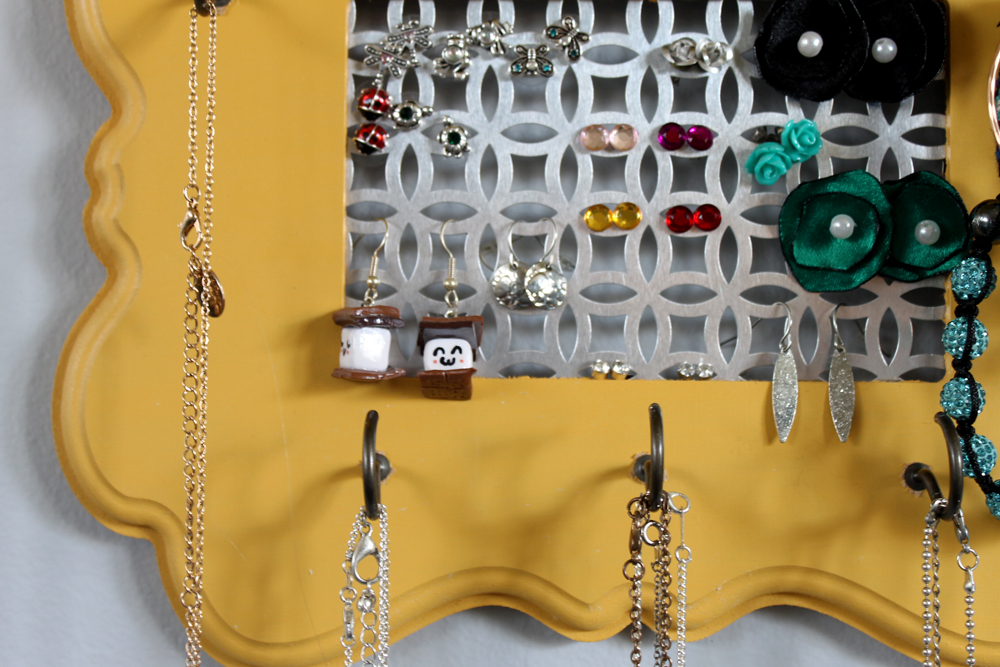
- Add a hanger to the back of your frame if it does not come with one and hang it on the wall. Add necklaces and bracelets to the hooks. Earrings go inside of the perforated metal.
Easier than you thought? Anyone who’s seen it asks me where I bought it. I have to say it’s been so nice being able to see all my favorite pieces in once place.

Did you make one? We’d love to see it! Share your photos on our Facebook page or tag us on Instagram!

by Angie Holden | May 19, 2017 | Recipes
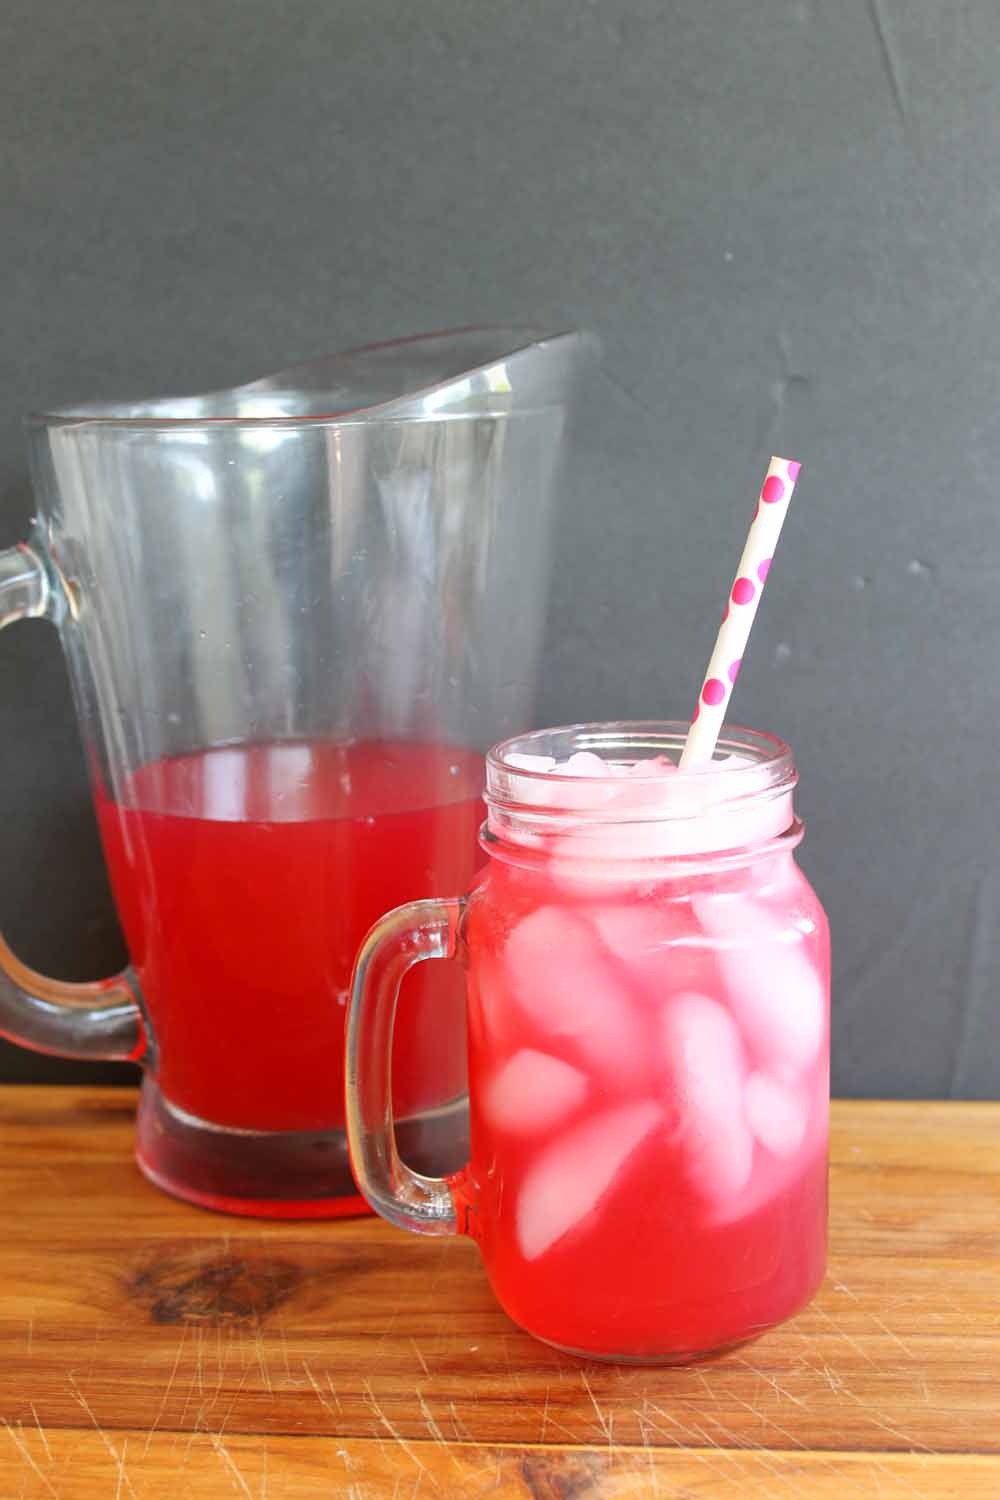
Do you ever wake up just thirsty for a venti Passion Tea Lemonade? No? Just me? Ok well, we know that the Starbucks addiction is real and if you’re reading this, you get it too. Since picking up Starbucks every morning can start to add up, I needed an easier way to get my Passion tea Lemonade fix, so ta-da! This Starbucks copycat recipe is so close to the real thing that it almost keeps me away from the real thing (but let’s be serious, nothing can keep me away forever). The Starbucks copycat recipe for Passion Tea Lemonade is also great if you’re looking for a party punch recipe that you know will be a hit! I’ve made this in a big batch before for a backyard BBQ and it was gone so fast I had to make a second batch.
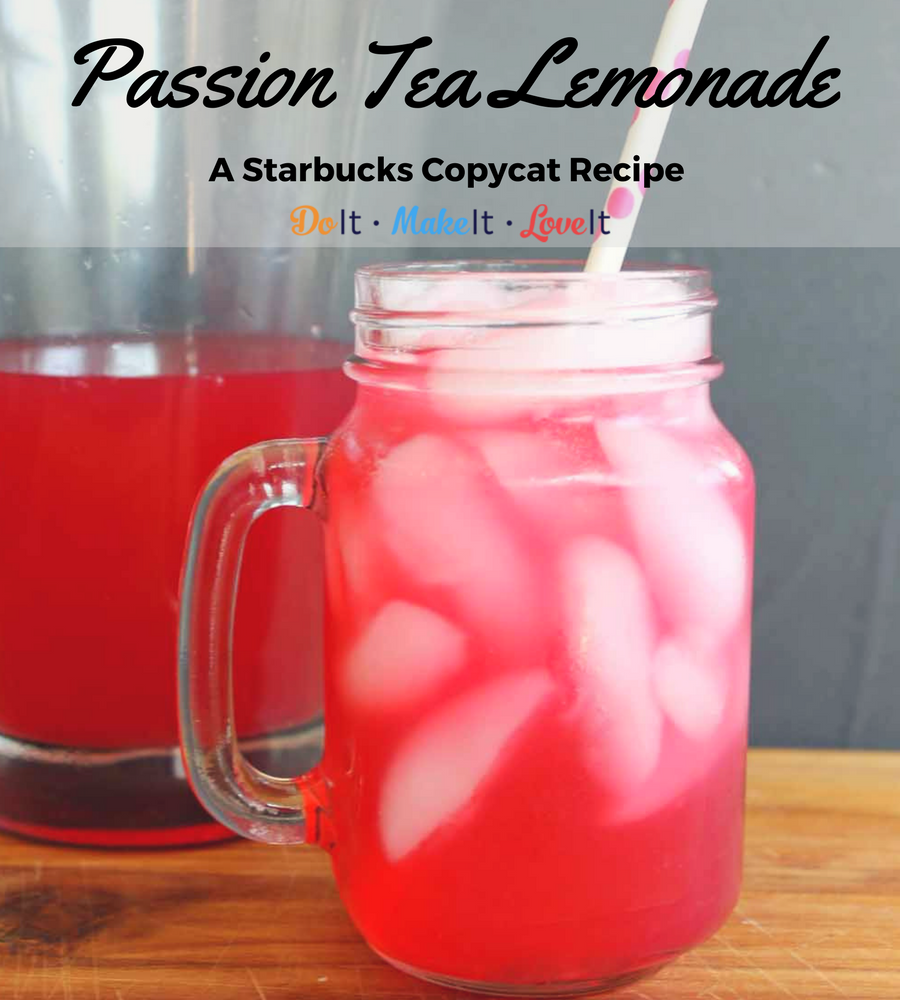
Copycat Starbucks Passion Tea Lemonade
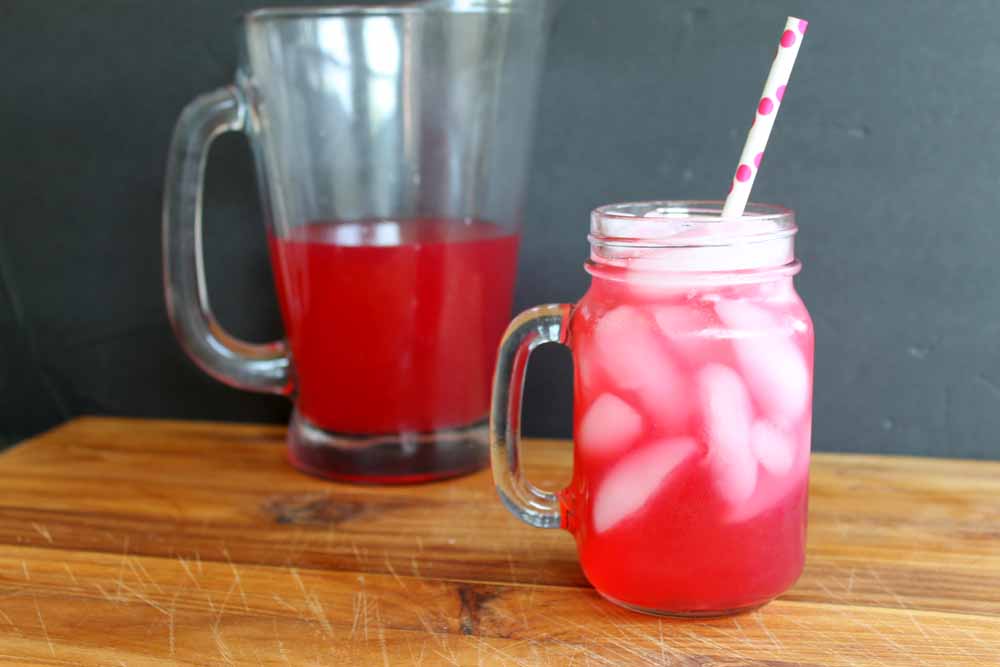
This recipe will make one pitcher of Passion Tea Lemonade but it’s so easy to double if you’re making enough for a party of people. All you need is 1 part water to 2 parts lemonade and use 1 tea bag for every 8oz of water. So simple!
Passion Tea Lemonade (Starbucks Copycat)
Are you a Starbucks Passion Tea Lemonade addict as well? Then you'll love our copycat recipe. Make a big batch for your next party!
-
1
bag
Passion tea
-
8
oz
water
-
3
tbsp
sugar
-
16
oz
lemonade
-
Bring 8 oz of water to a boil and add in tea bag.
-
Steep for 5 – 10 minutes.
-
Stir in sugar while the water is still warm.
-
Mix well until dissolved.
-
Add sweetened tea and lemonade to a pitcher. Mix well.
-
Your passion tea lemonade is ready to serve!
You can try less sugar or another sweetener if you wish.
So simple, right? I know. I felt silly for always running to Starbucks too. Of course, you can repeat these steps with other tea flavors and customize how sweet you like it. If you try mixing it with other flavors, let us know which was your favorite in the comments!
by Angie Holden | Feb 15, 2017 | Make It
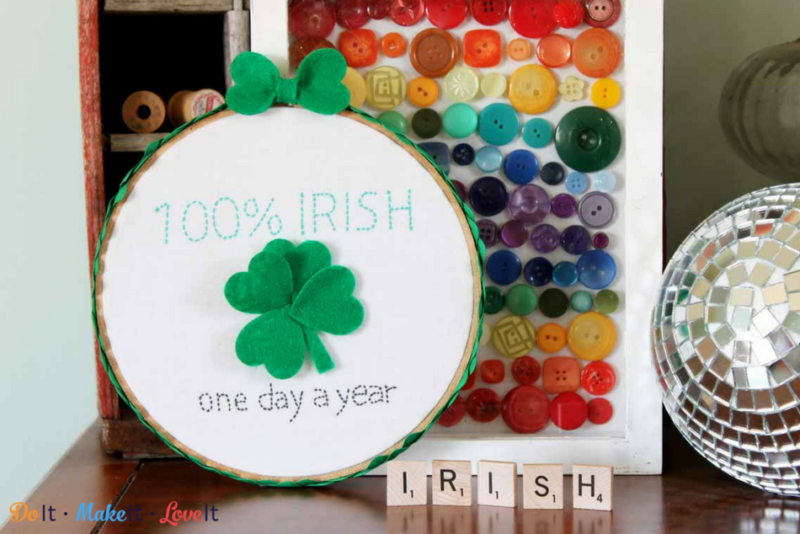
Everyone is all of a sudden wearing green, drinking beers, and talking about leprechauns – that’s right St. Patrick’s Day is coming! And we have just the St. Patrick’s Day craft for you if you love celebrating the holiday but maybe aren’t exactly….Irish. We all like celebrating the holiday, even if your roots aren’t exactly located in Ireland. Embrace it with this St. Paddy’s Day free embroidery pattern that shows off your pride.
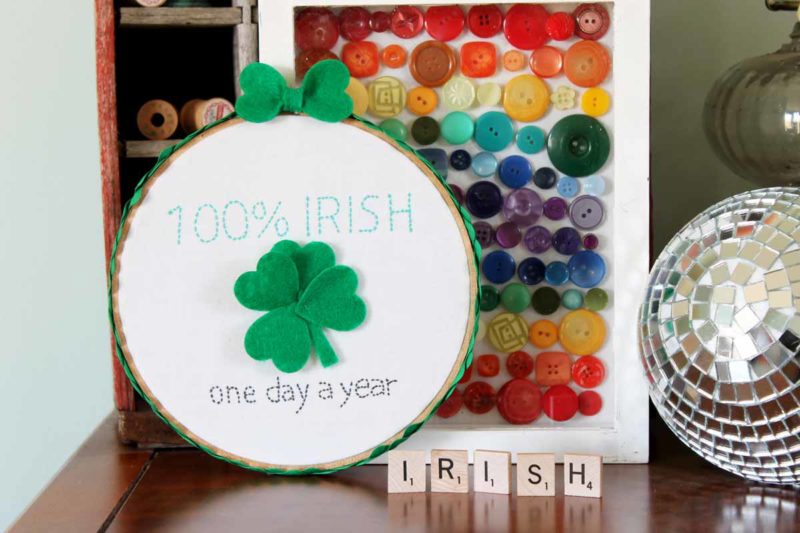
This adorable free embroidery pattern makes the perfect simple St. Patrick’s Day wall art for your party! The best part is that it’s so easy and quick to make, you can throw this together the night before and hang it up just in time to celebrate. Take a look at the steps below and get started!
This post contains some of our affiliate links for your convenience. Check out our full disclosure policy.
St. Patrick’s Day Embroidery Art Tutorial
Supplies:
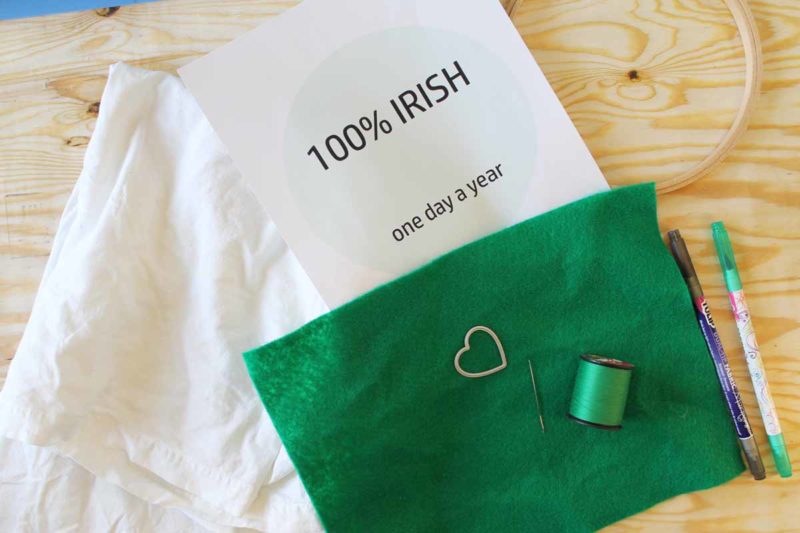
Instructions
- Put your pattern sheet under the cotton and trace the words with your fabric pens. Make dashed lines to trace to look like stitching. Iron away any wrinkles before adding to the hoop.
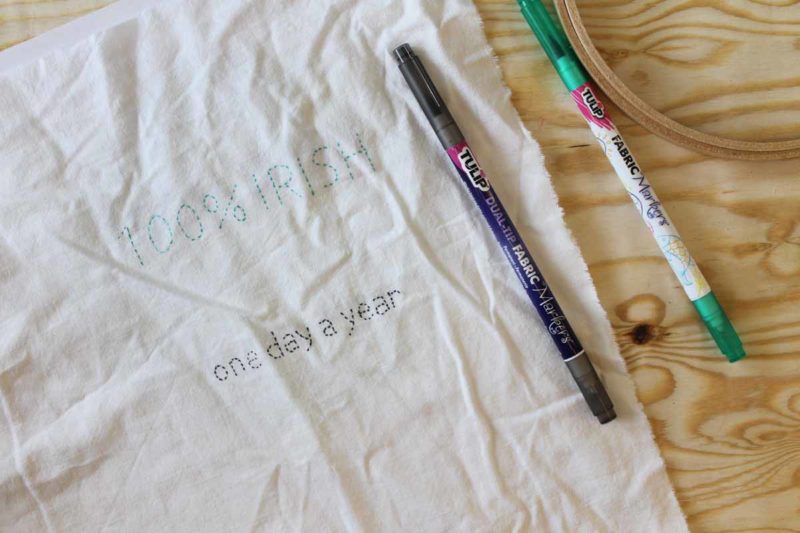
- Add your cotton to the embroidery hoop and stretch to fit. Trim the back with scissors. Go over the writing multiple times with the markers to get the look your desire.
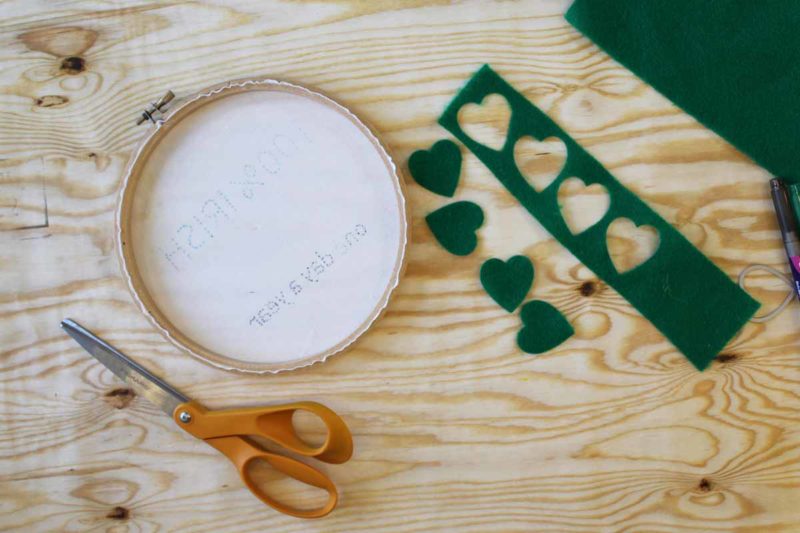
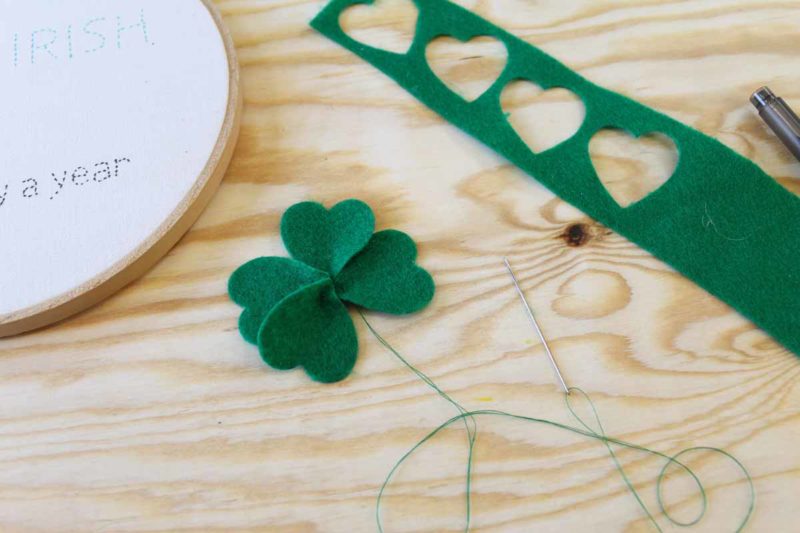
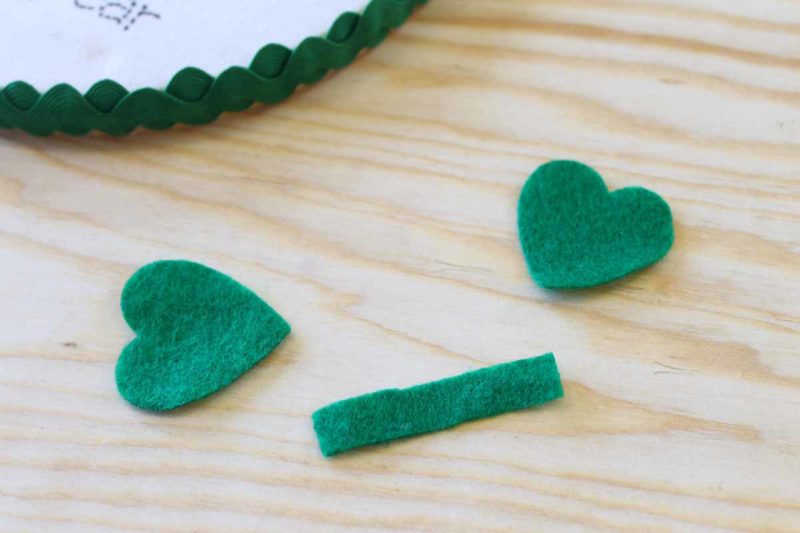
- Cut four hearts from felt with the die and your Sizzix. Use a needle and thread to gather up the hearts as shown below.
Note: The Sizzix and dies makes this super easy, but if you don’t have those things handy, just trace hearts on the felt and cut them out by hand.

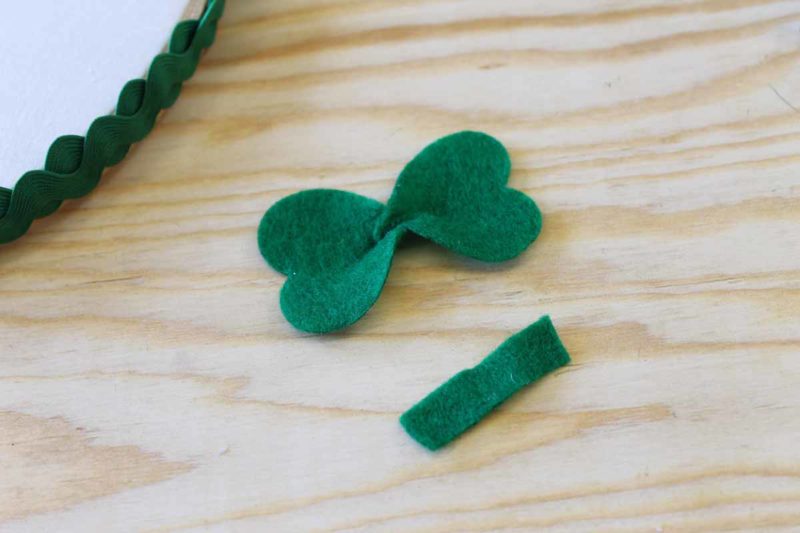
- Pull the thread through and make the hearts look like a shamrock. Cut a stem from the felt as well. Add the stem with the needle and thread.
- Knot off the thread on the shamrock and either sew or glue into place on the hoop.
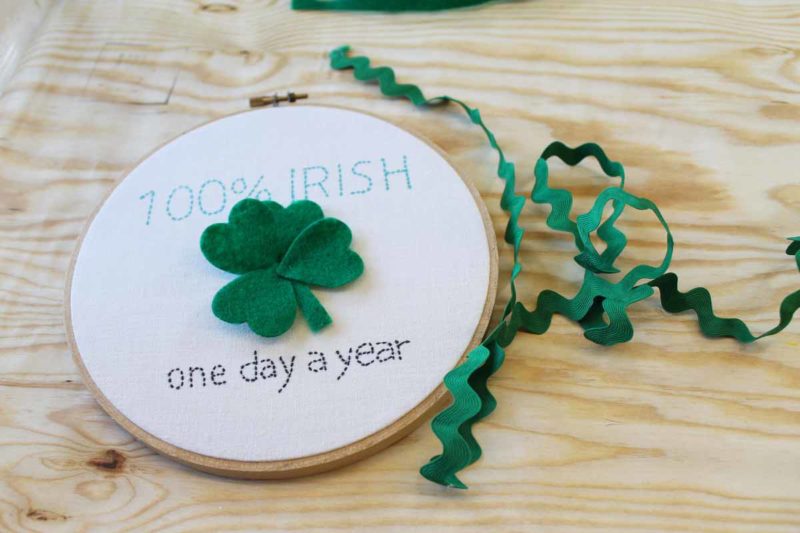
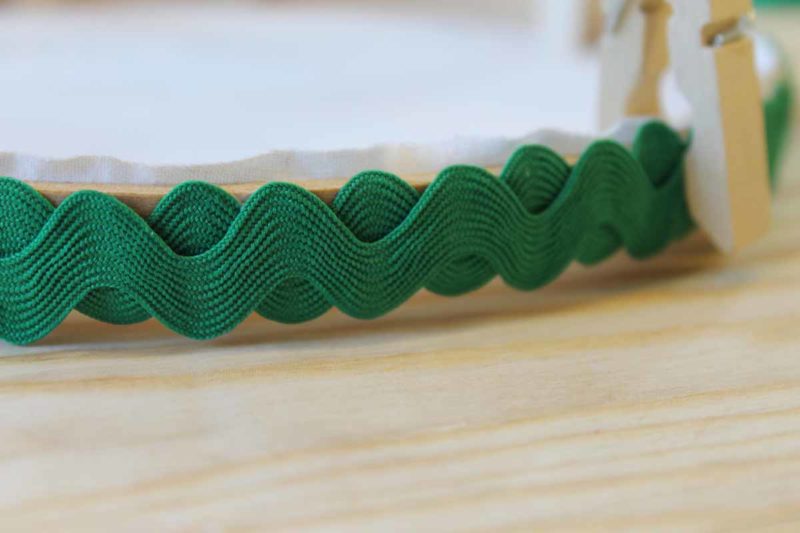
- Use tacky glue to adhere jumbo ricrac all the way around the outer edge of the hoop. I used clothes pins to hold into place while the glue dried. The extra width on the ricrac should hang over the front of your hoop art.
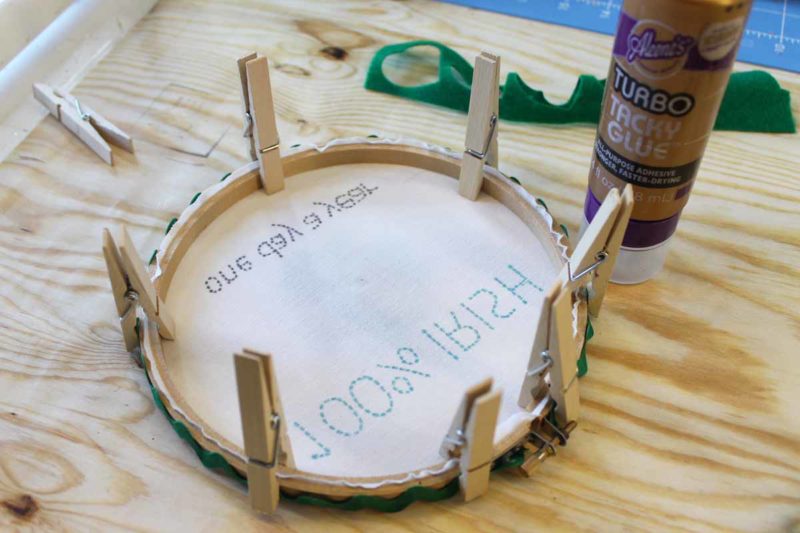
- Once dry, add a second row of ricrac with the tacky glue. Again hold with clothespins until dry.
- Cut two more hearts as well as a small rectangle from the felt.
- Use hot glue to secure together in a bow shape.
- Add to the top of your hoop with hot glue.
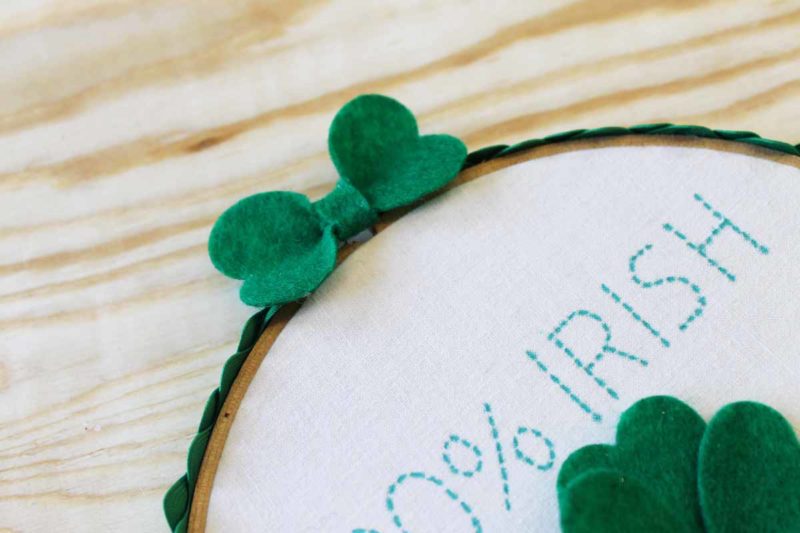
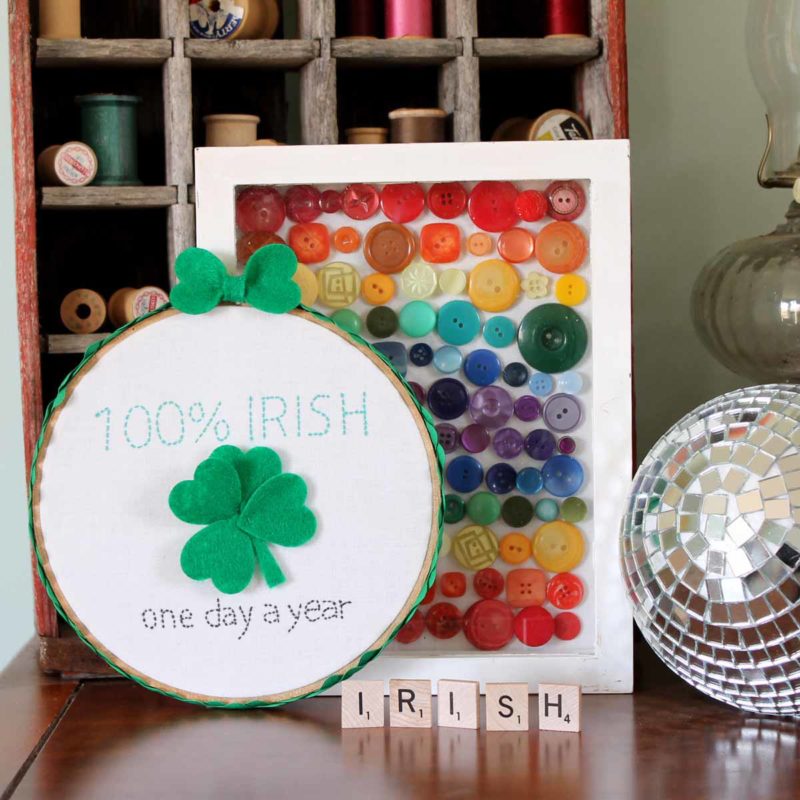
Ta-da! And you’re done. Your adorable St. Paddy’s Day wall art is ready to be hung up right by the snack table. This embroidery hoop project will work with any phrase as long as it fits! Just write out your favorite saying in a document, print it, and repeat these steps. You can even make multiple since there’s no embroidery required!