by Vicki O'Dell | May 22, 2017 | Love It
This post contains some affiliate links for your convenience. Click here to read our full disclosure policy.
Over 215,000 people bought an Instant Pot on Amazon’s Prime Day back in November of 2016. Were you one of them?
What’s an Instant Pot?
I was and several people I know did too. The thing I’ve noticed is that, while there are lots of folks gushing about their Instant Pot, there is very little instruction when it comes to actually using it. The box includes very little help. Especially if you’ve never used a pressure cooker before or are a new cook. I’ve seen several comments from people who bought one but who are afraid to try it.
If you’ve been watching videos and reading about the Instant Pot on the web you’ll find lots of information about how to put the lid in the handle so it stands up and about the tri-ply stainless steel disk on the bottom for more even cooking and maybe even about the removable silicone ring, but next to nothing about how to actually USE it.
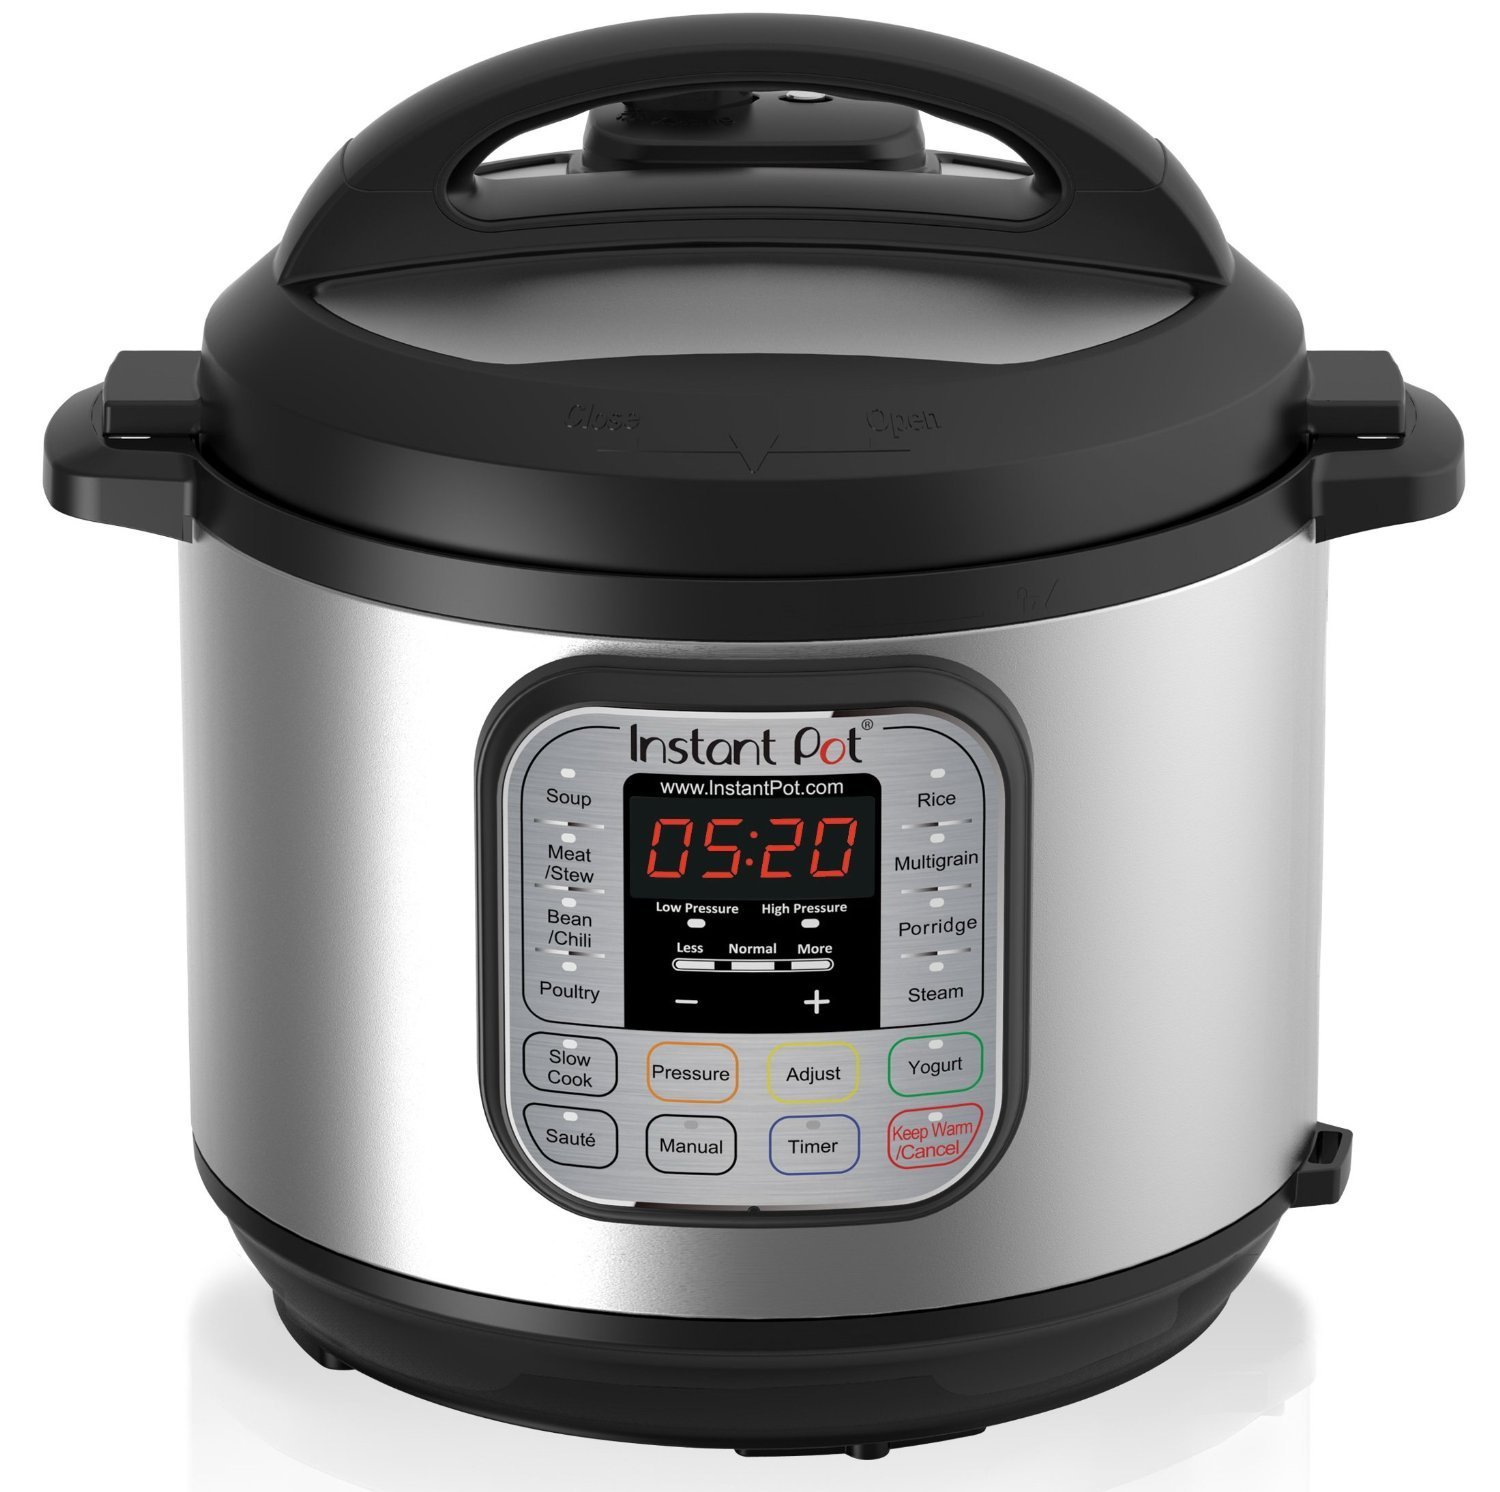
What are all the buttons on the Instant Pot?
You might want to highlight and print out this bit to keep handy.
- Sauté function (lower left on the panel)– use the Sauté button to sauté in the stainless steel pressure cooking pot with the lid off. You can also press Sauté and the Adjust button once (more) for browning. Press Sauté and the Adjust button twice (less) to simmer.
- Keep Warm/Cancel Button (Lower right on the panel) – Use this button to cancel a function or turn off your pressure cooker. On the Smart mode, you can use the Adjust button to reduce or increase the keep warm temperature from 145° (normal) to 133° (less) and 167° (more).
- Manual button is an all-purpose button. Use the manual button if a recipe says to pressure cook on high pressure for a specific number of minutes. Use the “+” and “-” buttons to increase or decrease the cooking time.
- Soup – high pressure 30 minute cook time. Press soup and the Adjust button once (more) to cook for 40 minutes. Press soup and the Adjust button twice (less) to cook for 20.
- Meat/Stew – high pressure 35 minute cook time. Adjusted to more – 45 minute cook time; adjusted to less – 20 minute cook time.
- Bean/Chili – high pressure 30 minute cook time. Adjusted to more – 40 minute cook time; adjusted to less – 25 minute cook time.
- Poultry – high pressure 15 minute cook time. Adjusted to more – 30 minute cook time; adjusted to less – 5 minute cook time.
- Rice – cooks on low pressure and is the only fully automatic program. It’s for cooking white rices and will adjust the cooking time depending on the amount of water and rice in the cooking pot.
- Multi-grain – high pressure 40 minute cook time. Adjusted to less – 20 minutes cook time. Adjusted to more – 45 minutes warm water soaking time and 60 minutes pressure cooking time.
- Porridge – high pressure 20 minute cook time. Adjusted to more – 30 minute cook time; adjusted to less 15 – a minute cook time.
- Steam – high pressure 10 minute cook time. Adjusted to more – 15 minute cook time; adjusted to less – 3 minute cook time. Use this function with a rack or steamer basket because it heats at full power continuously while it’s coming to pressure and you don’t want food in direct contact with the bottom of the pressure cooking pot. Once it reaches pressure, the steam button regulates pressure by cycling on and off similar to the other pressure buttons.
Some things you should know about the Instant Pot:
- Cook times for the Instant Pot sound really fast, but you have to remember that it takes about 10 to 13 minutes to get up to pressure (less if you’re using less water) and another 15 to 20 minutes to release the pressure after the cooking has finished.
- The Instant Pot cooks at 11.5 PSI, which means that it takes longer to cook than a stovetop pressure cooker. If you’re using a recipe designed for a stove top pressure cooker, add about 7 to 15 percent more cooking time. If you’re cooking at high altitude, you’ll need to add even more time.
- Don’t forget to close the vent after adding food and setting the time. Otherwise, you’ll hear hissing after a few minutes. If this happens simply close the vent. An open vent won’t allow the food to cook properly, so always try to ensure the vent is closed when you make each meal.
- Some cooks have reported that heating up the pot by using the sauté helps the InstantPot come to pressure quicker. For you truly impatient types.
- If you cook foods with strong flavors – fish or garlic – you may wish to purchase an additional seal for other foods like yogurt. You may also wish to store the InstantPot with the lid on upside down so that the seal will air out and not hold odors.
- The InstantPot needs a minimum of 1 cup of water or liquid to reach and maintain pressure. The more water – the longer to reach pressure.
- Heed the MAX FILL line on the side of the stainless steel pot to avoid messes.
- Natural Pressure Release allows the pot to naturally release pressure on it’s own after the food is done. It’s a form of release that is often used with pasta, soup (including lentils), beans, and meats – or a pot that is filled up to the max line. If a recipe calls for 5 minutes NPR, you will want to wait until the pot says L0:05, then you can release the pressure after that by opening the vent.Quick Release allows you to manually release the pressure on your meal by turning the vent valve at the top to open. You can use this for veggies, or for non-starchy foods. Always use tongs or a fork/spoon to avoid turning that valve with your hands when you release the pressure.
- The Instant Pot is not to be used for pressure canning.
- The Silicone Sealing Ring typically needs to be replaced every 18-24 months. It is always a good idea to keep an extra one around.
That is a good start. Some dos, don’ts and how-to’s regarding your new Instant Pot. I sure hope you find it helpful.

by Vicki O'Dell | Apr 26, 2017 | Craft Tutorials
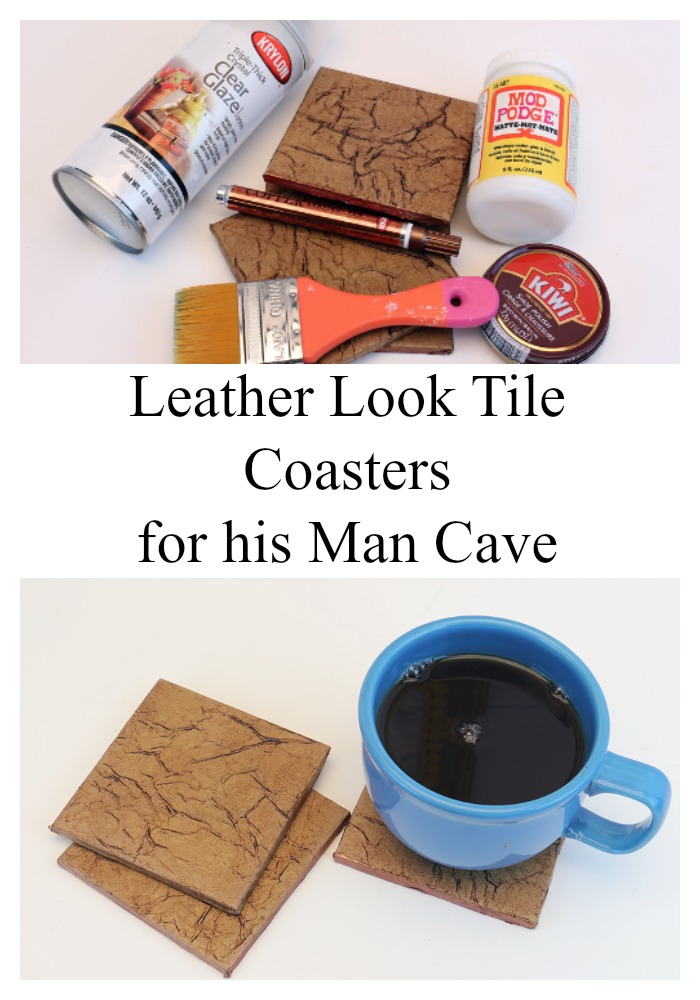
Are you struggling with styling a man cave on a budget? Just because he calls it his “man cave” doesn’t mean you want it to look like a third world country or for the furniture to look like it came straight out of a frat house. That’s why we created these Leather Look Tile Coasters for his Man Cave. To spare your furniture and possibly, your marriage. These useful and cool coasters are great DIY room decor for guys that doesn’t feel frilly or overdone. It’s such a simple projects that you might even be able to convince your man to help create this one with you!
DIY Leather Look Tile Coaster Tutorial
The supplies needed for this project are super easy to find. You probably already have many of them on hand.
We’ve included links to our favorite products too! If you purchase from these links, we’ll make a little money. Check out our disclosure and privacy policy.
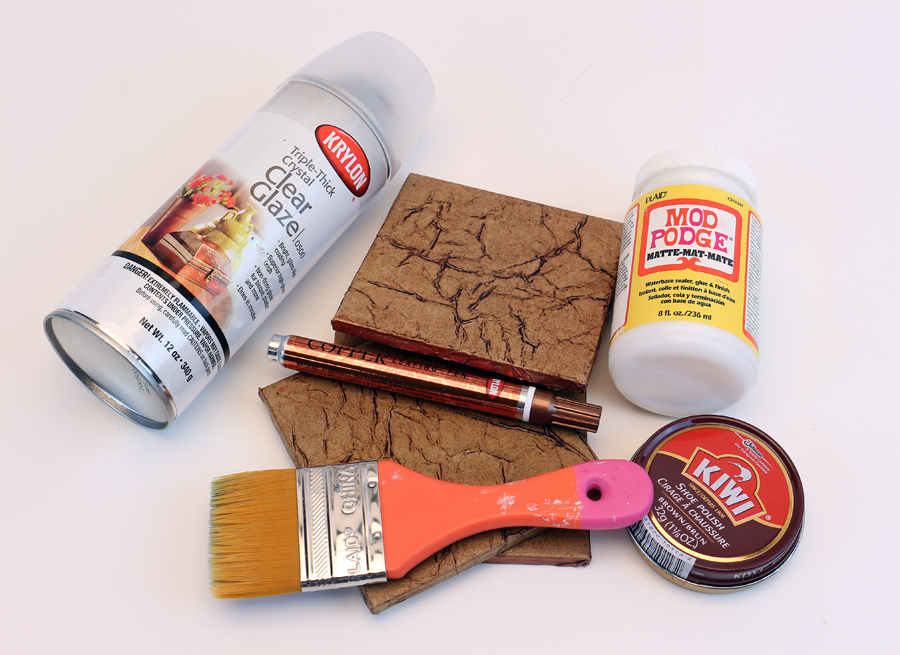
Supplies

Instructions
- Cut a piece of the paper bag (or craft paper) a little larger than the tile. Crumple it up and then smooth it out. Crumple and smooth again.
- Brush Mod Podge over the surface of the tile.
- Spread the paper over the tile and pat it all over to adhere to the tile. Wrinkles are great so do try to remove them – just make sure there aren’t wrinkles so large that beverages placed on the coaster are at risk of being easily knocked over.
- Fold the paper down over the sides to cover those too.
- Coat the paper with another layer of Mod Podge and let dry – preferably overnight.
- Spray the coasters with sealer. Don’t forget the sides.
- Allow to dry for 30 minutes or more.
- Run the copper leaf paint marker around the edges if desired.
- Allow the coasters to set to a hard finish for 48-72 hours before using for best results.
That’s it! Easy right? We love suggesting these as a cool DIY project for guys whenever someone is looking for something quick, easy, and useful to make as a gift. They really help finish off the look for your man cave on a budget. If you make some of these, share pictures on our Facebook page so we can see how yours turned out.
by Vicki O'Dell | Apr 25, 2017 | Do It
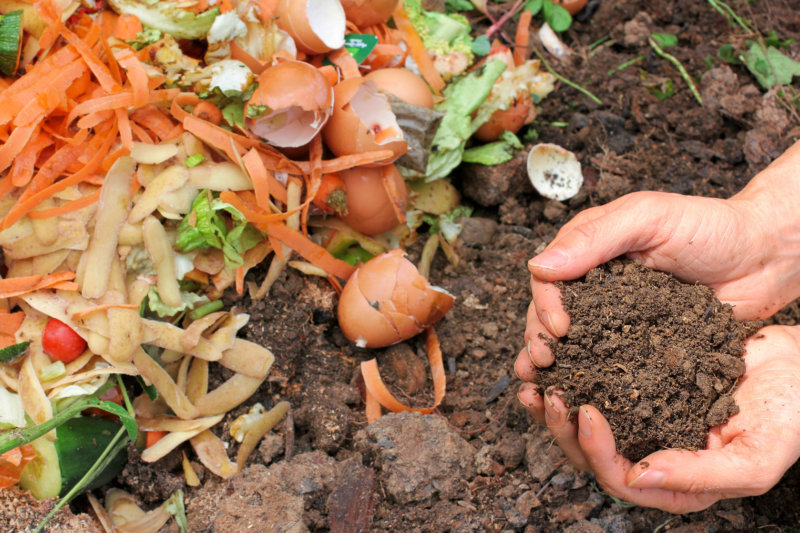
Composting is the natural process of turning organic material into a rich loamy soil known as compost. Home composting is an acceleration of the same process nature uses. By composting your organic waste you are returning nutrients back into the soil in order for the cycle of life to continue. Finished compost looks like soil–dark brown, crumbly and smells like a forest floor. It is gold for the garden or potting plants. But how do you get started? What sort of organic material do you need to start composting? Our How to Start Composting guide will help you figure all that out!

Composting 101
How to Start Composting
You’ll need greens and browns.
Greens are the kitchen scraps from vegetables and fruits that your household is consuming, coffee grounds, tea bags, egg shells, or grass clippings. Greens are rich in nitrogen.
Browns are things like leaves, wood chips, or straw. Browns are rich in carbon.
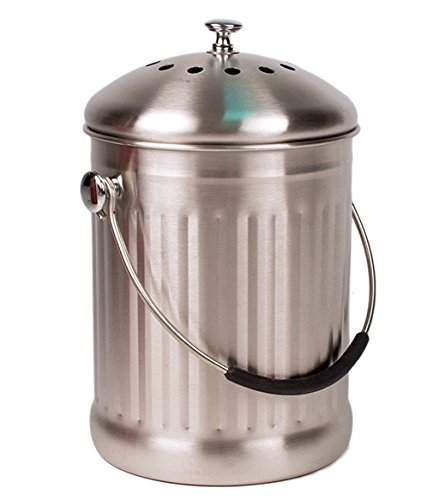
We use the VermiTek Countertop one at home. It’s the perfect size for leaving on your countertop and throwing in all your scraps as you’re cooking. Having it on your counter is a great composting reminder because it’s always right in view!
This post contains some affiliate links for your convenience. Click here to read our full disclosure policy.
Tools For Composting
- Something in the kitchen to hold compostable material
- Something outside to mix greens and browns in
- Pitchfork for larger compost bins

For the outdoor mixing, I use a black trashcan in the winter that has holes drilled into the sides and bottom. You can find these for pretty cheap at any hardware store. I fill it about half full of shredded leaves in the fall and then add the kitchen compost pail to it over the winter. I set the trash can at the end of the patio and that keeps me from having to trudge through the snow to the “way back” compost bins that are made from pallets and wire. Any fluid that comes out of the compost bin also feeds my shrubs at the end of the patio. Bonus!
To mix the greens and browns in the trash can I strap a couple of bungee cords across the top and then roll the can around the back yard a bit. Easy peasy!

My summer compost is where I dump and mix the winter compost along with the summer’s grass clipping and a portion of fall leaves. I have to use a pitchfork to turn this compost because it is a much bigger area.
Composting Tips:
- Junk mail that has been shredded is good compost material
- Do not use meat, fats or oils, dairy products, manure from carnivores or diseased plants
- Do not plant plants directly in compost. Either place a ring of compost around the plant base or work it into the soil before planting.
- Compost that is still “cooking” is too hot for delicate plant roots. When it’s finished cooking it will be dark and you will not be able to identify the various bits that went into the compost bin.
- If your compost looks a bit dry and dusty you can give it a bit of water
- You can also use compost in potted plants. Make sure it is completely cooked and mix it with potting soil.
Composting Tips for Apartment Dwellers:
- Brown materials can include cardboard boxes and shredded paper
- You can compost dryer lint, hair, pet fur and nut shells
- Your outdoor compost bin can be placed on the balcony. Try using a cat litter bucket to start small but be sure not to drill drainage holes in the bottom unless you have a way to catch any liquid that may come out.
There you have it! Isn’t it easier to get started than you thought? You’re already creating all the scraps you need to get composting every day. Now all you need are the bins to start storing them and you’ll be creating nutrient rich dirt for your garden.

by Vicki O'Dell | Apr 21, 2017 | Recipes
Spring and summer are a great time to try out a new party punch recipe. Whether it’s a graduation party, bridal or baby shower, wedding reception, or a simple backyard cook-out you’ll definitely want to check out some of these drink recipes. There are enough party punch recipes here to try a new one every weekend this summer! Weekends are a perfect excuse for a party, right? Your liver will hate you but your taste buds will thank you.

Party Punch Drink Recipes for Summer
This Cake by the Ocean cocktail looks as fun as it does tasty. After all, what’s better than a rim of sprinkles and floating fruit. Oh! The umbrella. Don’t forget the sweet little umbrella. The perfect drink for a tropical themed bridal shower, don’t you think?
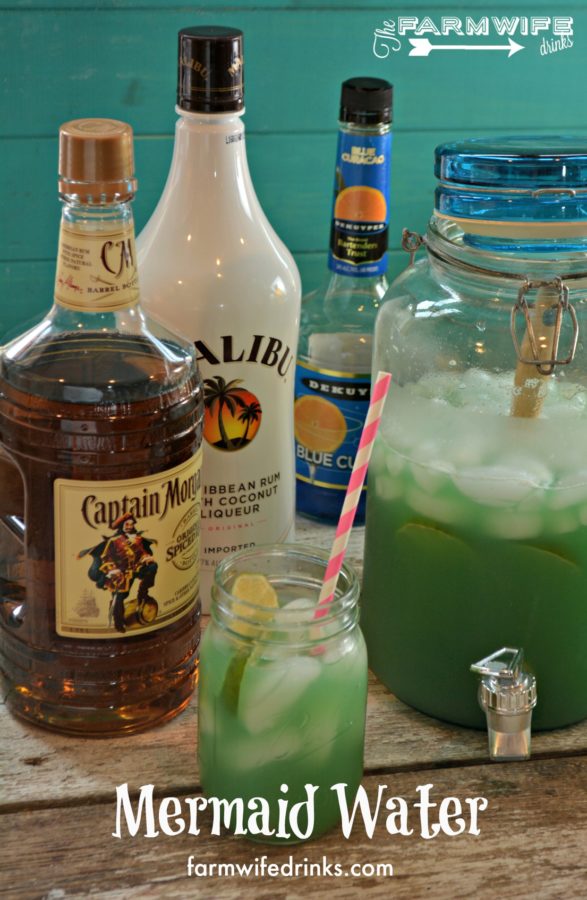
Being a mermaid is the new being a Bohemian gypsy and Mermaid Water is the perfect drink for all mermaids. Think of this recipe when you are having a mermaid themed bachelorette or birthday party. Add a sea shell tiara and you are good to go!
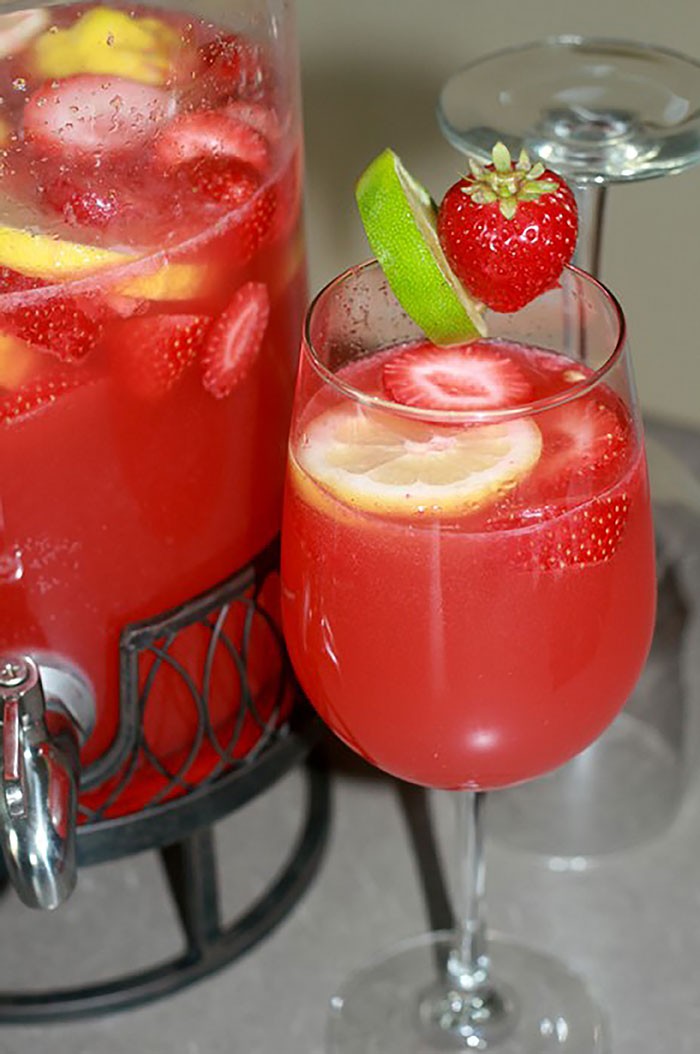
Why do I want to read this Strawberry Punch Limeade recipe with a Southern drawl? Doesn’t the name make you think of pretty ladies in fancy dresses having fun chatting in the shade of a big old oak tree? Ok, maybe not but it sure does look good!
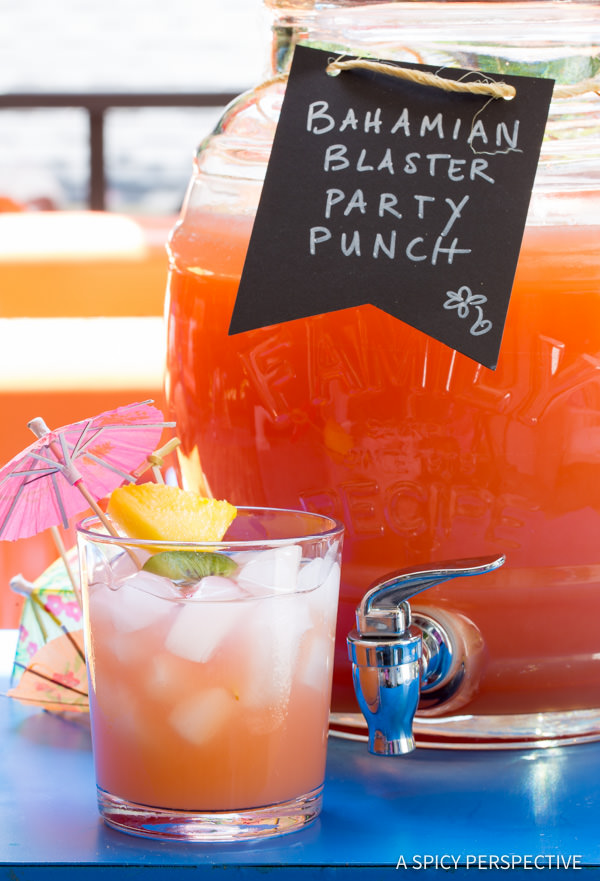
Bahamian Blaster Party Punch looks like a reflection of the sunset over the ocean. A great drink to enjoy while reminiscing about past adventures on the seas or the back yard pool. Either way, if you have too many you’ll never be able to say its name!
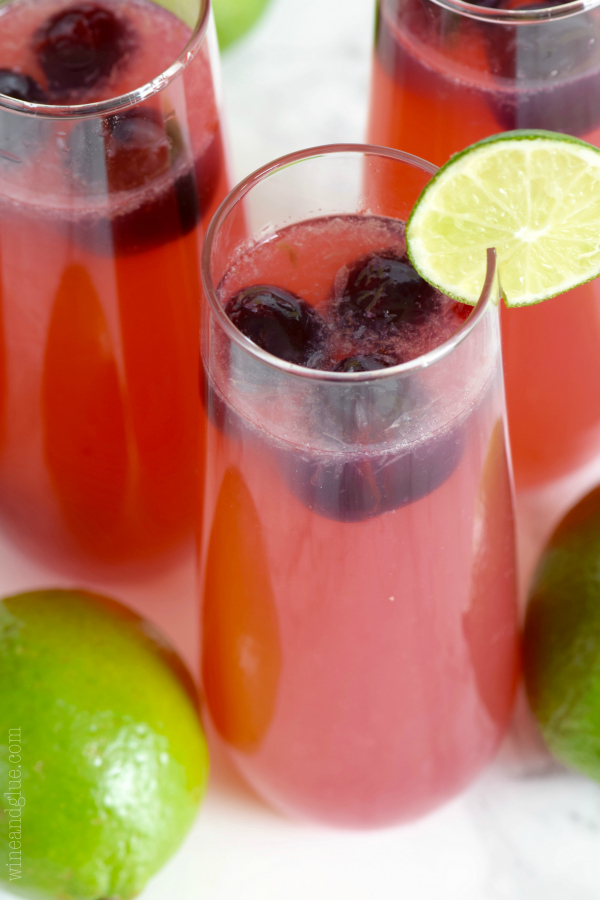
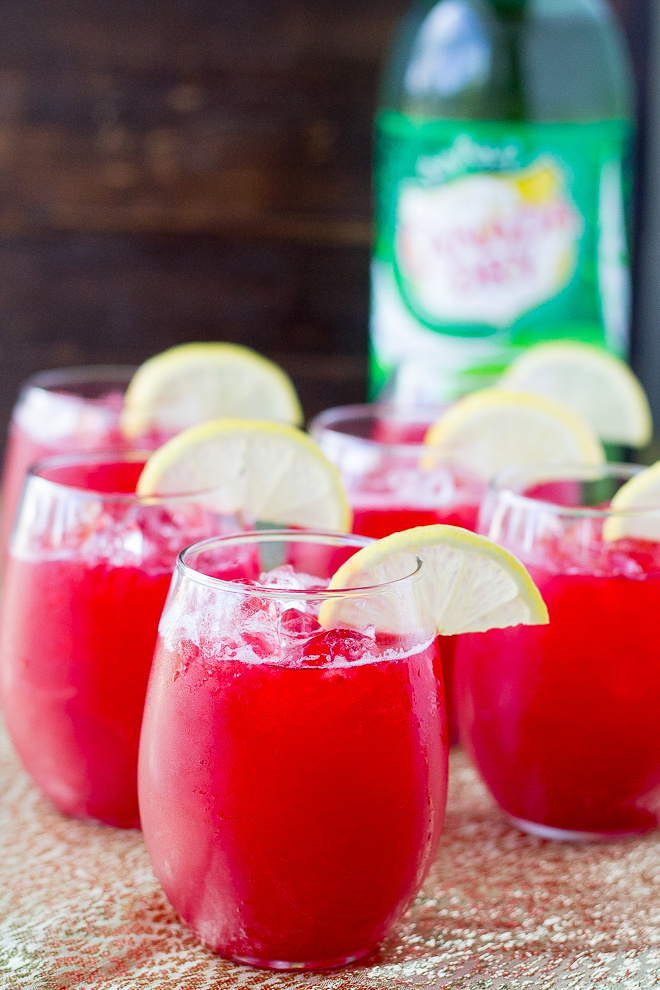
Cherry Limeade Sangria Cherries and Limeade? Sweet and sour and sweet. It’s a beautiful drink and super easy to make up. PLUS you can keep the ingredients on hand for last-minute visitors since many of the ingredients are frozen. Perfect drink recipe for a super hot afternoon or surprise summer guests
.
Whiskey Sour Party Punch is one of those recipes for the gals at the party who like their booze on the brawny side (me!) No sweet, delicate, lightly boozy drink here. This punch recipe will give you the (liquid) courage for just about anything.

On a sweltering day when the kids have zoned out from too much time in the pool and the adults want to sit and relax you’ll want to pull out this Frozen Fruit Sangria. Refreshing, cooling and not too filling.

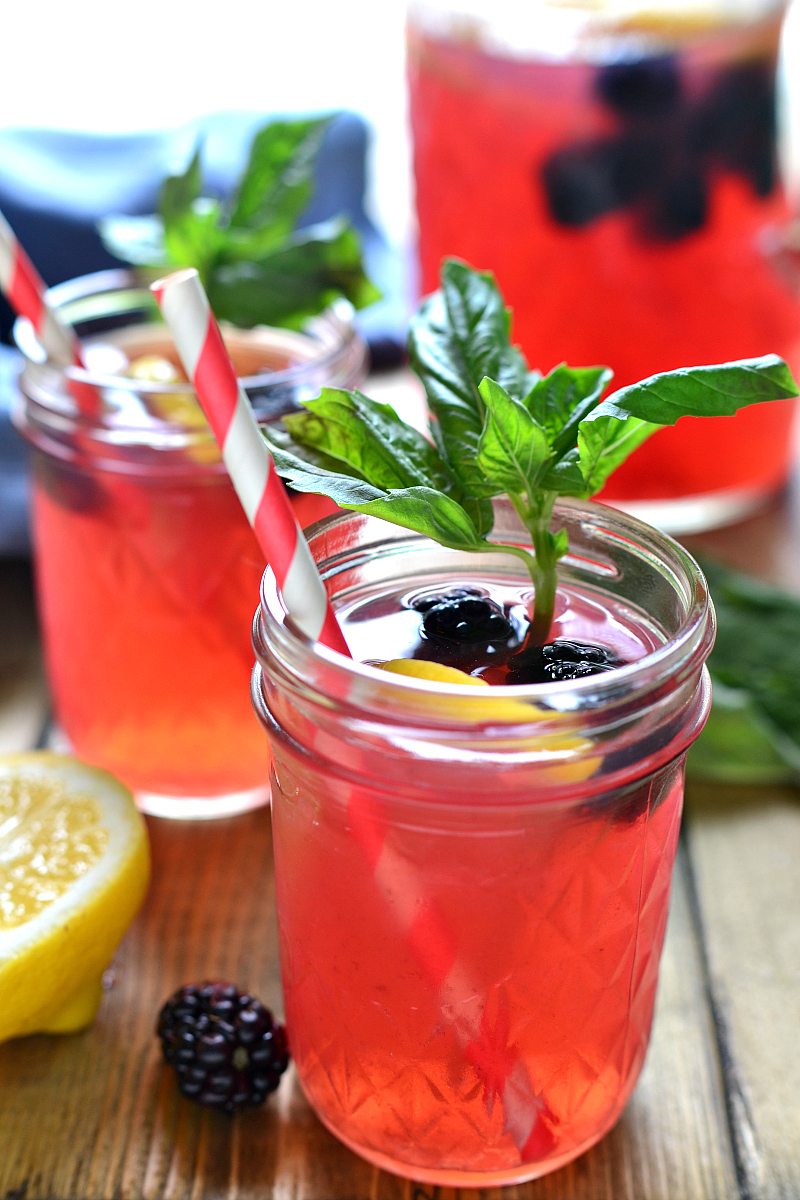
Blackberry Basil Vodka Lemonade combines sweet, tart lemonade with the delicious flavors of blackberry and basil in a refreshing cocktail that’s perfect for summer.
Just when you thought that you couldn’t be impressed by another drink the Champagne Float comes along and knocks your socks off by how pretty it is. Just mulitply the number of sorbet scoops and bottles of sparkling wine by the number of guests and it’s a non-stop party punch drink recipe. Rainbow sherbet will go with any color scheme the party is decorated with. Bonus!

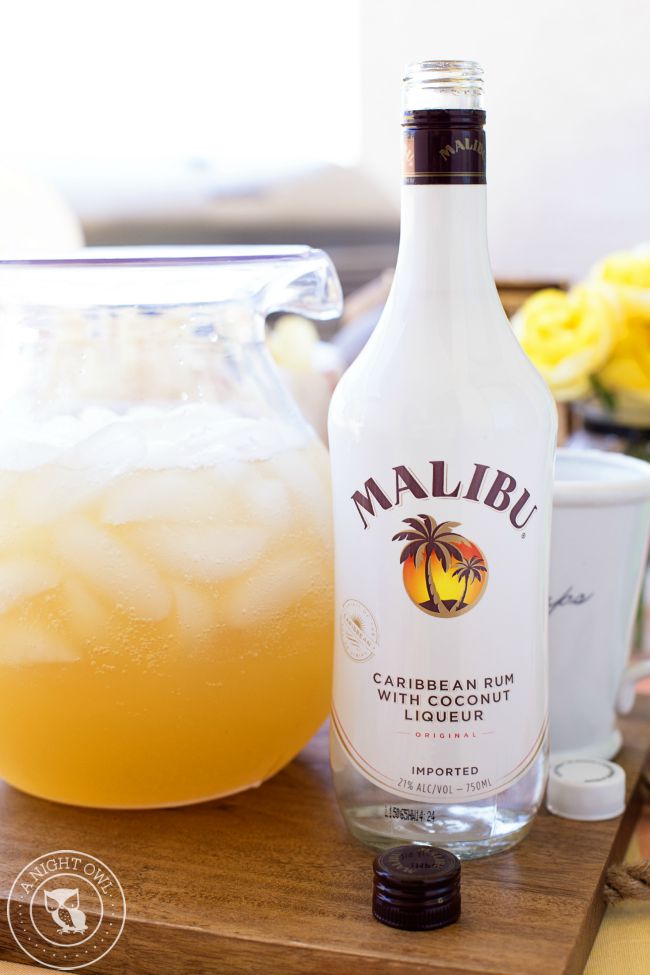
Drink recipes that can be made in big batches make hosting any party a breeze. This Coconut Rum Punch will keep you out of the kitchen so you can visit with friends and family.
Raspberry Lemonade Fizz – anything with a little fizz to it is bound to be a party favorite. Just remember to keep the adult version out of reach of the kiddos unless you want some REALLY UNEXPECTED surprises.
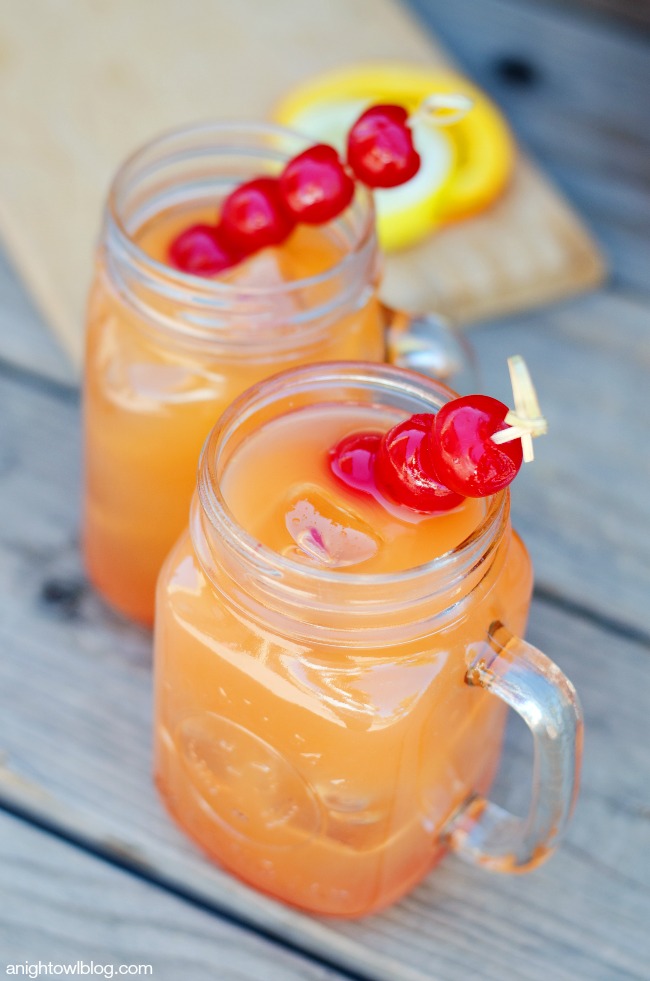
Pineapple Rum Punch is the perfect mix of tropical flavors in one amazing and easy to make party drink! Perfect on those hot summer days when you want to pretend you’re on a hammock staring at the ocean.
We definitely have some favorites in the bunch, but all of these alcoholic punch recipes are delicious. Which one are you going to try first? Let us know in the comments!
by Vicki O'Dell | Apr 17, 2017 | Do It
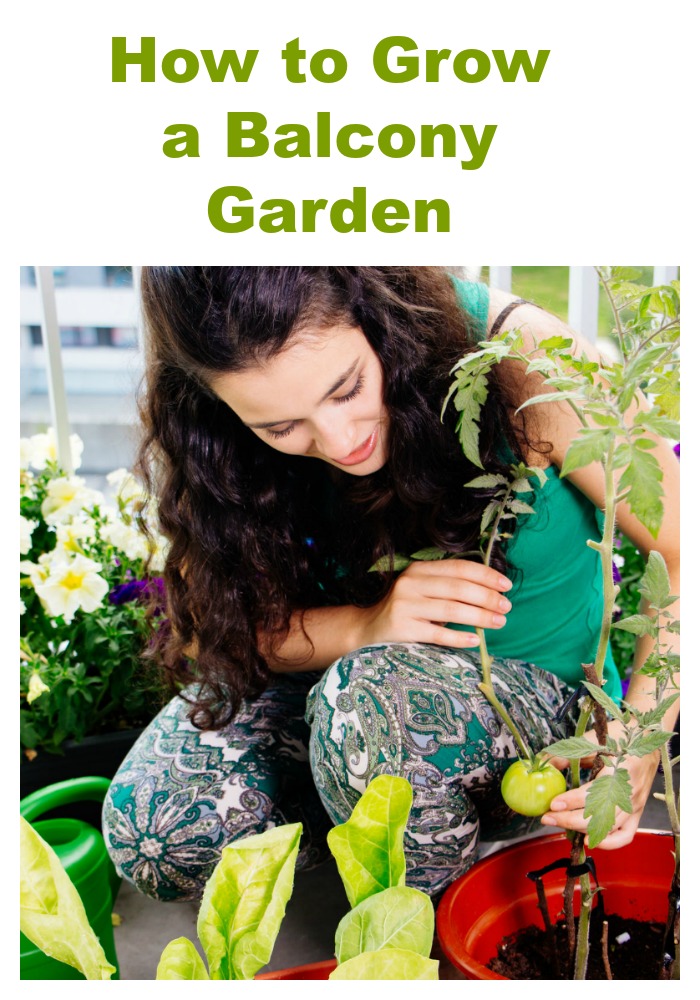
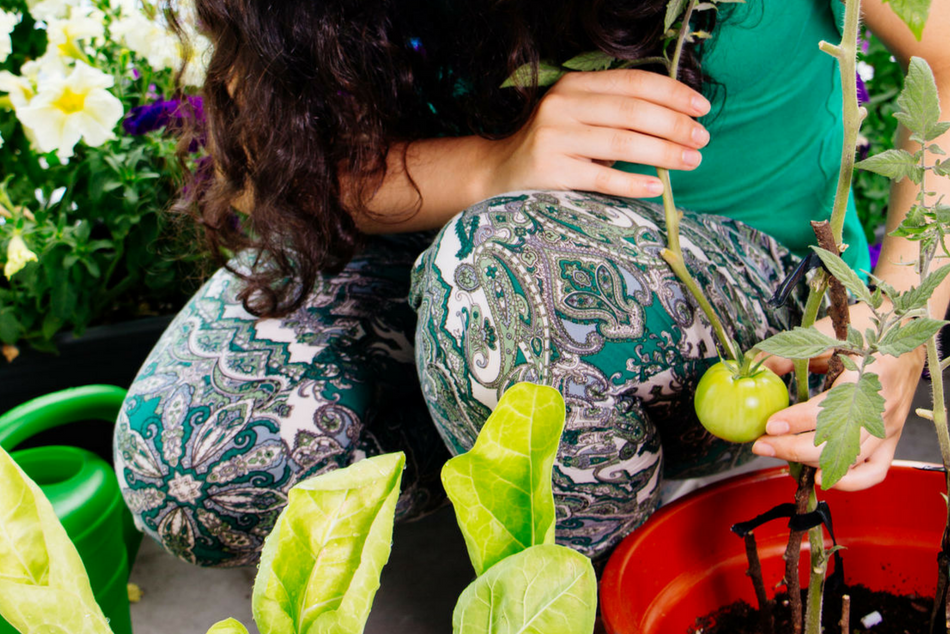
Let’s face it, not everyone can afford or wants to live on a few acres out in the country. But we do all want good, healthy food and many of us find great pleasure in growing something we can eat. But what if you don’t have much space – how can you grow food then? A balcony garden may be the answer for you! If you’re tight on space, growing a garden on your balcony or a well-lit window sill can solve the problem for you. Urban gardening has been a growing trend so there are lots of tools and planters out there made just for the urban gardener. But it can still be a challenge getting started, especially if you’ve never gardened before.
To help get you started, we put together a quick how-to guide to growing a balcony garden so that you don’t feel overwhelmed in your local gardening center. Get your balcony garden started right so that you won’t be disappointed if some of your plants don’t make it and get discouraged. It’s ok, some of them won’t make it! It’s just a learning lesson for you.

Supplies for Your Balcony Garden
- Flower pots in various sizes – deep pots for root vegetables like carrots and beets
- Organic potting or garden soil
- A small bag of river rocks or pea gravel
- Watering Can
- Compost
- Hanging pots are great for strawberries and herbs – use that vertical space
- Seeds or plant starts
How to Plant your Balcony Garden
- Go to your local garden center or hardware store to pick up your supplies, including plants and seeds.
- Place a layer of gravel or rocks in the bottom of the pot. This will help to keep your plants from standing in water if there is a heavy rain and also add some weight if you get high wind.
- Fill just a few inches below the rim of the pot with soil
- Plant seeds or starts according to instructions and water as instructed.
- Add any needed supports – like tomato cages – as soon as you plant. It will make your life much easier.
Keep in mind that terra cotta pots will freeze and break in harsh winter weather so unless you have someplace to store them you may want to use plastic. Also, the soil in terra cotta pots will dry out a bit faster so they may need more water.
Vegetables that do well on Balcony Gardens
- Tomatoes
- Beans
- Lettuce
- Peppers
- Chili Peppers
- Radishes
- Asian Greens – such as Bok Choy
- Spinach
- Peas
- Carrots
- Cucumber
- Eggplant
- Squash
- Kale
- Chard
- Garlic
- Mustard Greens
- Collard Greens
As you can see, you can have a whole salad bar of vegetables depending on how much sun you have. If your space is very limited you may have to choose one or two favorites to grow at a time.
Try peas, radishes, and spinach in the spring and then plant squash, eggplant, and Asian Greens. In the fall when the weather cools down again you can go back to radishes, spinach, and cucumber.
Don’t forget to plant a couple of small pots of flowers too. Encourage those pollinators to come and pollinate your plants.
BTW, you can also grow many varieties of fruit on a balcony too! Just be sure to buy the dwarf varieties!